• Skip to primary navigation
  • Skip to main content

All Phase TC

  • Buying Guides
  • Styles & Trends
    • Bathroom Lights
    • Ceiling Fans
    • Ceiling Lights
    • Lamps
    • LED Lights
    • Outdoor Lights
    • Smart Lights
    • Wall Lights
  • Wellness & Safety
  • Shop Products

Styles & Trends

How to Use Patterns and Textures in Every Room of Your Home to Personalize Your Space

How to Use Patterns and Textures in Every Room of Your Home to Personalize Your Space

by admin · Mar 22, 2024

Interior design trends seem to cycle back and forth every five to ten years. And right on cue, after a long stretch of neutral minimalism, maxalimist living has taken designers and influencers by storm!

The rise of maximalist design doesn’t mean you have to redo your entire home. But it gives you an excellent opportunity to touch up your existing space with bold patterns.

We’ll give you top ideas for incorporating patterns for any design aesthetic throughout your home! Then you can adapt these tips to your own style, budget, and space.
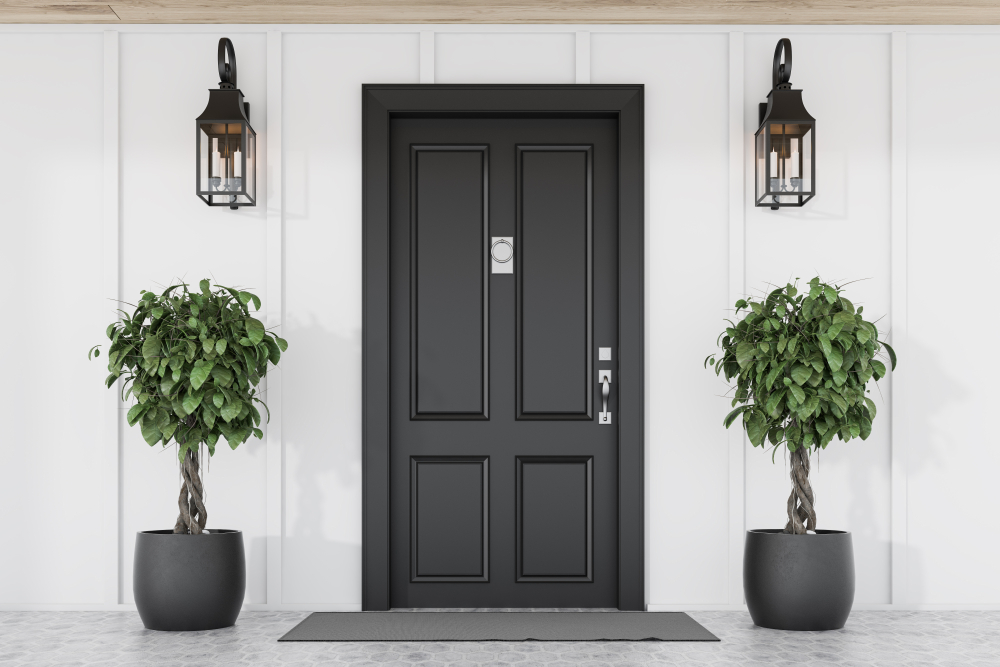
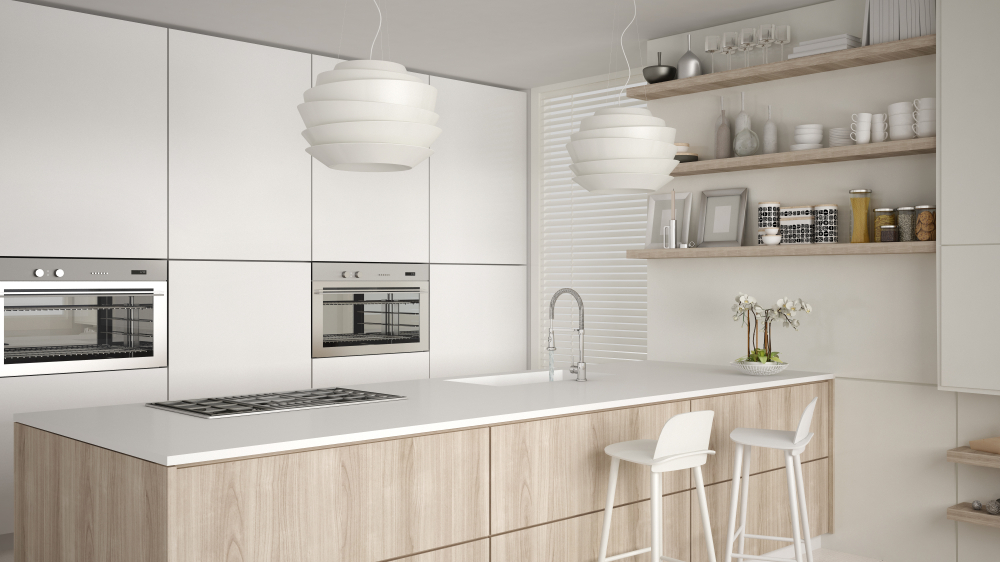
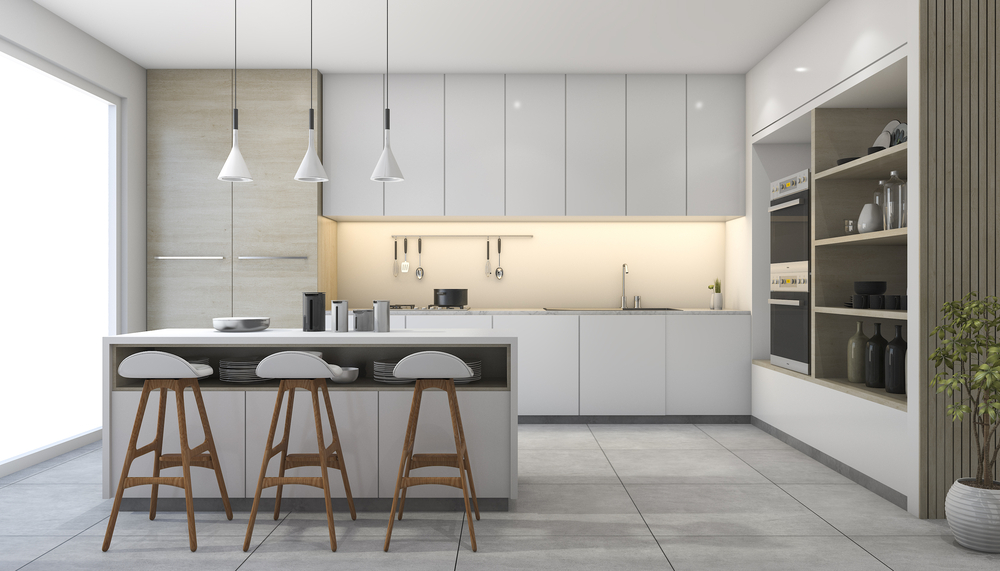
Kitchen

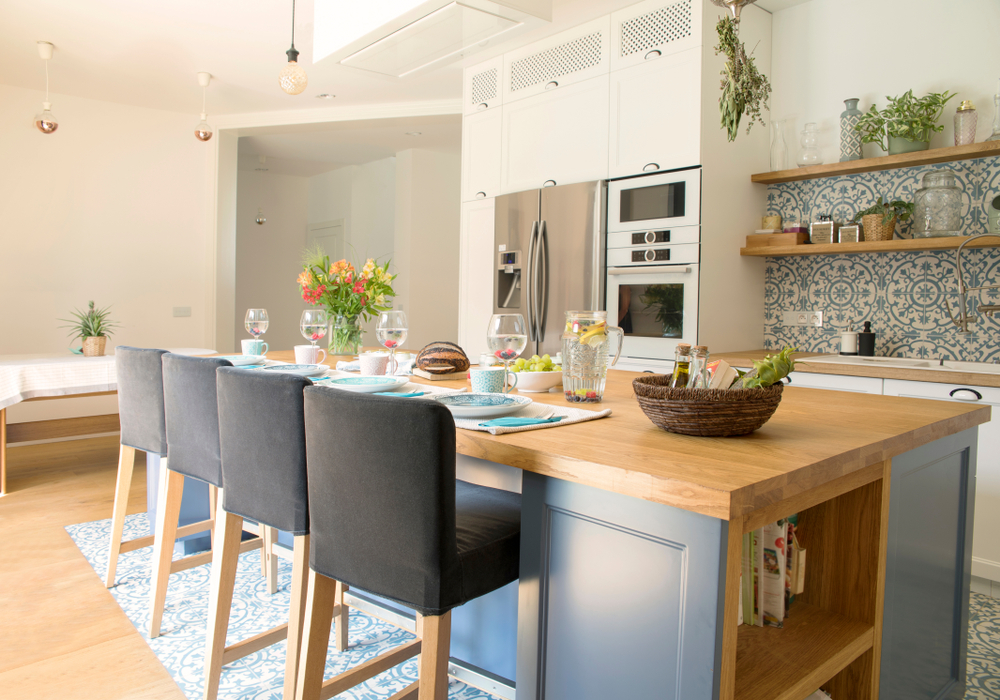
Your kitchen is the heart of the home, and so the style influences here will change how the rest of the house feels. 

So if you’re ready to change up the balance of your white cabinets and walls, try a few of these tips:

  • Custom backsplash: An easy way to increase the function and design of your home is by installing a backsplash that matches your unique style. With endless tile options, you can create a minimalist pattern or a loud mosaic impact with bright colors.
  • Runner rugs: Tired of aching feet and a crumby floor? Runner rugs make your home safer, cleaner, and prettier. Line your floors with patterned rugs to add dimension and enjoyment to your dinner prep.
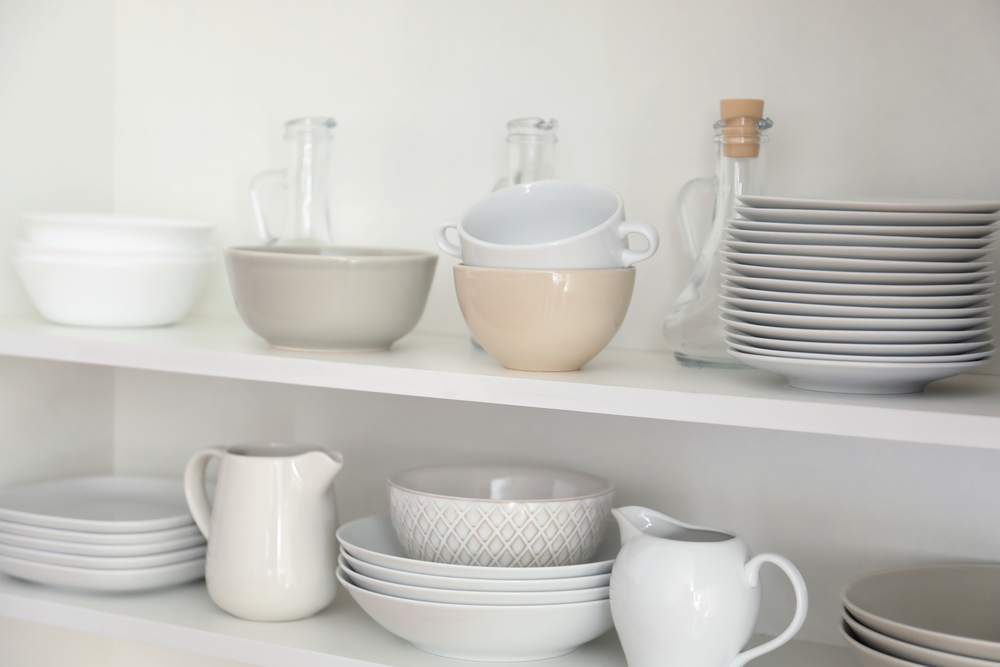
  • Display plates and dishes: The shift to a more maximalist design includes incorporating personal touches to your decor. So display your inherited china or thrifted dishes for another layer of patterns and history.
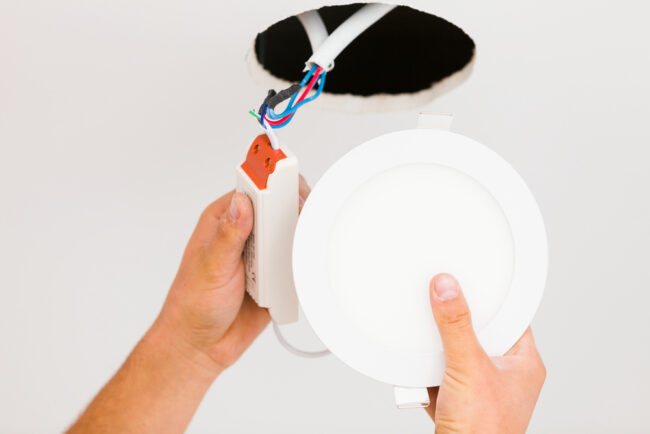
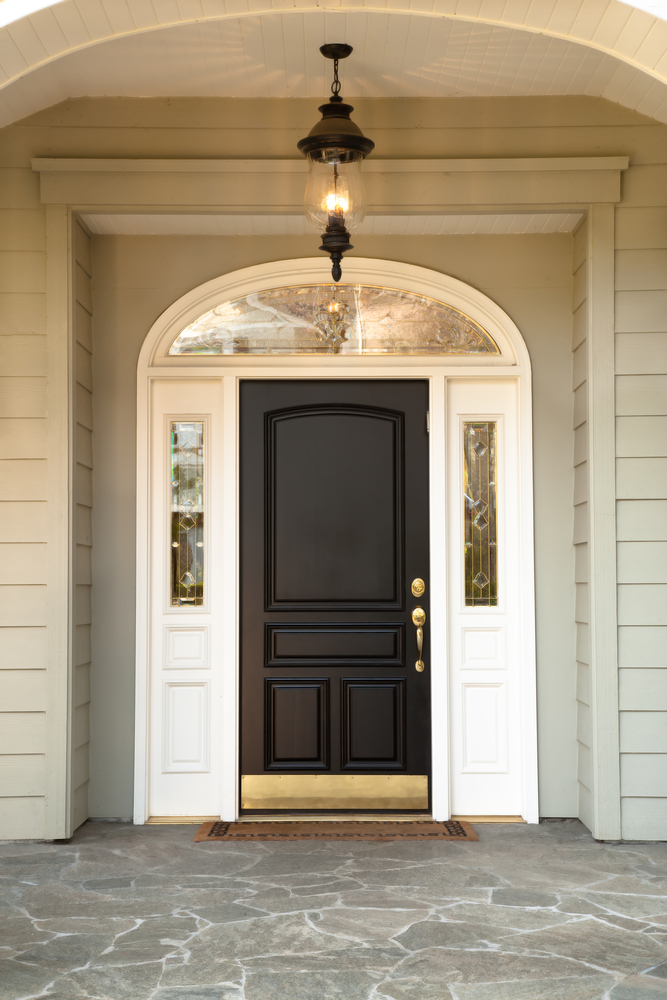
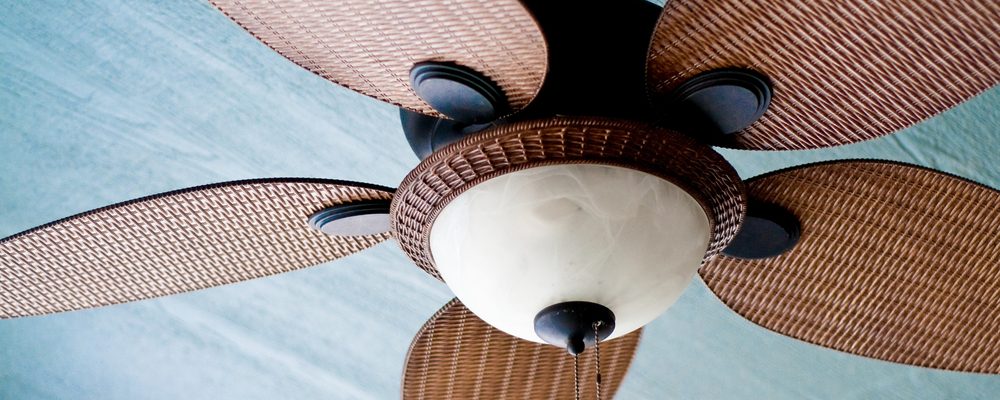
  • Island pendants: Create a final dimension of patterns with light! Your pendant shades can create shadows, new colors, or bright spotlights to increase the variety of your home.
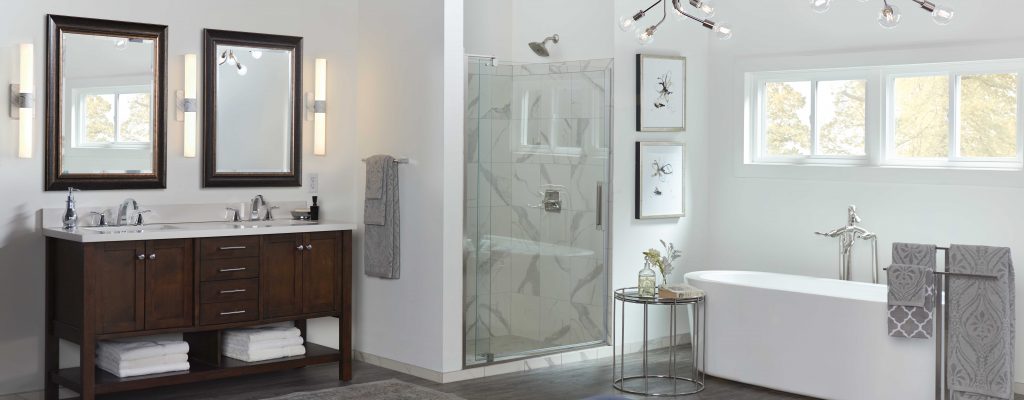
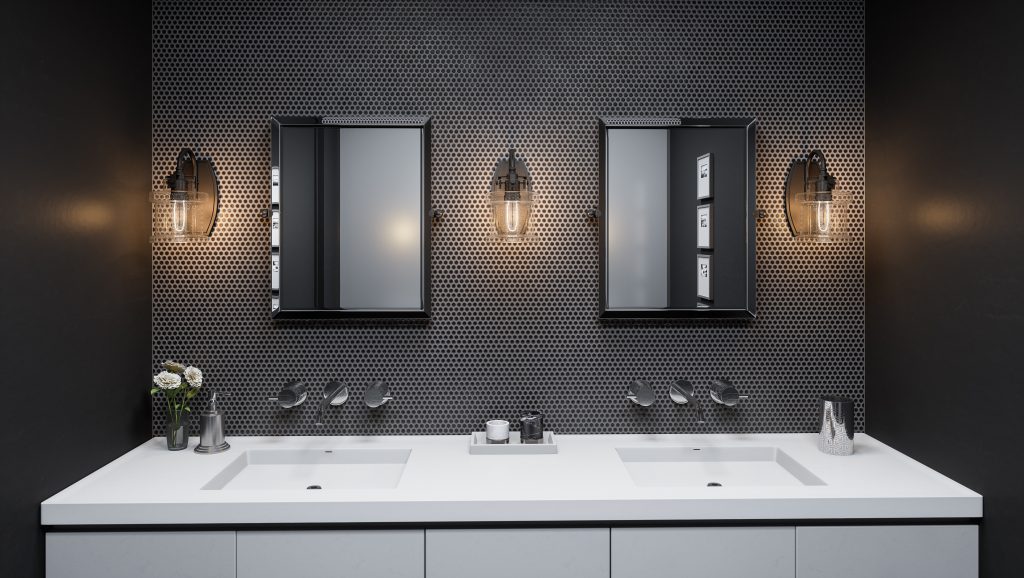
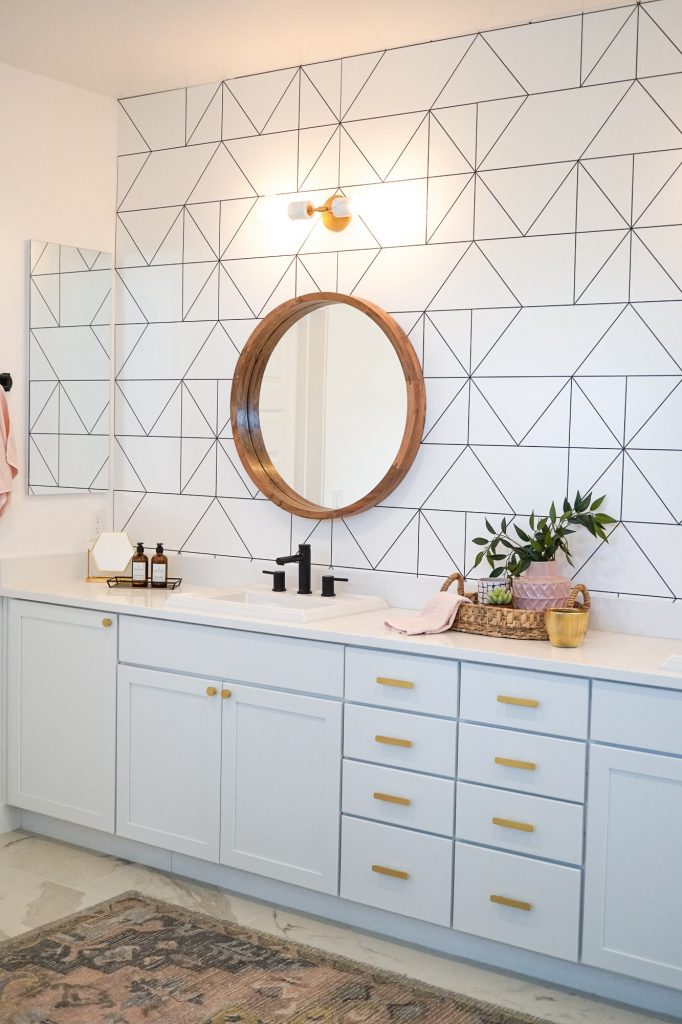
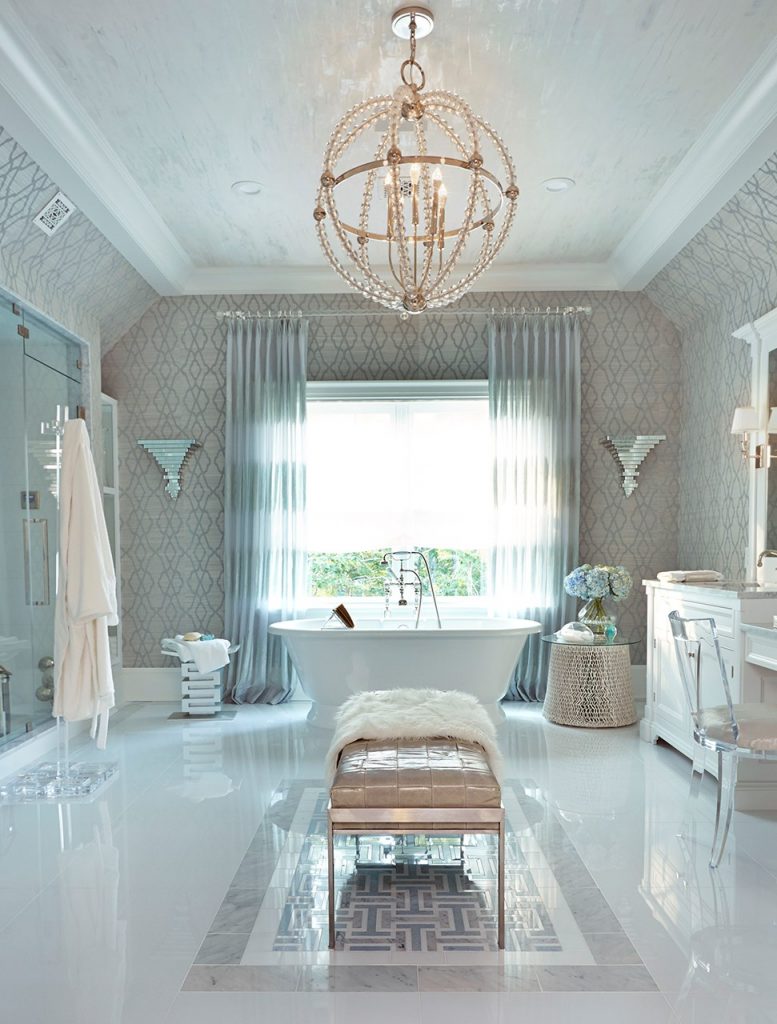
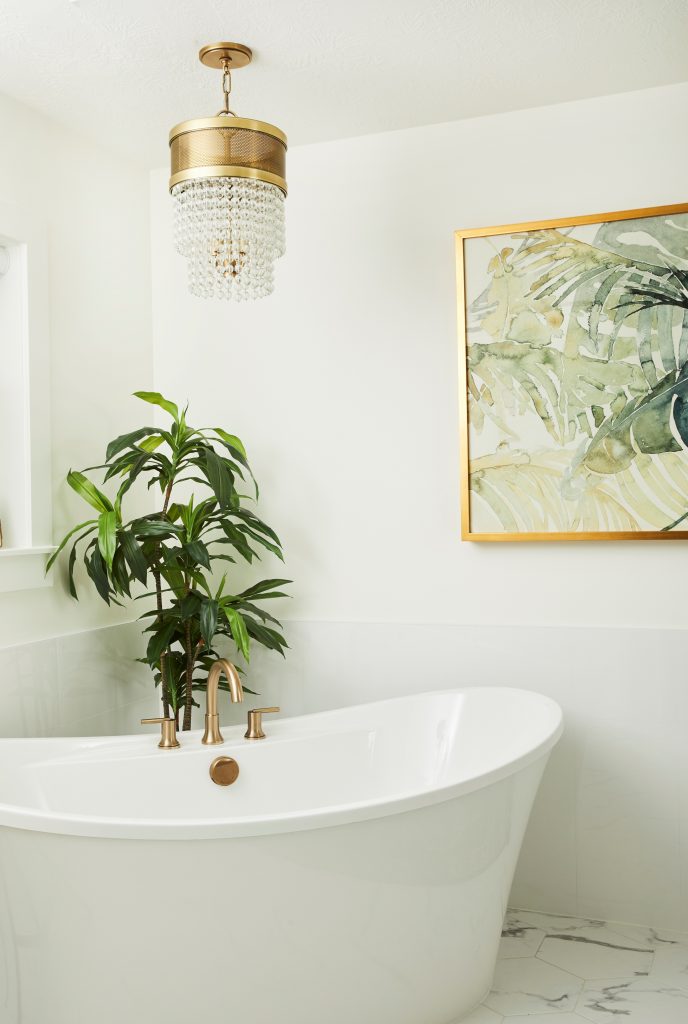
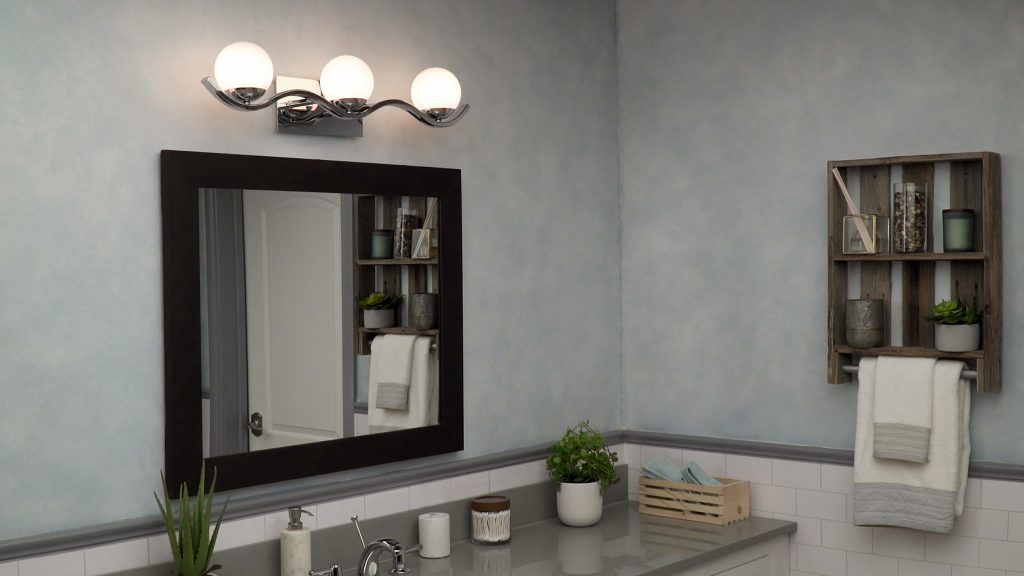
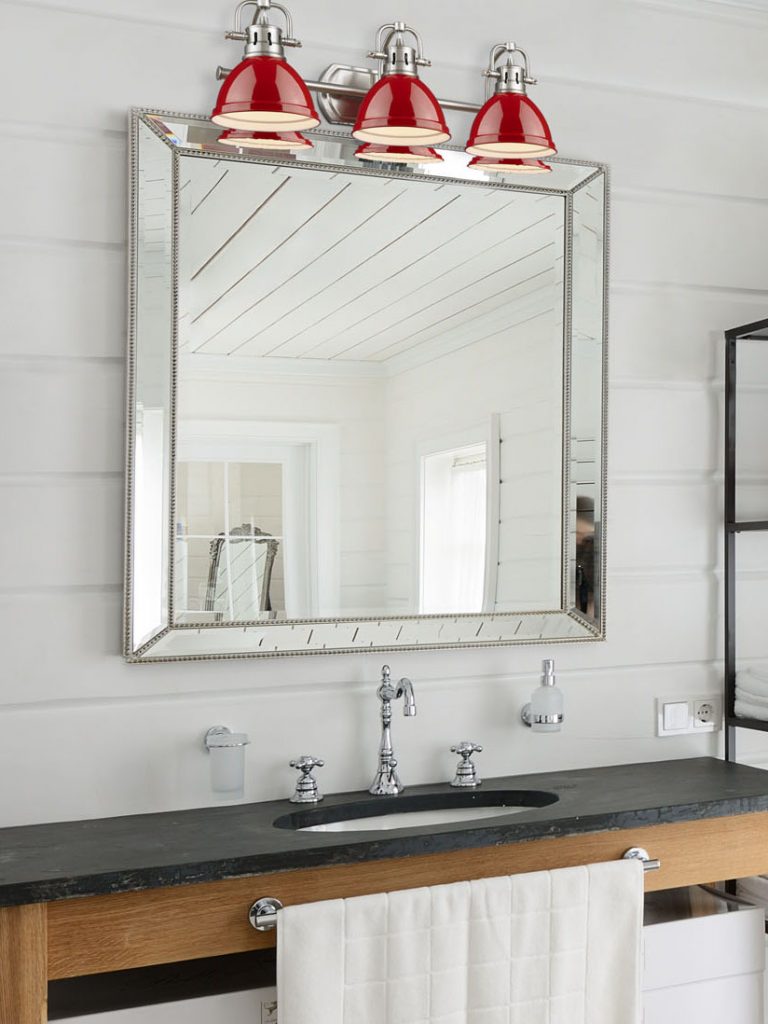
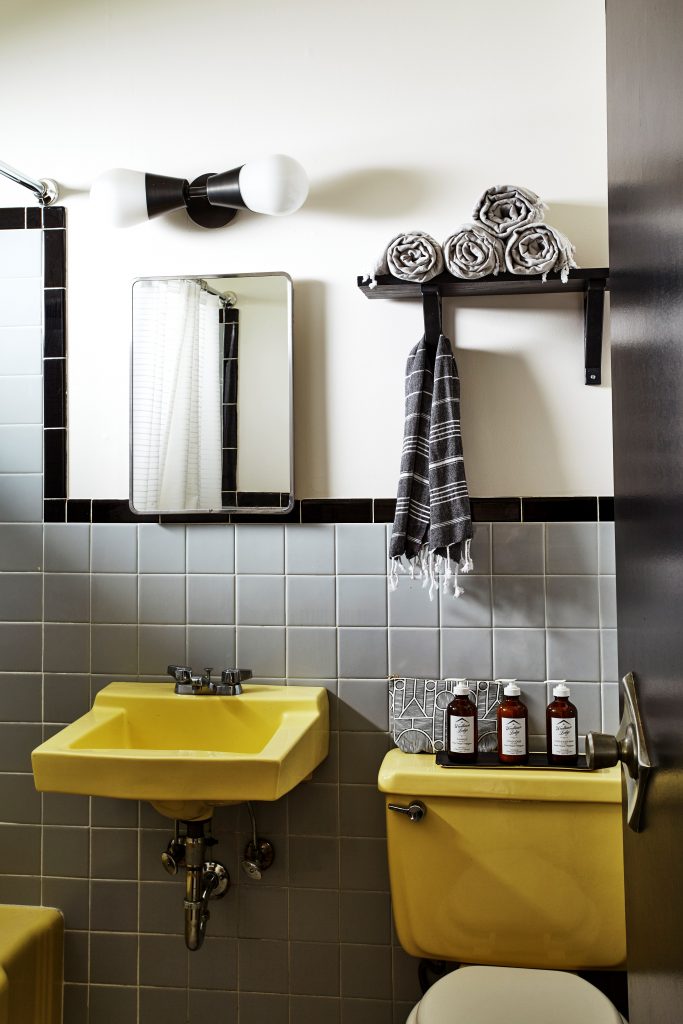
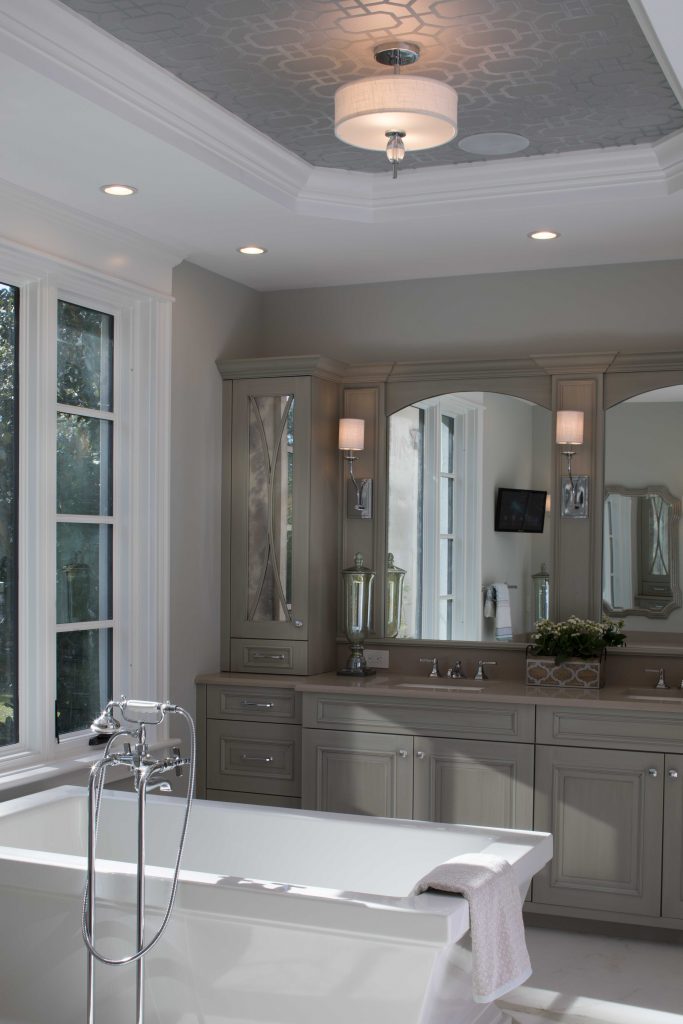
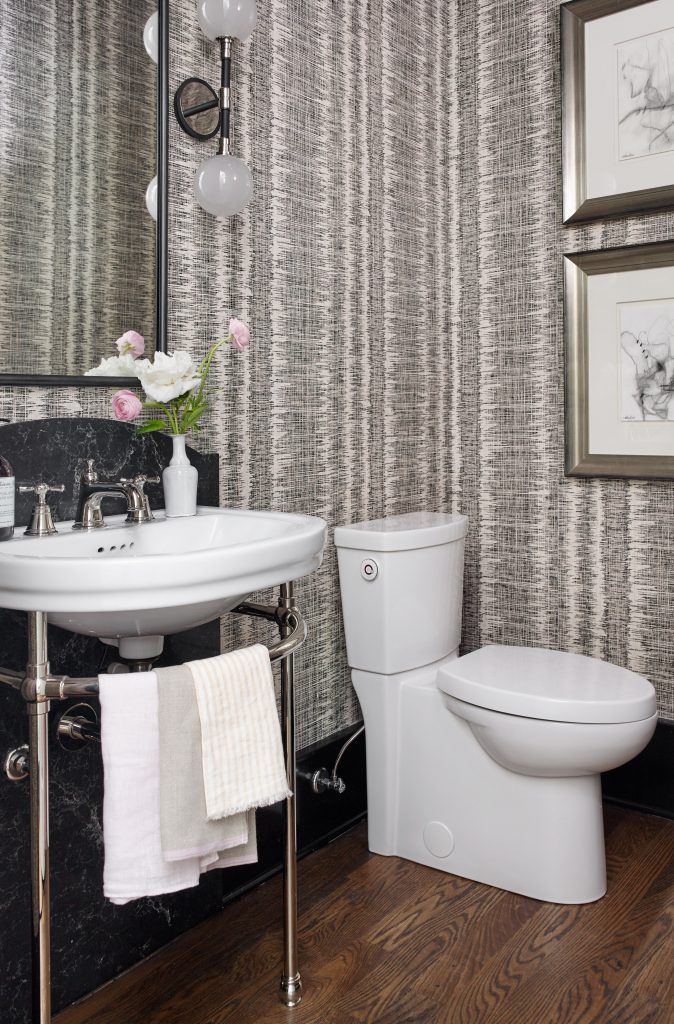
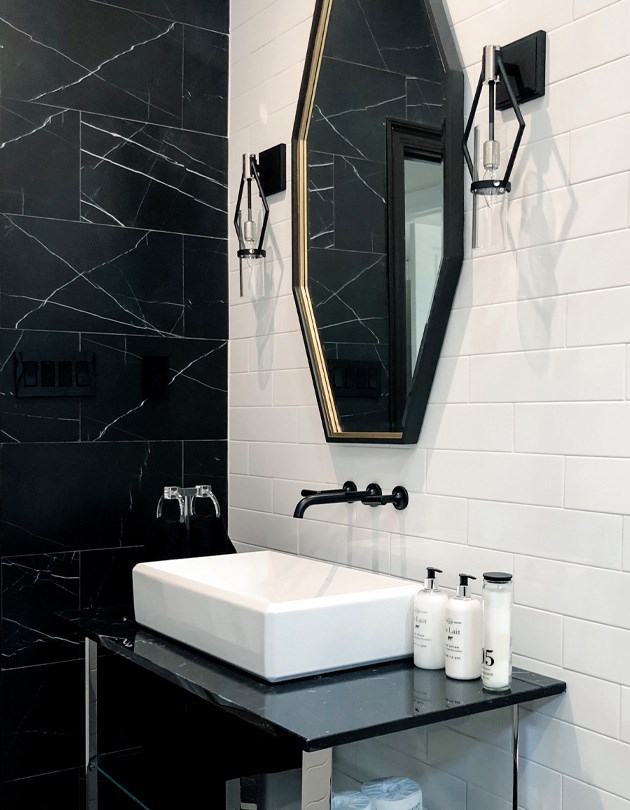
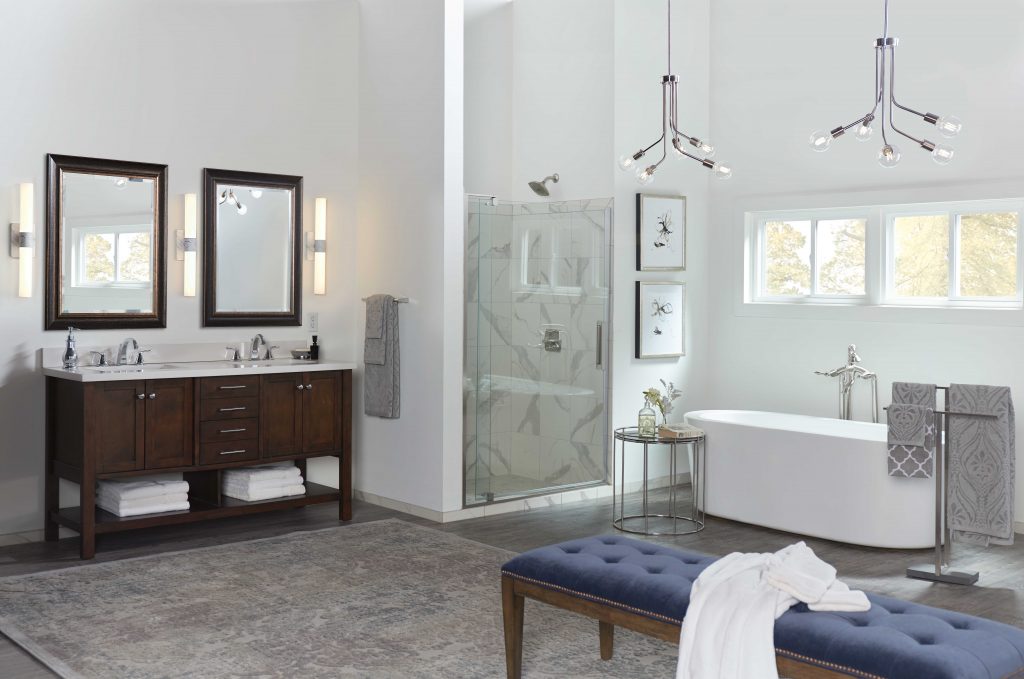
Bathroom

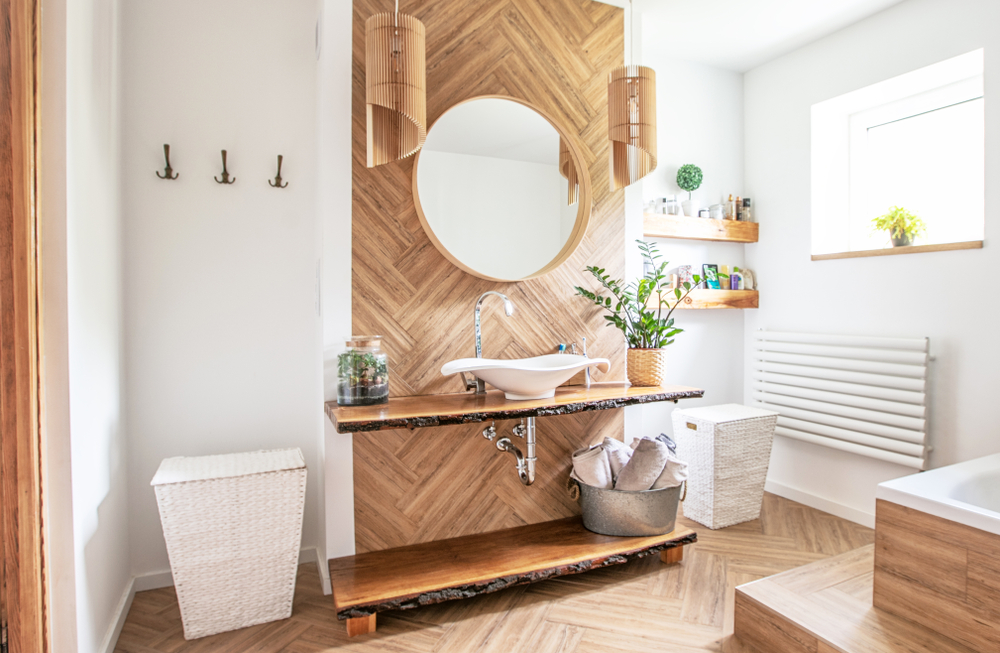
Bathrooms are often a tricky space to decorate– you want to enjoy your space, but you usually don’t have room to embellish much. With a little creativity (and courage) you can pack a punch with some washroom-approved patterns. 

Try adding some layers by updating your:

  • Wallpaper: Make an impact without taking up needed space with wallpaper. Add natural neutrals, bold art deco, or geometric modern to immediately glow up the area.
  • Tile work: Bathrooms offer so many opportunities to use tile. Redo your countertop, create a backsplash, touch up the floor, or renovate your tub and shower!
  • Vanity lights: The lighting around your mirror is another way to play with patterns. Whether it’s a custom shade or a unique number of lights, it’s another valuable investment that will significantly impact your bathroom. 
  • Textiles: Incorporate your towels, washcloths, and rugs into your design to save space and add beauty. Using contrasting colors and patterns, you can use these textiles as an accent layer in your design.

Hallways

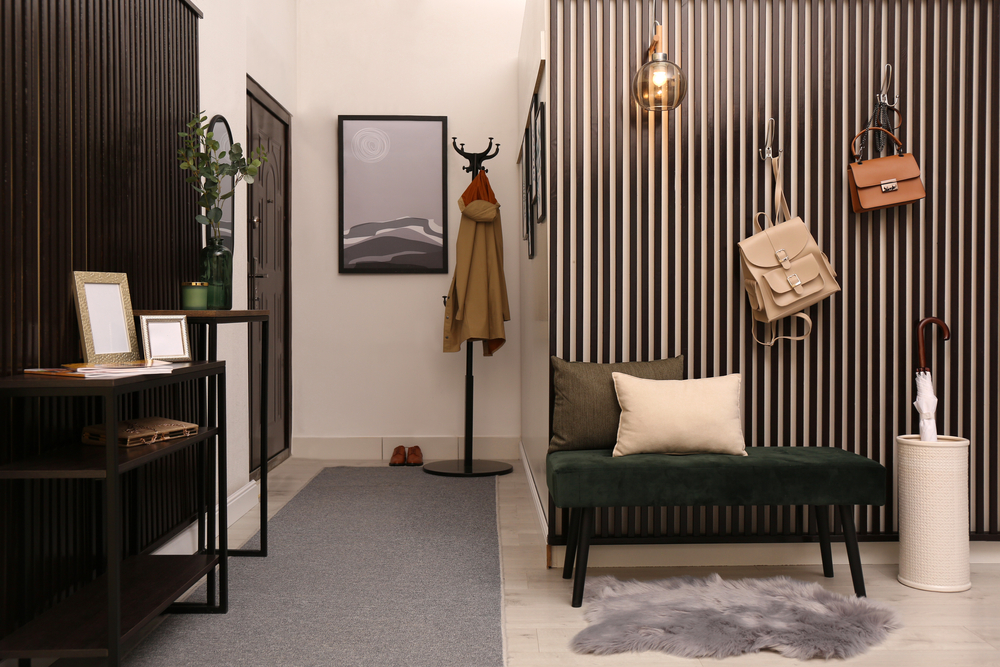
Your hallways are a tricky spot– not much light, wall space, or floor space is available to show your personality. But these small, narrow spaces are a great place to incorporate some maximalist colors and patterns.

Some space-saving, high-impact design tips include: 

  • Sconces: Create a new rhythm for your hall by spacing out wall sconces along the way. You can add beauty and light to any hall, from DIY peel-and-stick to professionally installed hard-wired options.
  • Textured walls: Add interest to your walls with custom board and batten or wood strips. It’s easy to customize, install, and match to any color scheme.
  • Runners: Protect high-traffic walkways with a runner rug! You’ll extend the life of your wood or carpet floors and add another layer of color and exciting patterns.
  • Eclectic gallery: While most hallways don’t have much open wall, an eclectic gallery can fit the smallest spaces. You’ll add color, personality, and pattern with a few frames tucked between doorways!
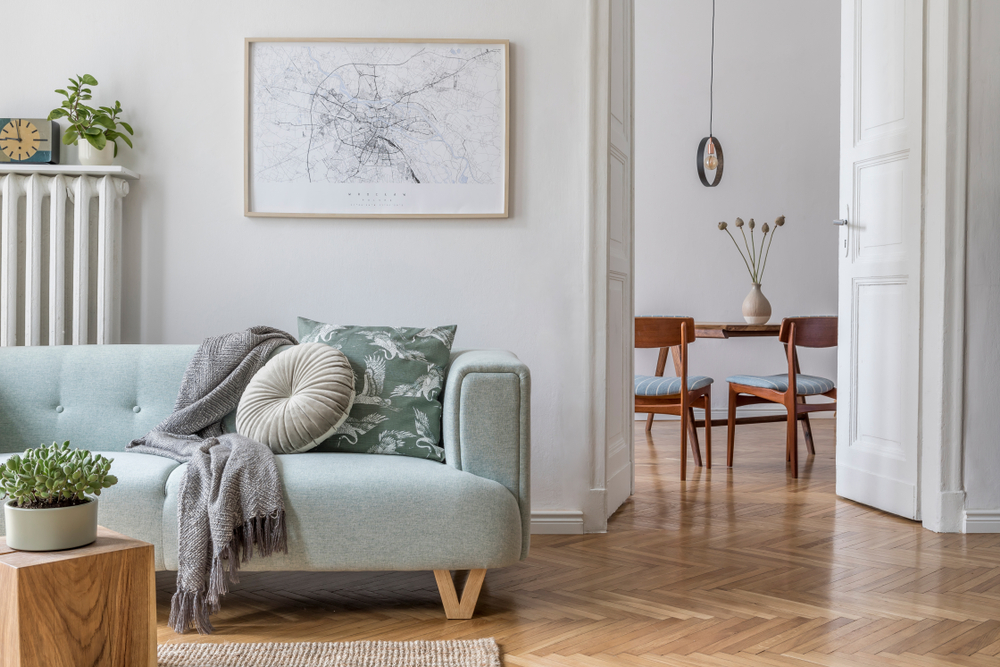
Bedrooms

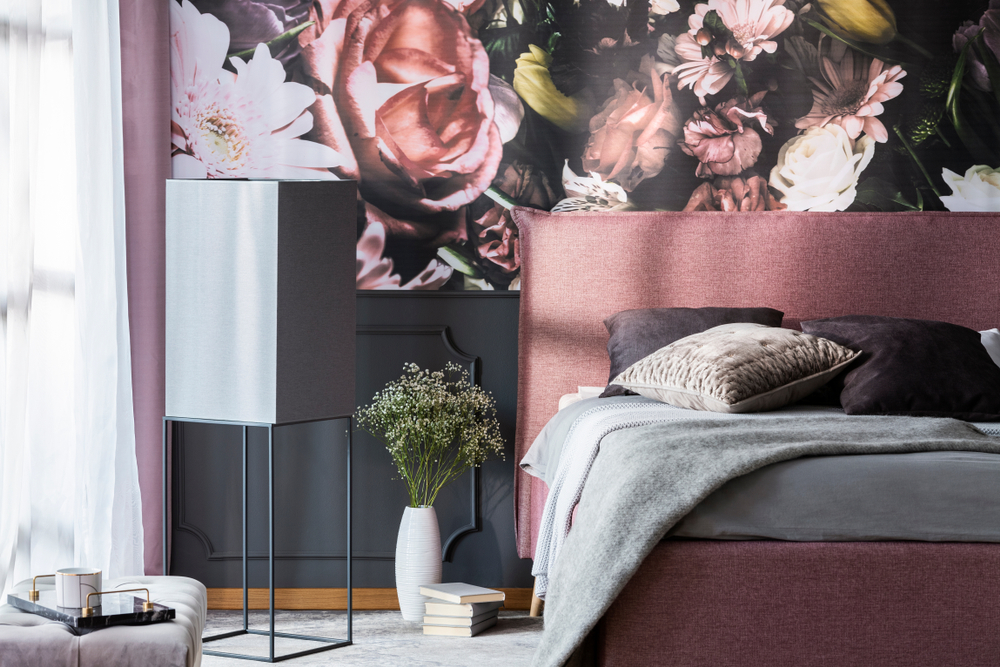
Your family bedrooms are a great place to match your unique personality. While the rest of the house may stick to one theme, this private space can be anything you want.

We recommend playing with:

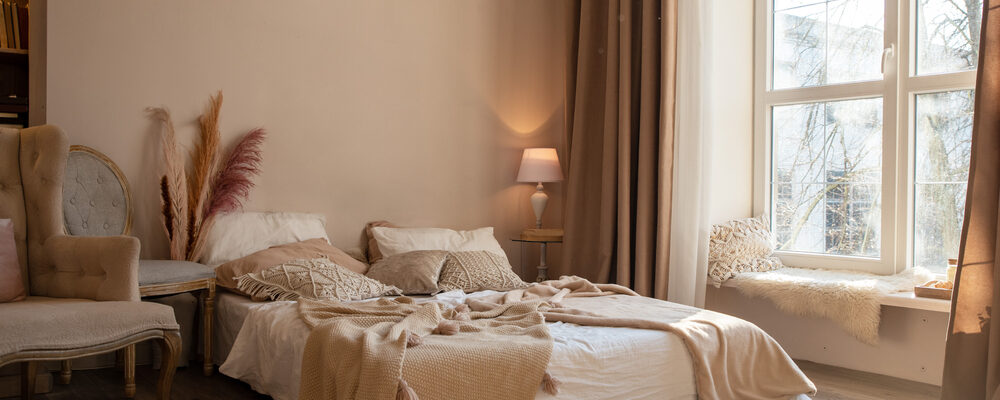
  • Curtains: Layer curtains for a custom layout and better sleep. Blackout curtains usually have less design variety, but you can layer them with patterned sheer curtains for a daytime set.
  • Accent walls: Create the perfect focal point for your personal domain with wallpaper or use wood planks in a custom design.
  • Bedding: Use a floral, geometric, or playful bedspread to display your personality. Or, if you like to change your look often, use a white bedspread and rotate patterned throws throughout the year.
  • String lights: Create soft light patterns by stringing fairy lights around your room. For an added layer, swap fairy lights for color-changing LEDs!
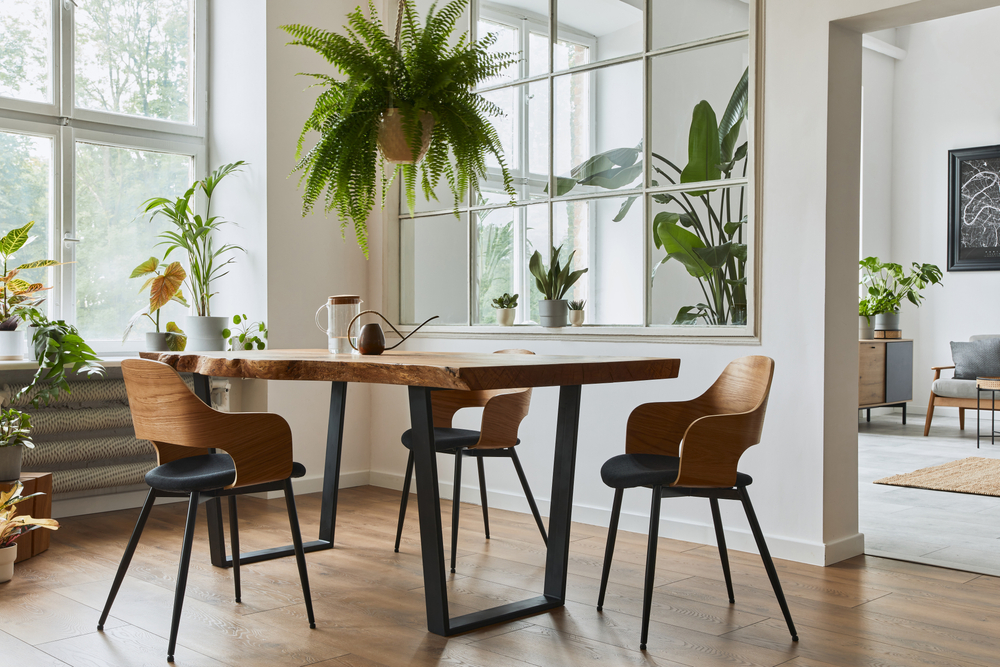
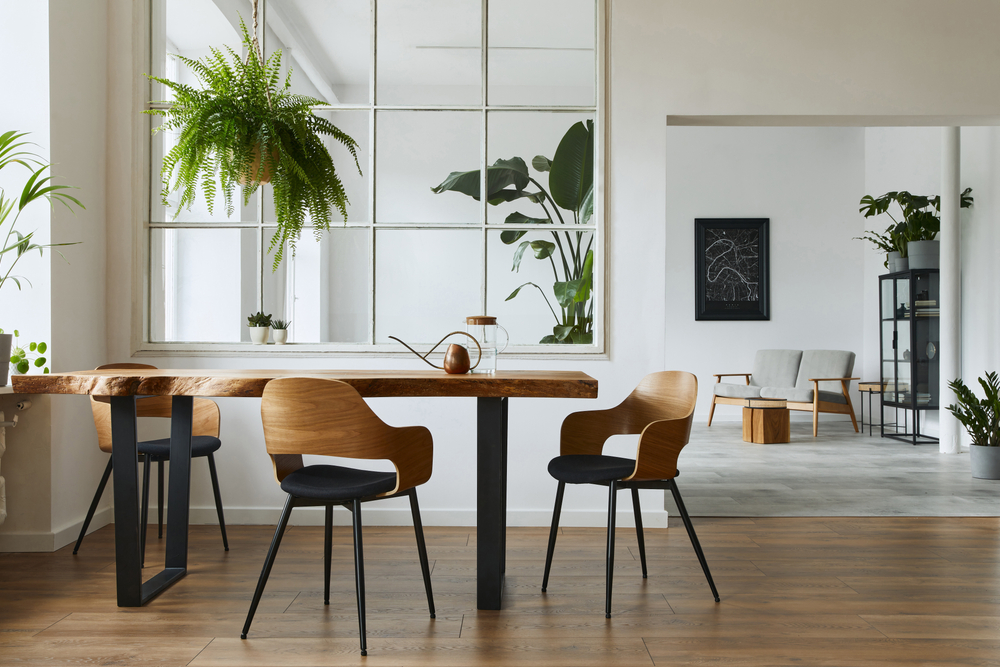
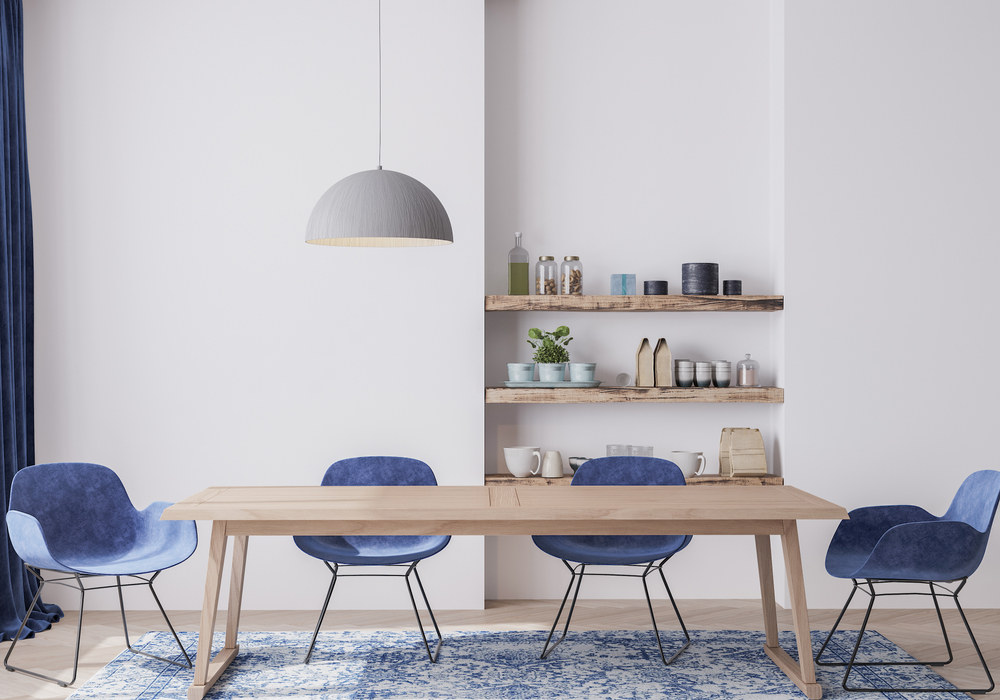
Dining Room

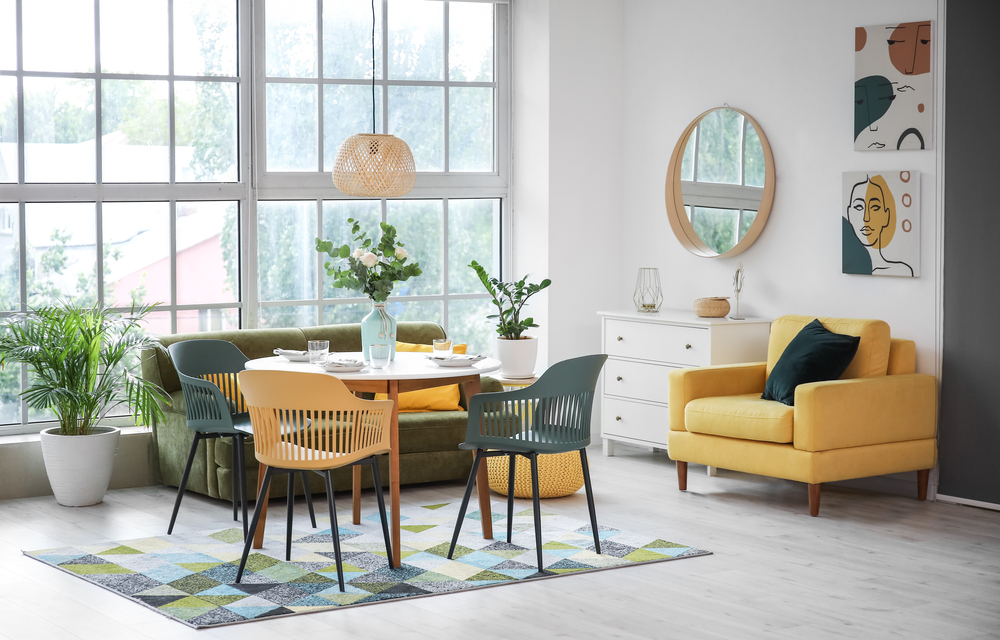
Whether your dining area is a dedicated room or a nook off the kitchen, it should be defined as a separate space. Then you can leave the work of food preparation stress in the kitchen and switch to relaxation and connection as you eat. 

Define the space by:

  • Distinct wall treatments: Change the mood by using different colors and shapes for your dining walls. Patterned wallpaper is an easy way to get a professional finish without detailed work!
  • A bold divider: If your dining room shares the space with your kitchen, add texture and pattern with a wall divider. From eclectic to traditional, you’re sure to find the right touch for your space.
  • Unique lighting: Signal a mood change with your lighting choices. Using a different style of pendant or chandelier from the kitchen will disrupt the food-making pattern.
  • Playing with upholstery: Use a table runner, placemats, or statement upholstered chairs for an added layer of personality.
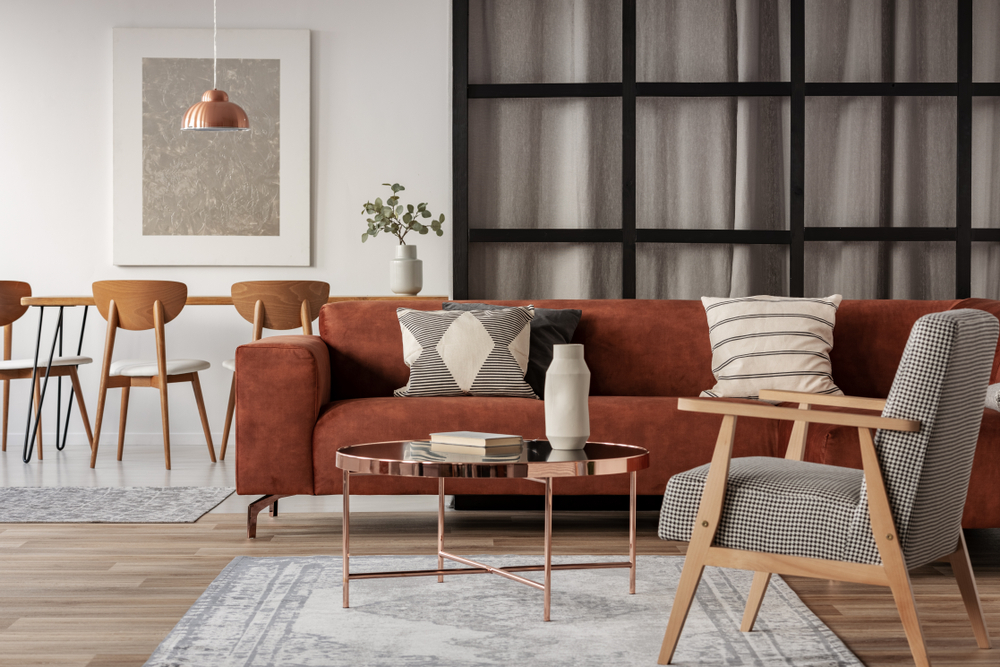
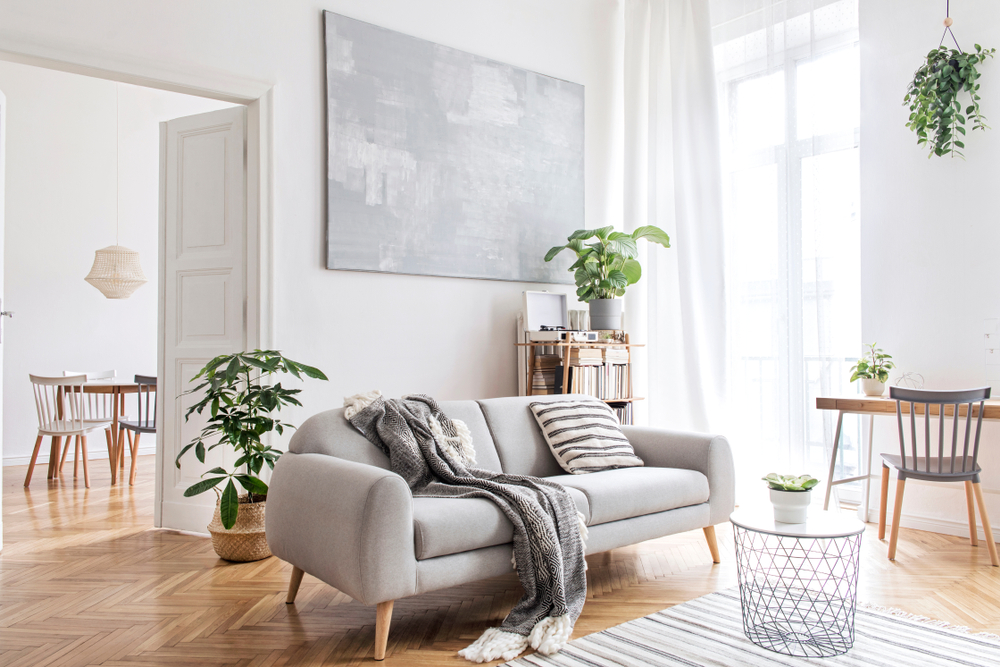
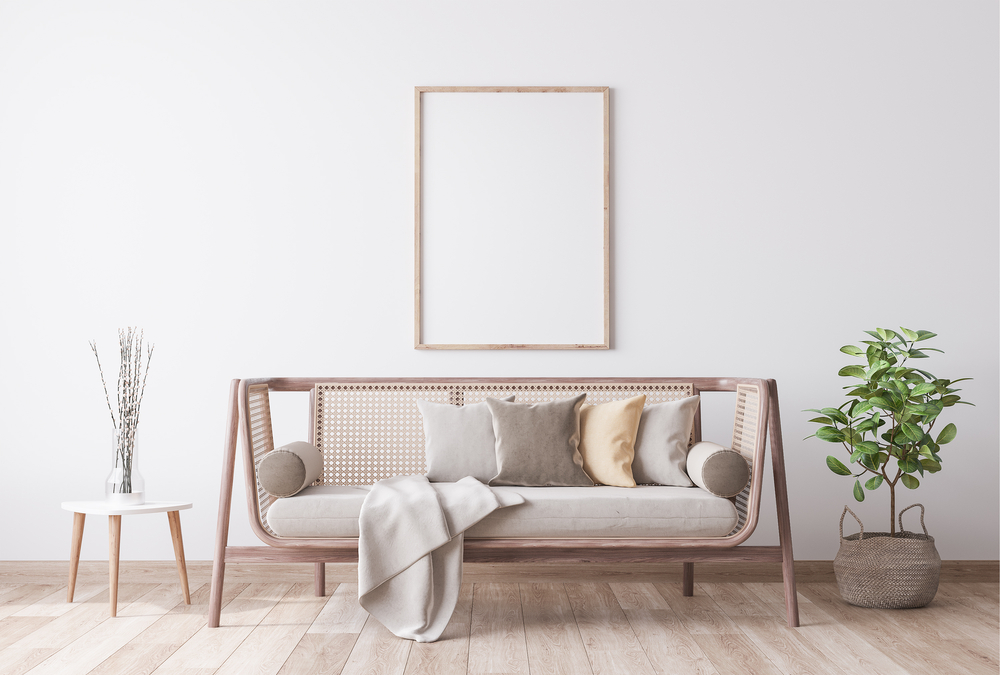
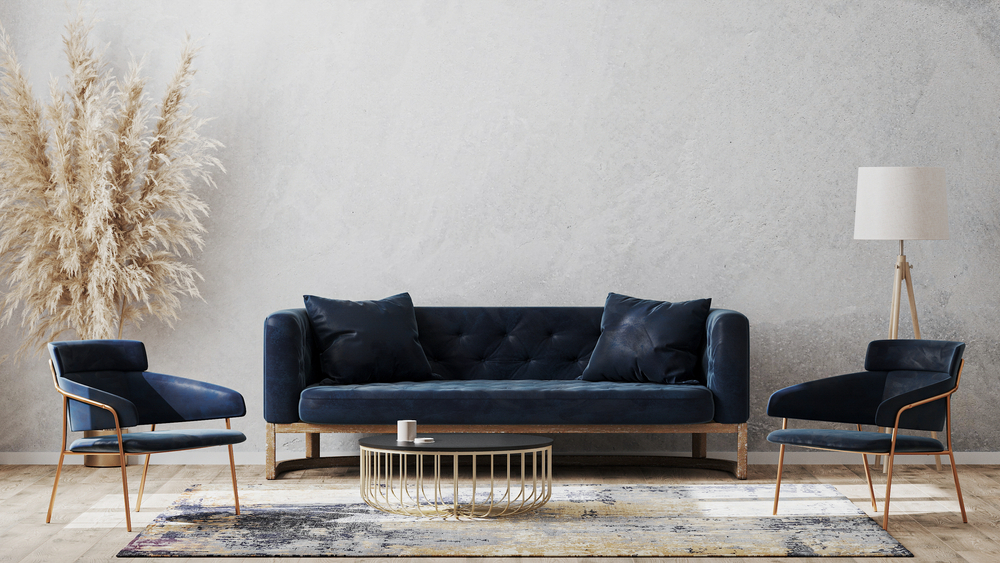
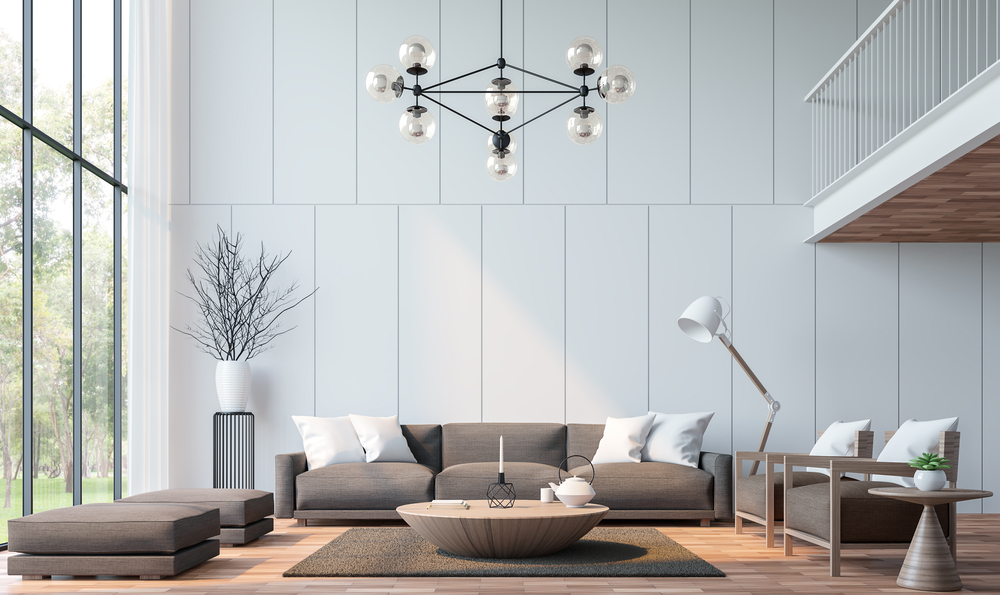
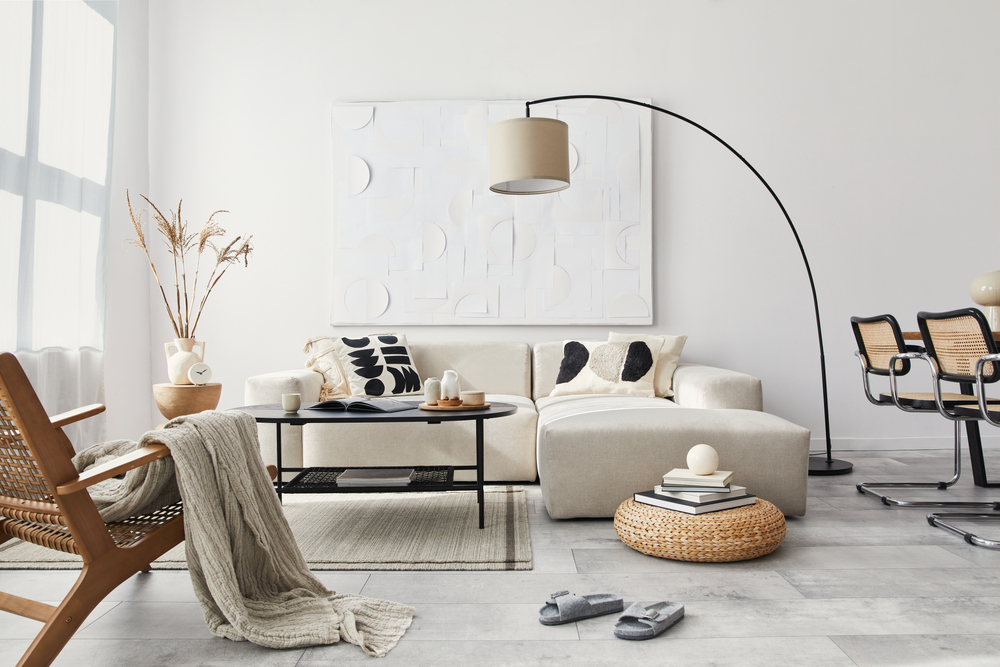
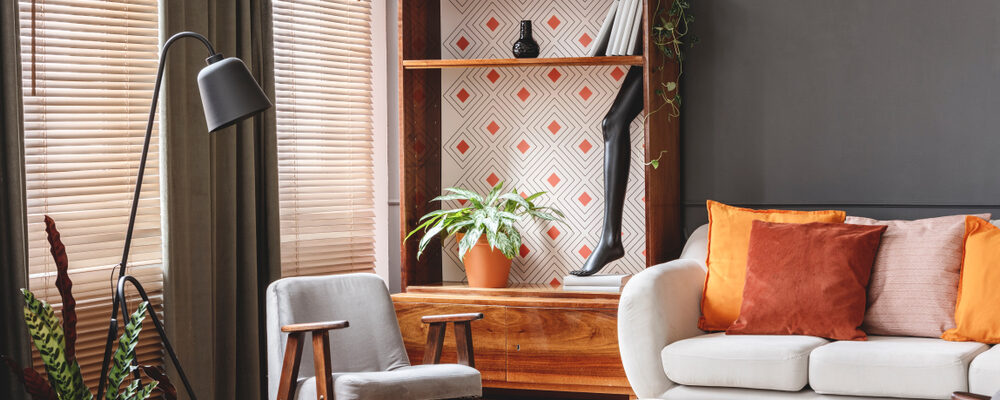
Living Room

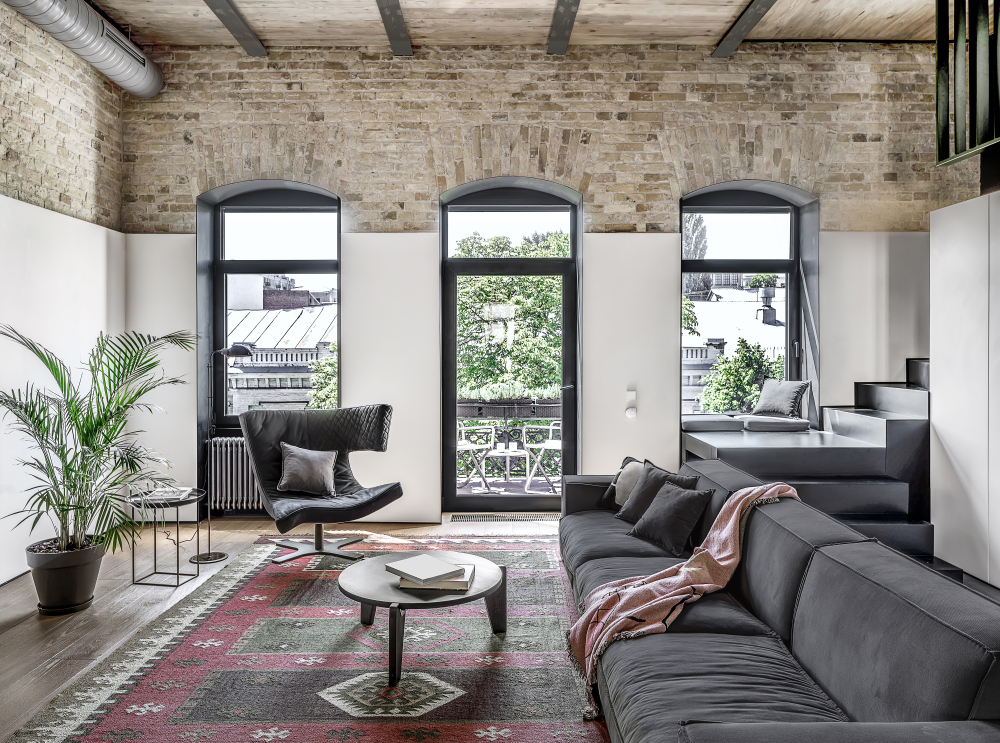
From hosting parties to a quiet movie night, your living room provides a comfortable space to relax and enjoy. But relaxation doesn’t mean it has to be quietly predictable. 

Try some of these tips to maximize design in your shared “unwind” space:

  • Wallpaper the ceiling: Do a unique riff on traditional wallpaper by wallpapering the ceiling. You’ll create interest by adding pattern and color to an ordinarily neutral space.
  • Change neutral patterns with colored LEDs: Prefer a neutral room but want to up the anti for parties? Then try color-changing LEDs to turn your neutral wallpaper into something bright and playful.
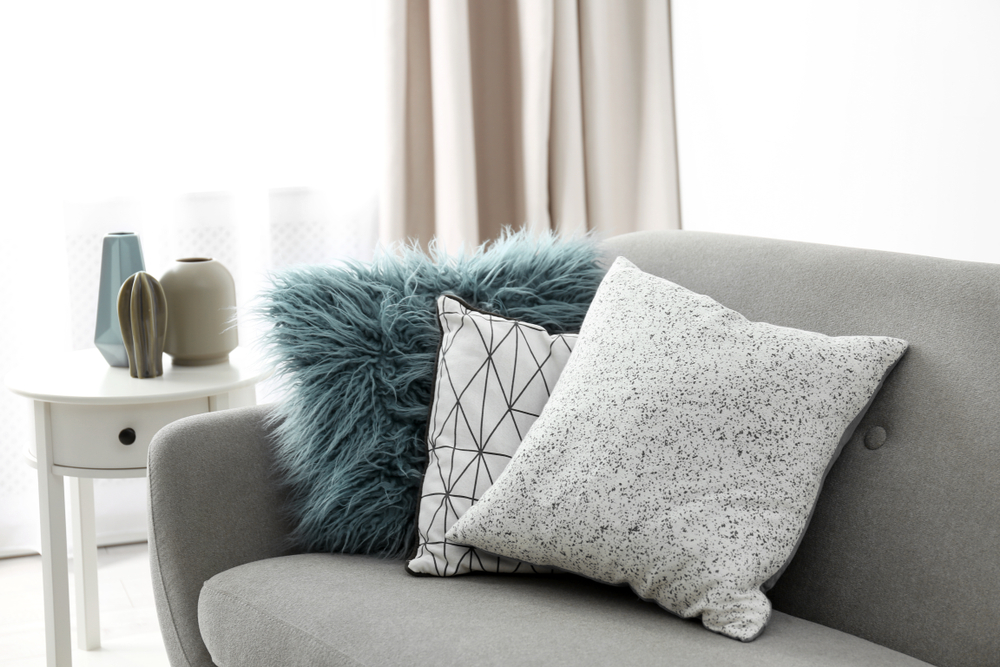
  • Swap pillow covers: Even in the most neutral space, you can add pattern and dimension with new pillow covers. Corduroy, leather stripes, or soft florals will make your sofas look brand new.
  • Layer rugs: Layering rugs is a new standard for luxe-looking living rooms. You can keep it simple with a muted border or play up the patterns with a modern geometric display.

Home Office

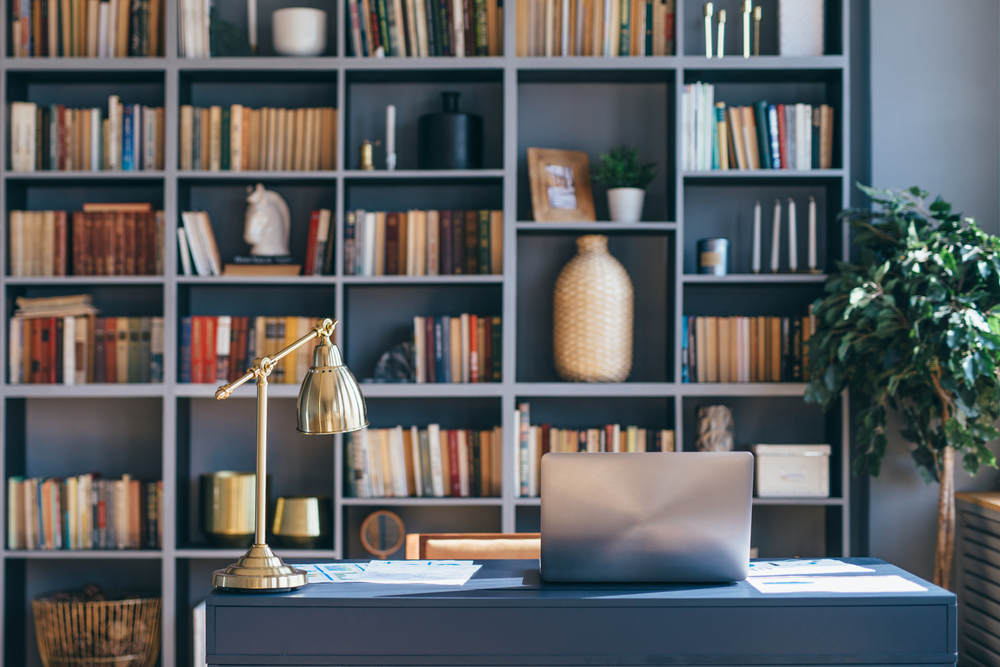
More people than ever have a dedicated work space from home– but have you taken the time to craft a space that works best for you and your tastes? 

Create interest in your Zoom meetings (without lagging virtual backgrounds) with some of these tips:

  • Accent wall for the camera: Show your personality to your coworkers and clients with a beautiful accent wall in sight of your camera. It will beat your cubical or office walls anyways!
  • Interesting lamp shades: Create shadow or color with a unique lamp shade. You’ll improve visibility and do better work, too!
  • Computer mat: Keep your workspace clean, organized, and attractive with a patterned laptop mat. You can cover your entire desk for a comprehensive update or accent your space with a keyboard-sized mat.
  • Reading chairs: Add flavor to your room with an accent reading chair or two. Reading chairs offer an excellent opportunity to introduce new patterns to the room without going overboard.

After years of minimalist, copy-paste interior design, it’s time to breathe new personality and individualism into our homes with some playful patterns. Go for whatever suits you best. You keep your minimalist aesthetic and introduce a few subtle patterns and textures. Or, you can go all in on a complete redesign and bring bold, beautiful patterns and colors throughout your home! 

Whatever your style, there are endless ways to incorporate patterns and embrace your favorite designs.
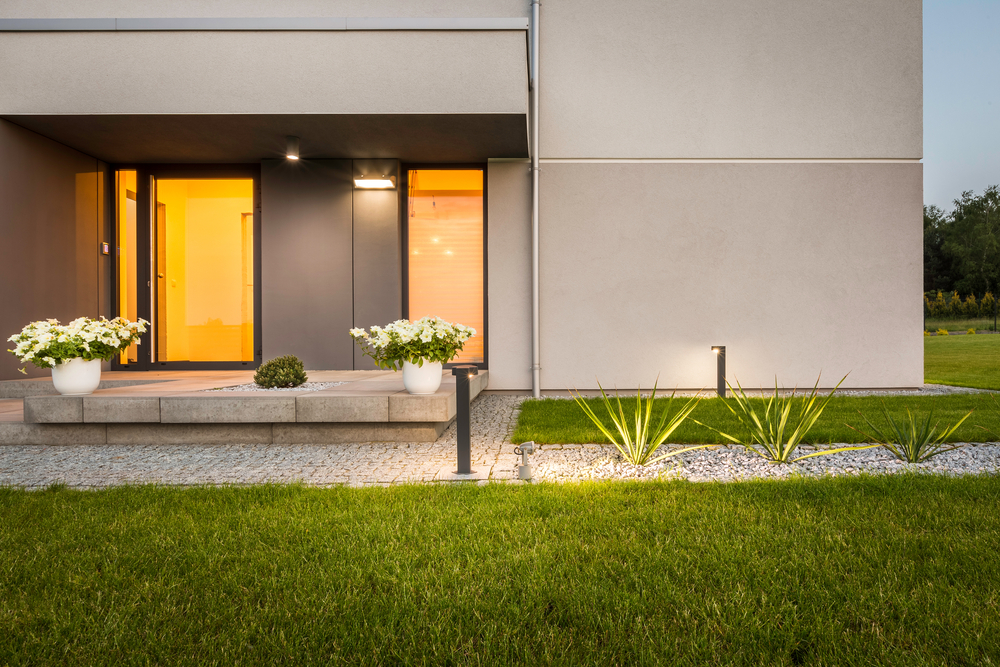
Need Help?

Proper lighting is essential to a fully functioning home– but it can be challenging to nail balanced brightness, great fixtures, and a budget! Contact the experts at Lit Living for advice on your project!


Filed Under: 2023, Bathroom Lights, Ceiling Lights, Lamps, LED Lights, Styles & Trends, Styles and Trends, Wall Lights

How to Safely Replace A Ceiling Light

How to Safely Replace A Ceiling Light

by admin · Mar 8, 2024

Ceiling lights are a must-have feature in any room. Whether you don’t like the previous homeowner’s taste or you’re just ready for an update, ceiling lights can revitalize your home space. It may be even easier than you think–just follow these steps to safely switch out those old light fixtures for a new look.

What you’ll need:

  • Screwdriver
  • Step ladder
  • Voltage detector 

You may also need:

  • Wire cutters
  • Wire strippers
  • Pliers
  • Painter’s tape
  • An extra set of hands 

Part 1: Remove Old Fixture

Step 1: Turn off power

Shutting off the electricity is important to your safety. Locate the switchboard for the room you are working in and flip the switch. If you’re not sure where the switchboard is, check the basement or garage. It might also be in the front of the house or near the entrance.

Once you’ve flipped the switch for the room with the ceiling light, go back into the room and flip the switch a few times to make sure the power is off. Then, leave the light switch in the off position. Make sure you lock the circuit box or leave a note indicating that you are working. 

Step 2: Remove cover and bulbs

Use a stable step ladder to reach your ceiling light. Hold the cover, or the visible, outside piece of the light fixture, in place with one hand. Loosen the screws with a screwdriver in the other. (For heavy or large fixtures, it’s best to have someone else hold on while you work on the screws.

Once the cover is removed, unscrew the light bulbs and set them aside.

Step 3: Lower the fixture base

With the cover removed, you will be able to see the base–the part of the light fixture that attaches directly to the ceiling. Typically, the base will have tabs or nuts and screws securing it. Loosen the nuts or screws, then lower the base to access the wiring (In the rare case you’re unable to find the screws, search for the installation manual online. You can also take a picture of your base and bring it into our showroom – we’ll take a look and help you figure it out!)

Until you have disconnected the wiring, you will want to lower the base but not remove it completely—an easy way to do this is by securing it with painter’s tape or having someone else hold it in place.

Step 4: Disconnect the wires

Once you have uncovered the space behind the old light fixture, there should be a junction box where wires are connected and stored. Start by removing the caps or tape covering the wire connections. The caps will come off when twisted counterclockwise.

 Pro Tip: Take a picture beforehand so you can remember exactly how everything was put together. 

Part 2: Connect the Wiring

Step 1: Test voltage

Test each exposed wire by touching it with the tip of your voltage detector. 

If the voltage detector lights up, there is a current running through, and the wire is unsafe to touch. Double-check your circuit box and ensure the switch is still flipped. 

Once you’re sure there is no electrical current, you are safe to continue working with the wires.

Untangle the wires and detach the fixture from the ceiling completely. Either hand off to someone below or carefully carry it down the ladder.

Step 2: Check wires

Frayed wires can be hazardous -if there is any fraying on the end of the wires, trim them down with wire cutters. Then, strip off any insulation on the outside with wire strippers. You only need to strip about ½ inch of insulation for the wire connection.

Pro Tip: Check your new fixture’s installation recommendations carefully. If you’re installing a heavy fixture such as a ceiling fan or chandelier, you may also need to install an additional support in the ceiling. 

Step 3: Match and Attach

Electrical wires are color-coded. Black or red are hot wires, white is neutral, and green or bare copper are ground wires. A grounding wire sometimes connects to a grounding screw instead of another wire. Look for a matching wire in your ceiling for each wire in your fixture.

Twist together each matching wire. Either by hand or with pliers, hold the exposed ends side by side with one hand and twist with the other. (This is where your picture of the original fixture’s wiring comes in handy.)

Now that the wires are connected, it’s important to cover the exposed ends again. Screw the wire caps on by twisting clockwise over the connected ends until they hold the wires tightly in place. If your original fixture didn’t have wire caps, you can use electrical tape as well.

Make sure to check the owner’s manual for specific instructions—for example, you might have an extra red wire that connects to a black wire. If you don’t have any instructions, generally you will be fine with just matching the correct wire colors.

Part 3: Install New Fixture

Step 1: Replace junction box

With all your wiring safe and sound, the junction box is ready to be put back into place. Tighten the screws securely against the bracket until  Fold the wires up into the box so they will be hidden behind the ceiling light.

Step 2: Attach new fixture

There are several different ways your new light fixture base could attach to the ceiling—these are the most common ways. As always, check the owner’s manual for anything specific or unique about your light.

Securely attach the light base by positioning it over the mounting screws. Place a metal nut on each screw and twist by hand until they are tightly holding the base in place.

If the fixture has a mounting bracket, connect the mounting bracket to the junction box first, then hang the base over the screws.

If it’s a keyhole shape, adjust the base so the screws slide into the smaller grooves and then tighten the screws with a screwdriver until they are holding the base securely.

Step 3: Install light bulbs

Now that your base is set, it’s time to add the light bulbs. Make sure you have the correct wattage—the fixture typically indicates its maximum wattage on the package or owner’s manual. 

When choosing which bulbs to use, the lower the wattage the safer. Most light fixtures are safe with up to 60 watt incandescent bulbs. You may also want to consider more eco-friendly choices, such as CFL or LED bulbs. These options have lower wattage but produce the same amount of lighting, saving you money on electricity in the long run.  

Test the bulbs by turning the electricity back on—flip the switch on the circuit breaker then turn on the room light switch. If it is flickering, dim, or not turning on at all, turn the electricity off again and check everything—look for loose connections or mismatched wires. If your lights are bright and solid, you are ready for the final step.

Step 5: Attach cover

Flip the light switch and circuit breaker back off before installing anything else. Take your light fixture’s shade, cover, or top and climb back up the ladder. Attach it to the base by twisting screws or attaching pieces until everything is tight and secure. If it’s a hanging light, make sure it’s at the proper height before finishing your work. Every light has different connecting components, so check your owner’s manual and just make sure it’s snug.

And there you have it, your guide for installing a new, updated ceiling light. Now that you know how to install it, make sure to visit our showroom to choose the perfect fixture for your ceiling!

Filed Under: 2023, Buying Guides, Ceiling Lights, Styles and Trends, Wellness & Safety

2023 Interior Design Trend: Creating a Cozy House that Feels Like Home

2023 Interior Design Trend: Creating a Cozy House that Feels Like Home

by admin · Mar 1, 2024

It’s 2023 and this is your wake-up call! Your home needs you – it’s ready for a refresh! This year, we’re all looking for a respite from the stress that always seems to work its way in. Designing a comfortable home will make you feel the extra happiness and productivity you’ve been in desperate need of. These 3 expert tips will make your home a haven you’ll be itching to get back to at the end of the day!

1. Choose a Soft Color Palette

It’s no secret that colors have a huge effect on your mood and the feel of a room. These rooms knock the color palette out of the park without sacrificing personal style or comfort. Achieving a soft color palette doesn’t have to be difficult – go with neutrals, a pop of color, or choose a monochromatic color scheme and you’re set!

Neutrals

A neutral color palette seems like an obvious choice when you’re going for comfort, but it can be tough to pull off – without color, other elements like texture or shapes will have to do the heavy lifting.

The heavyweight champions here are definitely the plants! Adding some green to an otherwise neutral-heavy space brings some life and vibrance without destroying the tranquility you desperately need. Finishing this look with a variety of textures and shapes from the hard wood edges to the pair of round tables to the woven area rug makes this space feel comfortable, creative, and cozy.

This neutral bedroom incorporates beige and white with black accents to ground the space. The night stands with pendants hanging above elevate the space, giving you lighting and a gorgeous focal point! We love how this space feels lived-in without looking cluttery. With neutral tones, the soft textures of the rug and blankets are what make this room feel comfortable and cozy.

Picking a neutral color palette for this sitting area really make the shapes shine. We love how arches are carried throughout the design from the furniture to the architecture. This chair looks like a cloud and with the gorgeous light above it, anyone sitting here would feel like they’re in the heavens!

Pop of Color

A cozy home doesn’t have to be colorless! If neutrals don’t speak to you, try mixing them with a pop of color. It’ll give your room some excitement, but not so much that it’ll feel busy or chaotic.

This living room took a bold color and ran with it. The navy blue is a stunning contrast to this cozy tan leather couch. If we could copy and paste this look into our homes, we would! The neutrals pop against the accent wall and we couldn’t be more obsessed.

These red velvet pillows and drapes contrast with the neutral room and bring in some cozy texture. The bright colors spice up what might otherwise feel like a bland living room.

Monochromatic 

Choosing a monochromatic color scheme is a 2023 trend we love. It’s bold, but still soft. In a true monochromatic space, there isn’t extra visual stimuli for your brain to process. This gives your brain a sense of peace and calm you may not feel in a room with more going on in terms of color. These rooms use a simple color palette and the effect is cozy with a touch of elegance. 

Green is one of the most soothing colors. It can bring a sense of peace and harmony to your home. This couch and wall combo is no exception! Choosing to pair them with beautiful browns makes this sitting room look like it was plucked straight from nature, then given a facelift.

This kitchen uses the monochromatic color scheme to make it look bigger than it is. We especially love that extra wood cabinet with accent lighting both for functionality to store more and for decorative purposes. The calming blues make this a space you’d want to do some stress-baking in!

2. Add Soft Textures

Texture is a vital tool in an expert’s tool belt, especially when comfort is your end-goal. A space can be gorgeous, but if it feels like a place your grandma will yell at you for touching anything in, it won’t really feel comfortable. Texture is what takes a space from formal and austere to a beautiful, cozy space you can actually live in.

There’s no question this bedroom is gorgeous, but it also feels like a space you could spend time in without completely messing it up. The intentionally unkempt linens on this corner of the bed add simulated texture that makes it feel like home. We also love the green velvet accent pillow and floor pillows for an extra cozy touch! A lamp and pendant allows you to have dimmer or brighter lighting to accommodate your changing needs.

There is no world where a chunky-knit blanket and lots of pillows won’t scream comfort. The touches of fur on the rug and the side bench give it an extra dose of coziness. Anyone would love to curl up and hibernate here all winter! Light a few candles in the lanterns and switch on the pendant for the perfect reading spot at night.

This feminine bedroom is a corner of paradise! The colors are soft and gorgeous, but the textures are what really make this space magical. The velvet headboard brings delicate softness to the space. The textured pouf and cane-detailed night stand here are working overtime – and they should get paid for it! They bring elements of texture and give some seating and storage space. The blanket and soft rug are the finishing touches that would have anyone making excuses to retreat here for peace and quiet.

3. Soften Your Lighting

Harsh lighting is the opposite of comfortable! It’ll leave you with a headache and can actually make it harder for you to sleep at night. To bring in some much-needed comfort, you’ll need to soften up your lighting. In a room with soft lighting, the transition from light to dark is gradual and easy on the eyes. Avoid harsh shadows and balance your lights out using these three tips and your eyes and mood will thank you!

Dimmable Lighting

Switching to dimmable lights is a relatively simple way to soften your lights and make your lighting customizable. This cozy room is the perfect place to recharge your batteries. Dim the lights 2 hours before bed to help yourself sleep better, then brighten them in the morning to jump start your mood and your day!

Layer Your Lights

Layering your lighting is a fool-proof way to give you adjustable light. Every room in your house should have at least a few light sources to make it feel more comfortable and eliminate any dark corners. Adding a few lamps across a room and some pendants will give you flexibility to have more or less light depending on your need and mood.

Accent Lighting

Accent lights are the finishing touches that make a room feel complete. They’re the piping on top of the icing on the cake! Adding them makes a room instantly feel warmer and more comfortable. Plus, they soften up your lighting by eliminating harsh shadows in areas that might otherwise go overlooked. Put sconces on an empty wall, strip lighting under cabinets like in this kitchen, or pendants above conversation areas. A room with warm, balanced lighting is a guaranteed ticket to having the relaxing ambiance you need for comfort.

—

Listen, it’s 2023 and it’s time you started living your life in comfort! Choosing to design a cozy home is about more than just aesthetics. It’s about overall wellness! You deserve to live in a home you love, so it’s time to get started. With a little inspiration, the expert tips above, and help from All-Phaseyou’ll be set! Give us a call and we’ll help you soften your lighting and give your home the extra relaxing boost it needs.

Filed Under: 2023, Styles & Trends

5 Simple Tips to Boost Curb Appeal

5 Simple Tips to Boost Curb Appeal

by admin · Feb 2, 2024

They say not to judge books by their covers… but isn’t that what the cover is for? A book’s cover can give off a vibe that will help you decide on an impulse if that book is for you. Your house’s exterior is its cover. Based on its appearance from the street, or curb appeal, passersby (or potential buyers if you’re selling) will decide if it’s worth their time (and money) on a split-second impulse. 

Whether you’re trying to sell your house or increase its value, the look and feel of the exterior of your home has a significant impact on the bottom line. The good news is, giving your house a cover anyone would want to open is simple with these tips!

Tip 1: Add and Update Lighting

Light makes a huge difference when it comes to curb appeal. Choose modern fixtures or timeless classics, but make sure you have a variety of quality lights so that no matter what time of day, your house–and the landscaping you’ve worked hard to maintain–shines. 

These symmetrical sconces contrast with the white of the house perfectly and add some visual interest. You could also add matching ones by your garage for even more light.

If you don’t have room for outdoor sconces, consider a pendant light like this one. It adds a perfect lighting focal point without distracting from your picture-perfect entryway.

From top to bottom, this house will not be ignored! It draws your eyes toward it by using tons of lights. From the overhead light on the front porch to the lights under every roof overhang, you’ll see this beauty no matter where you are.

Add low-voltage outdoor lights or solar-powered lights to your driveway or walkway for a quick lighting upgrade. They’ll catch eyes, and guests won’t waste time looking for a path through your front yard.

Landscape lighting like this puts an emphasis on your garden beds, flowers, or other plants. You’ve worked hard to maintain them, so make it count–day or night. 

Tip 2: Utilize Color

You can use color to create a focal point for your house. It doesn’t matter whether you use neutrals, contrasting colors, or pops of bright color; careful color selection can really create an inviting exterior.

Don’t be afraid to be bold! This aqua-colored door with a bright floral wreath immediately draws the eye and invites guests in. (Plus, check out that perfectly-placed pendant that will light up the door at night!)

When you’re looking to add bright color, flowers are a great way to go. These gorgeous window boxes add a much-needed pop of color without feeling committed to a paint color. For the DIYers – window boxes are a great little project you can throw together with your scrap wood!

Whatever color you go for, make sure your trim and siding complement each other. Update one or both, but don’t forget to give your house a good power wash!

If your garage is looking a little worn out, a fresh coat paint is a quick fix. This house’s garage matches the trim and contrasts against the white perfectly. 

Tip 3: Decorate, decorate, decorate!

One of the easiest (and least expensive) ways to increase your curb appeal is by adding some decorative items. It’s a great way to make your porch feel more like an extension of your home than just a set of concrete steps. 

Decoration doesn’t have to be complicated. Add a simple wreath and cute doormat with an undermat to invite people in.

A front porch with furniture makes you feel right at home. Throw some chairs and a bench up for a cozy place to sit with your guests, or to watch your kids ride their bikes around the cul-de-sac. Pro tip: Add a few outdoor pillows for a pop of color! You’ll want to spend all summer outside and boost your curb appeal. Win-win!

Have you ever been looking for a house, but you can’t seem to find it? Your house numbers are an essential for guests trying to locate your house. If yours are feeling a little lackluster – changing them out is a very simple project with a big impact! This house’s numbers and door hardware match, pulling the look together. 

Shutters are a classic way to increase curb appeal. These shutters create some high-contrast visual interest by framing in the windows – and the symmetry pleasantly draws your eyes right up the path and straight to the front door.

Tip 4: Exercise Your Green Thumb

Landscaping is one of the first things you see when looking at a house. Is the lawn sickly and brown or thick and green? Are there bright flowers? Trees? You may not have a green thumb, but there are ways to make your yard and house stand out without getting (too) dirty.

Add some interest to your entryway with symmetrical pots next to your front door. Plant some easy-to-maintain flowers or greenery in them for a simple way to spruce up your front porch.

Update your garden beds with some plants and mulch. The contrast of the mulch in this house’s landscaping makes the greenery look lush and healthy. The depth of color helps the white paint on the house look bright and crisp, too. (Bonus points for the lights above the garage–we love the way they pop!)

If you’re a registered plant-killer, no need to fear! Pick low-maintenance plants that require little care – or take a look at getting some artificial outdoor plants. If you live in a place where water conservation is a concern, you can xeriscape (landscape with minimal water use) instead. Choose your plants mindfully, and your maintenance can be simple.

You could also consider planting less and adding lights to make what you do have pop (without all the hassle)!

Tip 5: Regular Maintenance

No matter what your house looks like, keeping it clean and dressed up will make a great impression. From state-of-the-art mansions to 50-year-old starter homes, regular maintenance will make any home look like a million bucks.

This house has clearly been well-cared for. The white is still white (not brown–yikes), the lawn is green and mowed, and the driveway is clear of yard waste. 

If you have pavement, make sure to get out your broom or leaf blower to clear it off! If you don’t, consider adding one. It creates a place to walk so your yard stays nice and creates a line for your eyes to follow up to the house. 

If you have limited time or resources, make sure to design your yard with maintenance in mind. Choose artificial plants or some that require little water. This house doesn’t have grass to mow, and the plants are low-maintenance.

Another tip to reduce maintenance is to use LED lights that don’t need to be replaced as often. Taking care of your house doesn’t have to take your entire weekend!

Curb appeal is what brings a smile to your face when you come home every day. It creates an atmosphere you’ll want to share with those you care about. Whether you’re trying to sell or just looking to impress your guests, updating your lighting, utilizing color, decorating, landscaping, and maintaining your house will make you feel at home and leave your guests with a first impression they won’t forget. Contact All-Phaseor visit our showroom for more tips on boosting your home’s curb appeal!

Filed Under: 2022, Architectural Lighting, Home & Garden, Life & Style, Outdoor, Outdoor Lights, Tips and Tricks

How Many Blades Does Your Ceiling Fan Really Need?

How Many Blades Does Your Ceiling Fan Really Need?

by admin · Jan 26, 2024

Ceiling fans are great at providing comfort year-round. A good ceiling fan will help you save on energy costs by circulating the air in your home. In the summer they create a draft, making the room feel cooler. In cold weather, you can switch the fan’s direction to circulate warm air from central heating around the room. 

Ceiling fans are so ubiquitous that for many people it’s hard to imagine life without one! So what happens when your fan breaks, and it’s time to get a new one? 

If you’ve shopped for ceiling fans recently, you know that there are a lot of options. From the ultra-modern models with a single fan blade, to the “windmill” design fans with so many blades that there’s hardly any space between them – many homeowners on the hunt start to ask: 

How many blades does my ceiling fan really need? 

Does the blade count actually change anything, or is it just for aesthetics? 

In short, the answer is “yes to both.” The blade count on a ceiling fan is largely viewed as a style issue, but it does impact the way the fan works. Apart from the obvious design differences, the number of blades on a fan will also affect its noise level and energy consumption. 

Noise Level

The fewer the blades, the faster a fan needs to spin to move the same amount of air. Lots of spinning means lots of moving parts, which usually translates to more noise. Take large industrial fans, for example – they typically have two or three blades and are pretty loud. 

On the other end of the spectrum, fans with higher blade counts can move a lot of air spinning at a slower rate. Less motion means less noise – windmill-style fans with eight to ten blades are virtually silent. 

There isn’t an exact cutoff between noisy versus quiet fans, but a good middle range is around five. If you want a quieter fan, one with five or more blades will likely be your best choice. 

Energy Efficiency

Another thing to consider when choosing a fan is how much it will cost to run. Fans with more blades create more drag, requiring more energy to operate. This is one reason why large, always-on fans (like you’d see in a commercial space) often only have three blades. They may be a bit noisier, but they save on energy costs.

While its blade count does impact the energy efficiency of a fan, it’s definitely not the only factor involved. The efficiency of fans can also be affected by the length and angle of the blades and by the type of motor it uses. It’s best to check the energy rating of your fan when possible. 

Style and Aesthetics

Aside from energy efficiency and noise level, the main difference between fans with high and low blade counts is really just style and aesthetics. “Windmill” styles with eight to twelve blades can feel rustic, whereas fans with two to three blades usually feel minimalist and industrial. 

How do I know what the right number is for me?

The short answer to this question is – it really doesn’t matter very much for most people. It doesn’t matter whether noise levels, energy efficiency, or aesthetics are your top priority; it’s pretty likely that you’ll be able to find a fan that will meet your needs in all three categories. 

Most often, it’s safe to shop by your style preferences first, then find a fan that meets your noise and efficiency needs from that selection. A modern, high-quality ceiling fan will be designed to work well regardless of the blade count.

If you’re looking for a quality fan that will keep you cool for years to come, stop by our showroom or give us a call. Our lighting experts are ready and waiting to help you find exactly what you need!

Filed Under: 2022, Ceiling Fans, Informational

5 Easy Steps to Create a Modern Minimalist Interior

5 Easy Steps to Create a Modern Minimalist Interior

by admin · Jan 5, 2024

With an intentional lack of furniture and decorations, minimalist design can sometimes come off as cold and uncomfortable. Over the past few years, as we’ve spent more time in our homes than ever before, the need for comfort in a home design has been made crystal clear.


Today’s modern minimalism prioritizes simplicity with a decluttered and uncomplicated aesthetic, while also emphasizing the need for comfort in a space. You’ll see more color and accessories than the minimalist interiors of the past had, but they’ll be thoughtfully chosen extras that provide warmth and life to the space without going overboard. 

Whether you’re interested in adopting a minimalist lifestyle or just love the simple yet dramatic design aesthetic, modern minimalism is an achievable aesthetic for just about anyone! 


To help you get started, we broke down the basics of modern minimalist interior design into a handful of easy steps you can use to confidently focus on the right essentials. 


1. Create an Open Floor Plan

Focus on creating as much connected open space as possible. Obviously, taking out walls is the easiest way to create an open floor plan. But if you’re not in a place where you can tear down walls, there are some simple and subtle tricks you can use to make adjoining spaces feel more connected. 


One way to connect spaces in your home is to use the same flooring and wall paint colors for the entire space. This will make rooms look like they belong together, even through a doorway. 

A unique accent, like this minimalist pendant light, grabs your attention through the doorway from across the way, which helps your brain perceive the two spaces as one.

Finally, play around with your furniture placement to maximize your space. In smaller spaces, this often means keeping large furniture close to the walls to keep open pathways throughout but don’t underestimate the power of a simple, low-profile, floating sofa used to define a space.

2. Choose a Small Color Palette

A classic hallmark of minimalist design is a neutral monochromatic color palette, typically in warm grey, white, or beige tones. Contrast is important – add dimension and balance with a mix of darker and lighter shades within your color palette.

If an all-neutral color palette just isn’t your thing, you can still get a modern minimalist look with color – you just need to stick to a small palette. Keep most of the colors you use very light, to increase the feeling of airiness and reflect light best. 

3. Functional Design is Key

It doesn’t matter how pretty a room is, if it’s inconvenient or difficult to use you’re not going to be happy with it. When you’re trying to adopt modern minimalism, understanding how to pare down to only the essentials can be hard. When you’re going through your room, ask yourself:


 “Does this serve a purpose?”   “Do I already have something that serves this purpose?”   “Is there a multipurpose option that will serve this purpose and others?” 

Just remember, there’s no hard and fast rule for what it means to be “functional” – and you don’t need to justify every item you love to keep it in your home. A funky decorative pillow that makes you smile when you see it is serving a purpose (and it’s making your couch more comfortable – so it’s multifunctional!) 

A huge part of functional design is organization. Decluttering for a modern minimalist space involves reducing “visual clutter” too! Things not actively being used should have a home where they can be tucked away until they’re needed. 


Opt for storage options that have doors that will hide the things you’re not using.  When styling open shelving, choose items that match your color palette, leave plenty of open space, and use boxes or baskets to organize and hide loose items.

Don’t be surprised if you get down to the basics and you aren’t in love with what you have left. You’ll likely need to start making smart trades here and there to end up with a set of basics that you love.

4. Add Light – Lots of It

Like most modern design aesthetics, modern minimalism focuses on filling the space with light. Where possible, introduce as much natural light as you can. The light colors on your walls and floors will reflect it – making your room feel open and airy. 

In addition to natural light, a modern minimalist space needs a well-thought-out interior lightscape. Make sure your general ambient light is bright without being harsh, and add extra lighting in dark corners and over workspaces. Hidden lights, like LED strips under a cabinet, are an expensive DIY trick with a big payoff! 

Because minimalism is all about doing less with more, it’s okay to be choosy about how you add light to your space – you don’t want to clutter up your home with a floor lamp in every dark spot! When you’re shopping for fixtures, stick to simple shapes that can double as design elements.

5. Finish it Off With Thoughtful Accents

Little pops of color and texture are what take a modern minimalist space from blah to wow. You can do this in a number of ways, but remember to keep it simple. Start with just one color or texture and see how it feels before committing to more. 


When possible, look for ways to upgrade your existing decor rather than adding extra items. Look for functional pieces that you need in your space, but feel a little lackluster, and find a more interesting alternative. Replace an old, overstuffed sofa with a simpler version in a deep color (as long as it’s in your color palette!), or give an old end table new life with a coat of paint.

Pro Tip: If have a hard time committing to color, consider using houseplants! They introduce a vibrant green color and soft, organic textures, which can balance out a minimalist design quite nicely.

By far, one of the most effective ways to accent a modern minimalist design is with an interesting light fixture. Your room will always need light, so it might as well be an integrated part of the design! 


A stunning ceiling light with a simple shape will stand out as a piece of art against a minimalist backdrop and elevate the entire design of the space. 

Pendant lamps are popular in modern minimalist design because they come in simple shapes with lots of finish options, so it’s easy to find something that will match your aesthetic. 

If replacing a ceiling fixture isn’t an option, you can get a similar impact with a carefully chosen floor lamp! Lamps are the MVP of accent lighting for a reason – they’re easy to move, replace, and rearrange, and come in a HUGE variety of styles. You can go for something small that blends in, but we also love the way a large, yet simple, lamp like this one makes a statement without taking over. 

That’s all there is to it! Just to recap, here are the 5 Easy Steps to Create a Modern Minimalist Interior: 


  1. Create an open floor plan – tie separate spaces together with color and materials, and rearrange furniture to maximize your space.
  2. Choose a small color palette – neutrals are your friend, but it’s okay to add in a little bit of color to make your space feel like you.
  3. Functional design is key – use multipurpose furniture, and organize, organize, organize. Store things that aren’t being used so that they’re not cluttering up your space.
  4. Add light – having lots of natural and indoor lighting is what makes your space feel open and airy. Light up dark corners and workspaces.
  5. Finish it off with thoughtful accents – Don’t over-accessorize. Pops of color and texture give life to a space, but try to incorporate these add-ons with the functional elements of your space – like a colored sofa or an upgraded light fixture.


——–


Modern Minimalist design can be a difficult concept to balance, but it’s very forgiving and so beautiful when done correctly. If you need help finding the right lighting for your Modern Minimalist home, the experts at Lit Living can help!

Filed Under: 2022, Decor & Home Accents, Styles & Trends, Styles and Trends

7 Ways to Transform Your Bathroom

7 Ways to Transform Your Bathroom

by admin · Dec 15, 2023

Your living room shouldn’t be the only room in your home that showcases your style – it’s time to show your bathroom a little love too! Wondering how to get started? Here are 7 tips, and plenty of inspiring examples, to show you how you can transform your bathroom into a space that you can be proud of!

1. Use Striking Wall Colors

Coloring with contrasts make for a striking match with any vanity set. A simple, yet functional brass light fixture ties the whole look together, while still providing the bright light you need to get ready every morning.

Sometimes, simplicity makes for the best design. Matte black task lighting, bright yellow bulbs, and a textured black backdrop create a truly showstopping combination, adding a dramatic effect that’s sure to leave any guests talking.

2. Color-Coordinate Your Hardware

Make any vanity look luxe with gold features. Coordinate your drawer handles, faucets, and light fixtures for a put-together feel. Especially when paired with simple blacks and whites, these accents really shine!

This bathroom uses a brilliant geometric design as a wall accent, then simplifies the space with a clean-cut, over-the-mirror light fixture in a pretty accent color. The result is an engaging, but not overly busy, bathroom look.

3. Use Chandeliers to Make a Statement

Create a primping room fit for a Hollywood A-lister by using some surprisingly simple décor essentials: a classic vanity, glamorous chandelier, and patterned walls. The result? A bathroom with a touch of flair, lots of style, and a slight air of drama. We love it!

Want a more understated room with just a touch of glitz? You can still lounge in luxury as you soak beneath a dazzling chandelier.

4.  Mix Natural and Modern Elements

Bring all of the soothing spa vibes to your own bathroom while still keeping it chic. Here, natural wood elements are balanced with sleek, simple light fixtures and mirrors that provide an understated modern touch.

This bathroom makes a great use of natural touches with wooden shelves and small potted plants. To top it off, the light fixture’s wavy, modern design sends an organic “go with the flow” impression that matches the tone of the room’s décor.

5. Choose Bold Color Accents

If you want a pop of color in your bathroom, but you aren’t willing to commit to a full accent wall, try colorful light fixtures! These red lights are a bright spot in a white room that draw attention and add style without being overwhelming.

If you’ve got some fun color elsewhere, like this vintage yellow toilet and sink, that’s great! This black fixture blends with the style and lets the colorful toilet and sink truly shine.

6. Embrace Classic Elements

If you’re looking for a simple, sophisticated bathroom, this one will suit your tastes. The vanity set and walls have subtle detailing, while the silver light fixtures boast clean lines and an elegant silhouette. 

Here, a large, gorgeous vanity takes center stage. Combined with modest, shaded light fixtures, the overall effect is timeless and elegant.

7. Play Around with Interesting Shapes

Hoping to create a quaint, charming wash room? A minimalist vanity, pretty wall pattern, and small vase of flowers are a good way to start. The light is a beautiful finishing touch: it’s simple enough to highlight the other design elements, but the double-sided fixture is unique enough to add some extra flair.

In this bathroom, diamonds are everyone’s best friend. Flanking the mirror with unusual diamond-shaped light fixtures creates a distinctive, fashionable element, making this space seem subtly one-of-a-kind.

While the task lighting on each side of the mirrors is straightforward, it’s the unusual shape of the overhead lighting that commands attention in this modern bathroom. The overall effect? A bathroom that’s stylish, sleek, and unique.

Feeling inspired? Transform your bathroom into a space that’s truly yours with any of these simple tips. Whether you add an accent wall, a colored fixture, some interesting shapes or natural elements, we’re sure you’ll love the effect! Best of luck from us here at Lit Living.

Filed Under: 2021, Bathroom Lights, Styles & Trends

« Previous Page
Next Page »

Copyright © 2025