• Skip to primary navigation
  • Skip to main content

All Phase TC

  • Buying Guides
  • Styles & Trends
    • Bathroom Lights
    • Ceiling Fans
    • Ceiling Lights
    • Lamps
    • LED Lights
    • Outdoor Lights
    • Smart Lights
    • Wall Lights
  • Wellness & Safety
  • Shop Products

Styles & Trends

5 Styles of Exterior Lighting to Try in 2024

5 Styles of Exterior Lighting to Try in 2024

by admin · Jan 24, 2025

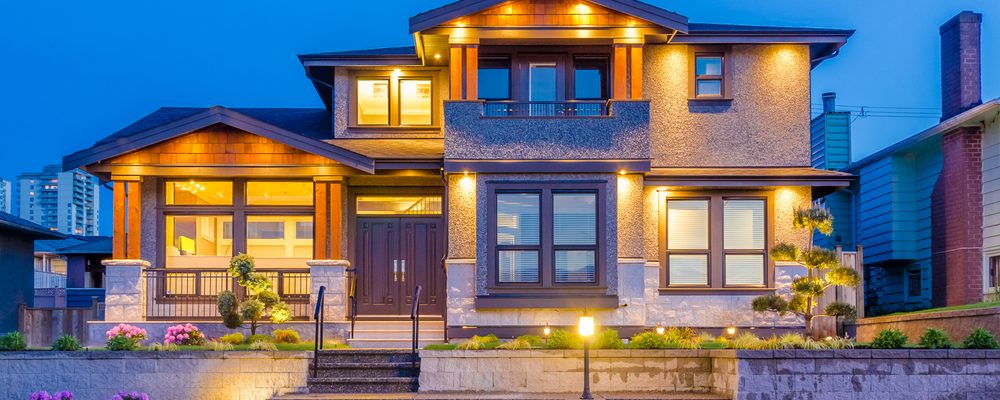
Exterior lighting serves as much a practical purpose as an aesthetic one. It lights the way after nightfall and even deterring criminal activity. And style-wise, outdoor lighting has come a long way! If you’ve hesitated to upgrade your lighting because you’re not sure where to start, we’ve got a few recommendations for beautiful, functional lighting styles that will elevate the curb appeal and outdoor living spaces of your home.

Here are 5 styles of exterior lighting fixtures you should consider for your home in 2024.
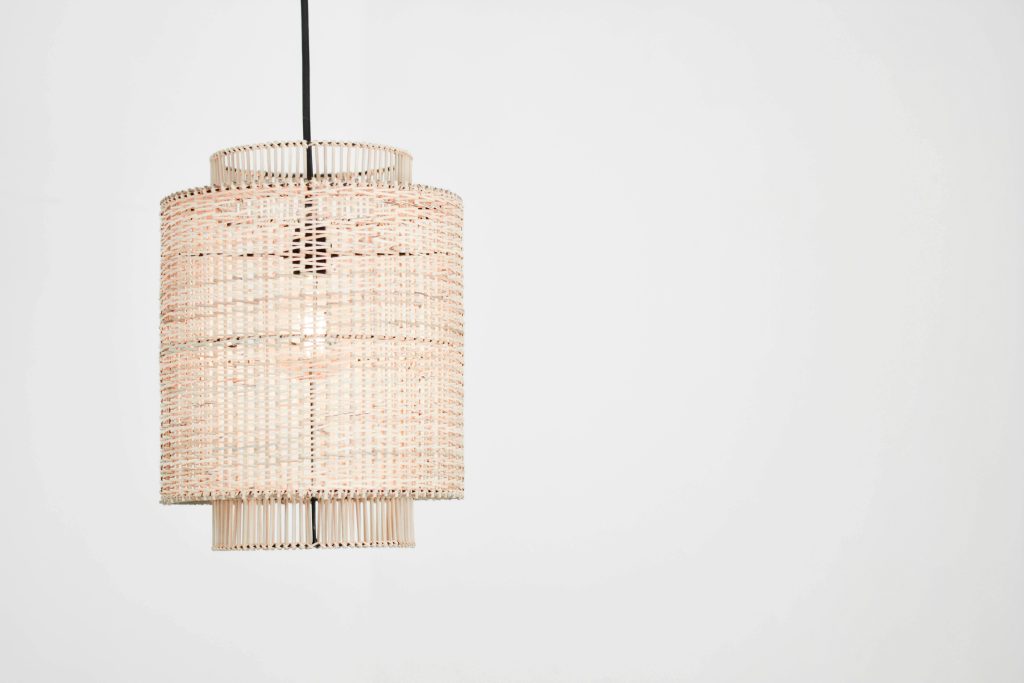
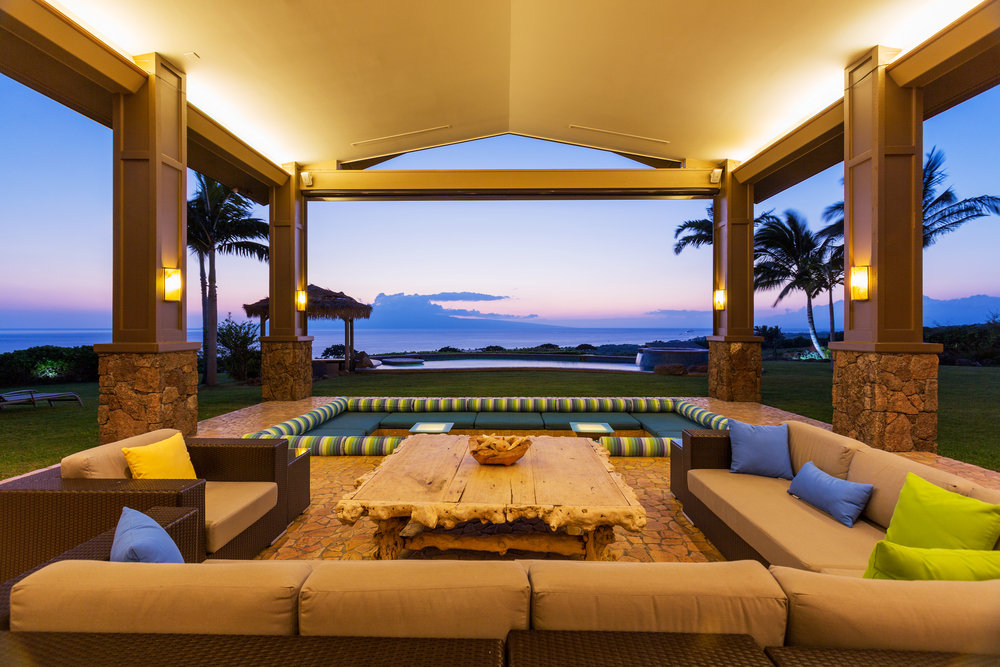
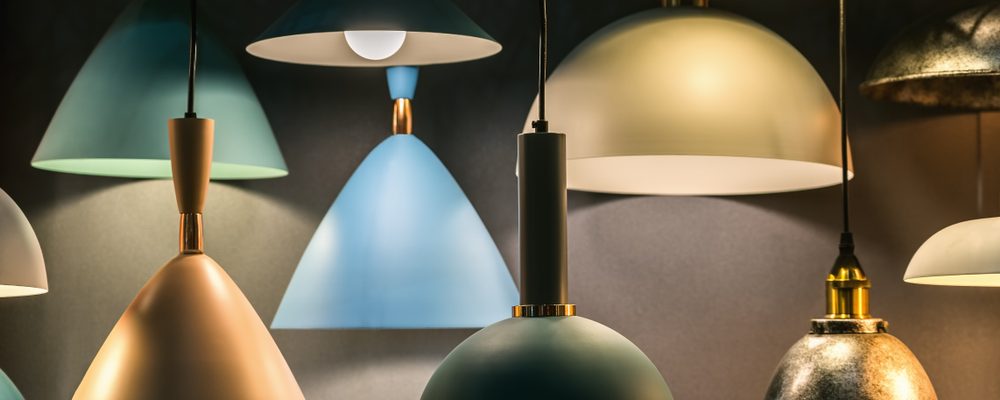
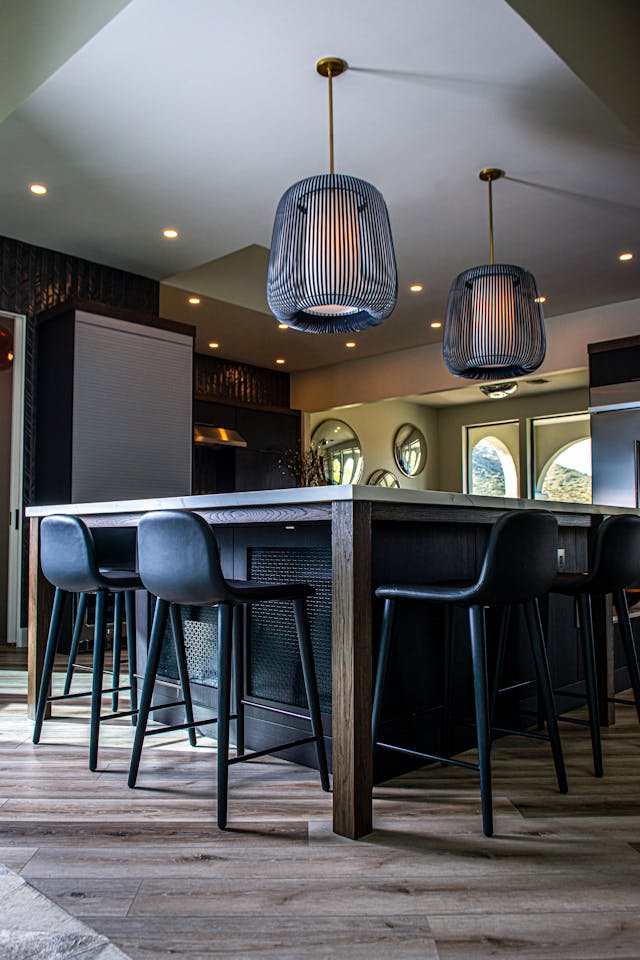
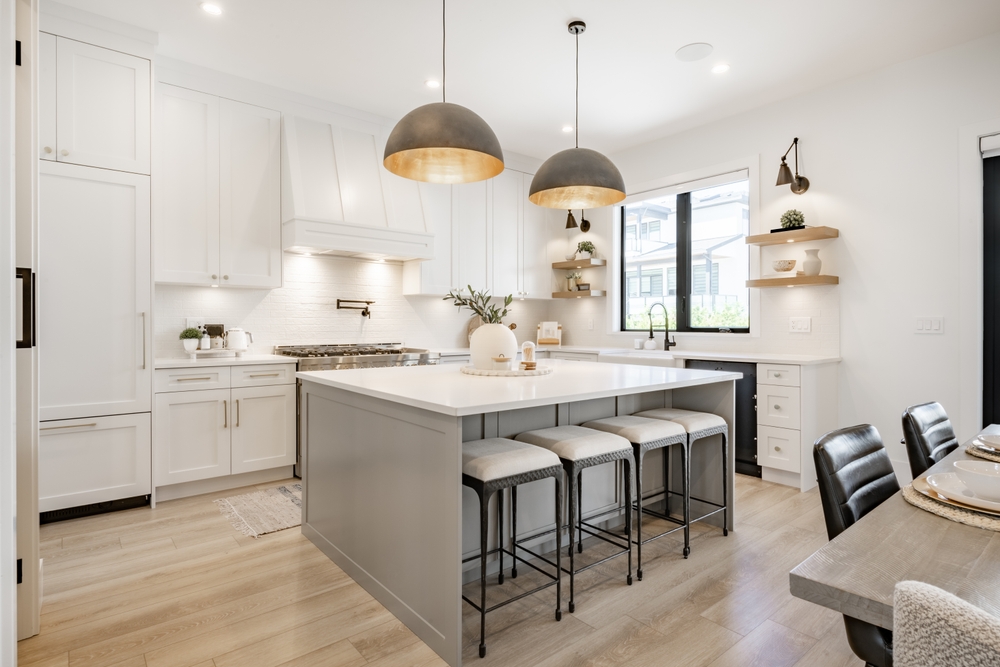
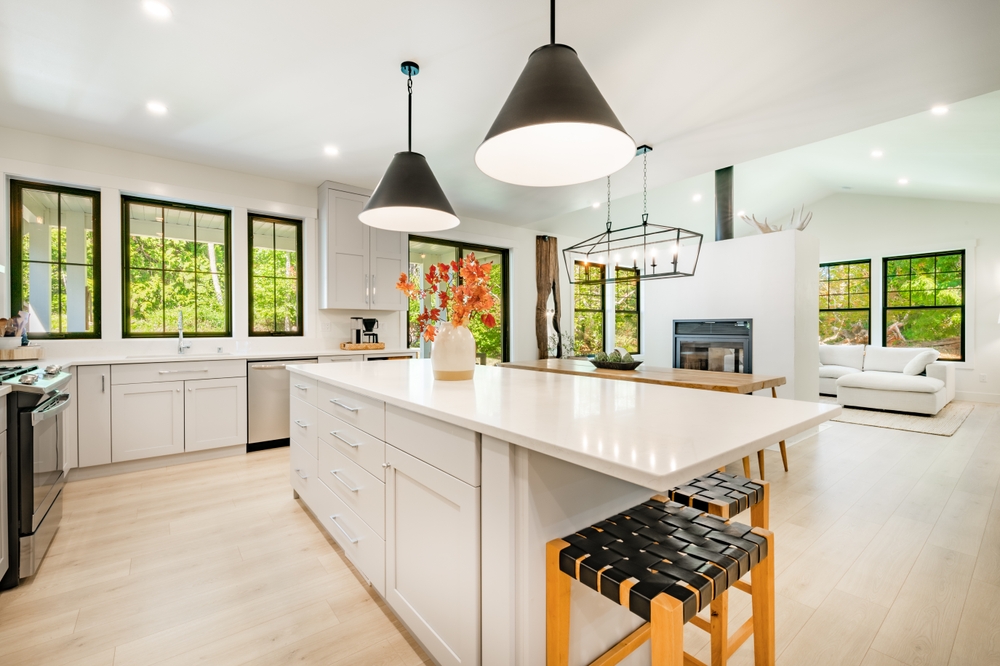
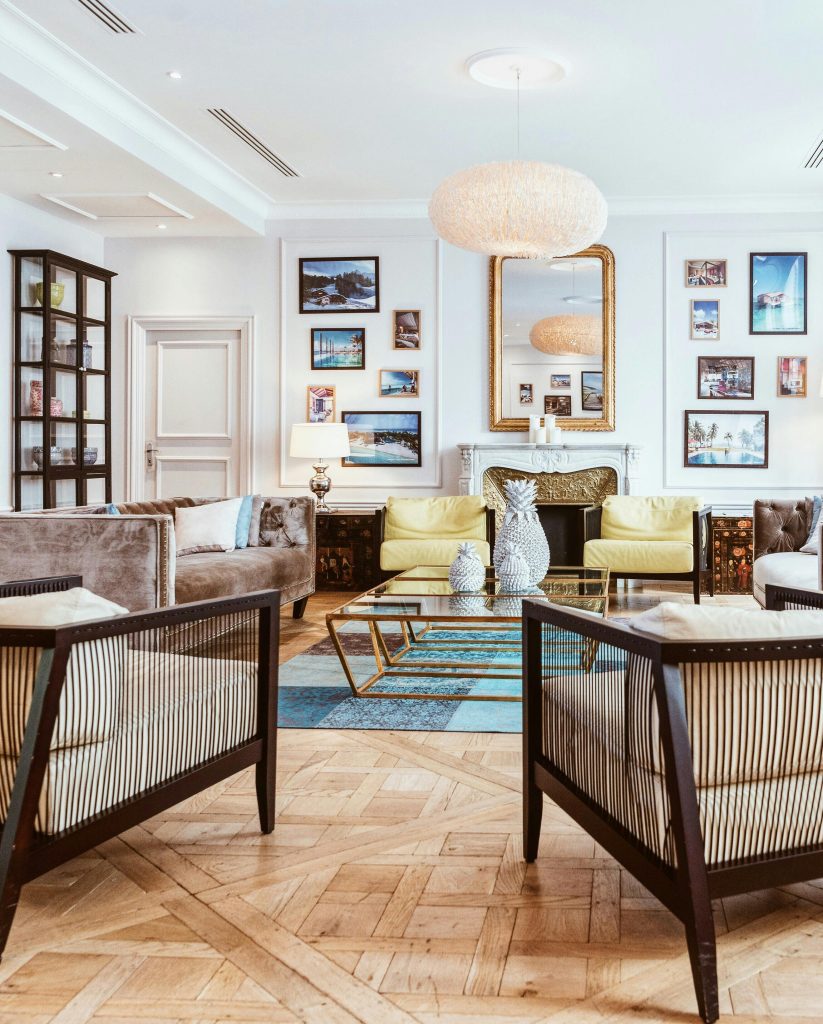
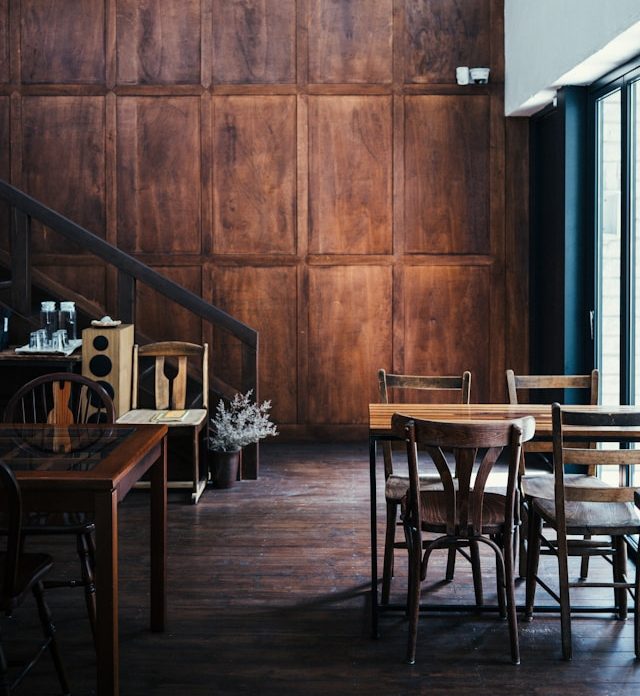
Outdoor Pendants

The pandemic brought a lot more of our lives outside, and we’re pleased that even post-COVID, we’re still enjoying meals and family time in the fresh air. Pendant lights bring a finished feel to outdoor dining and living spaces, making them more appealing for everything from a dinner party to a quiet night reading your favorite novel. A woven pendant feels casual and coastal, while a lantern-style metal and glass pendant is ideal in more traditional or rustic homes.

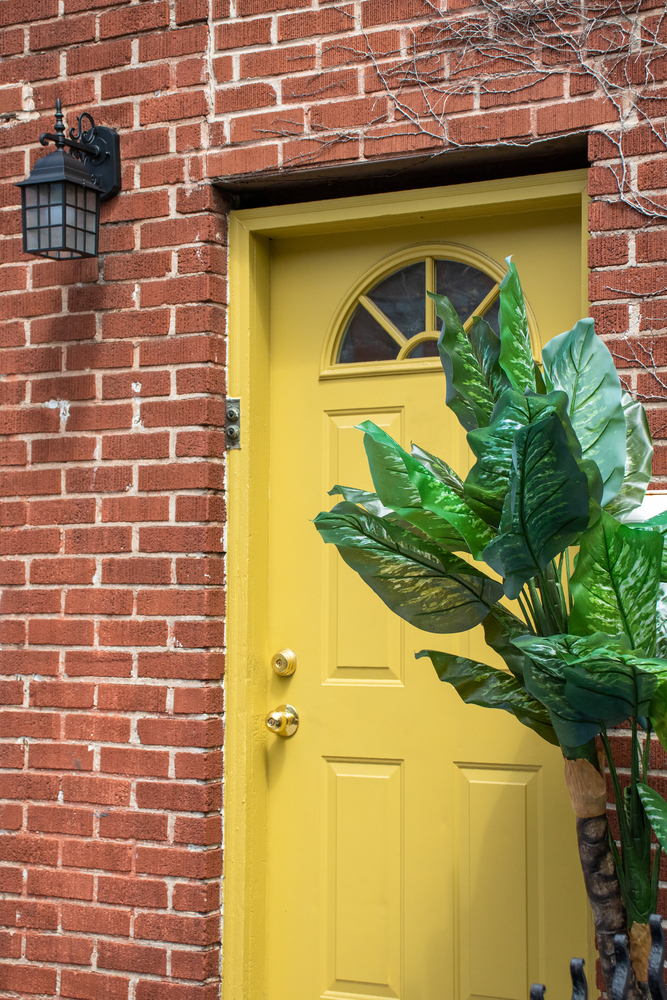
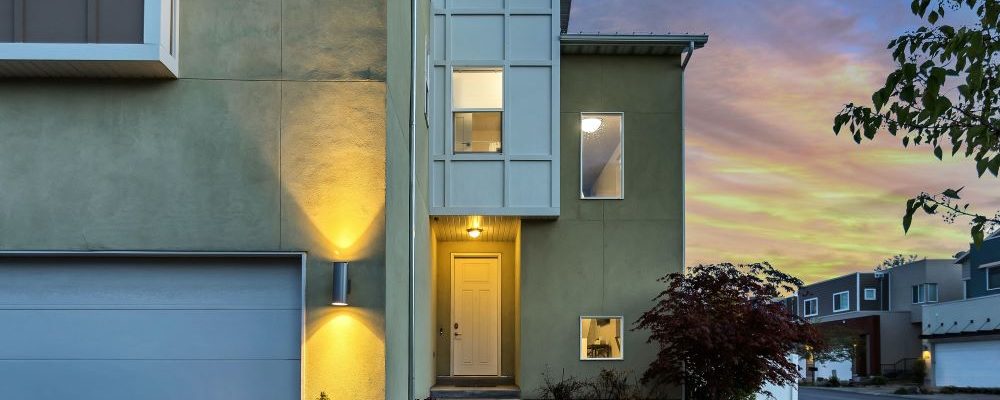
Exterior Sconces and Lanterns

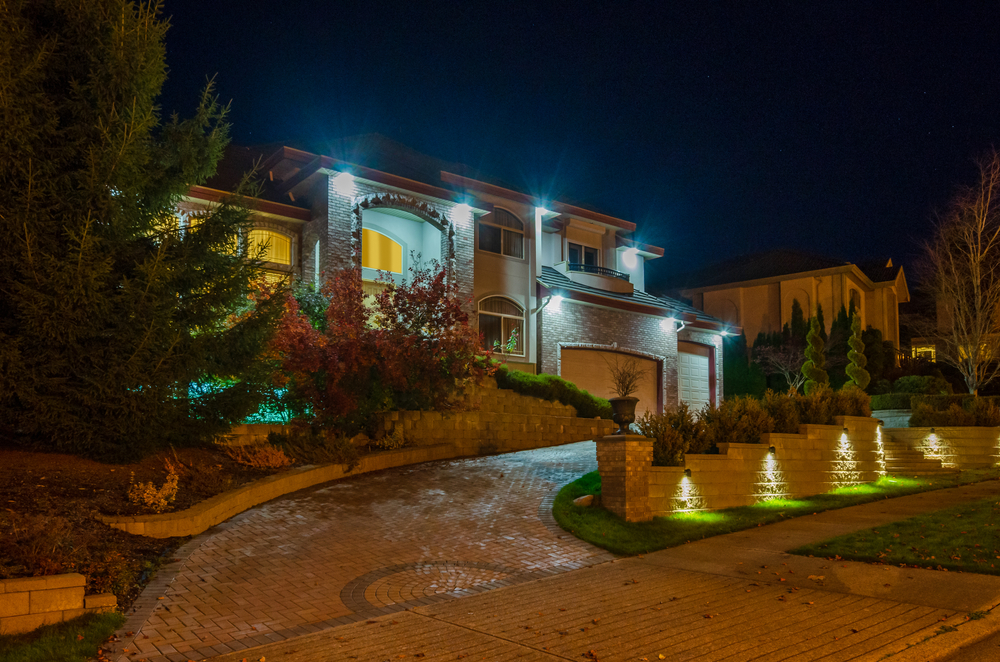
Nothing says “curb appeal” like one (or a pair) of classic exterior sconces flanking your front door making your home’s portico look welcoming and warm as the sun goes down. 

Adding a motion detector switch turns a beautiful sconce into a security measure for your home.  It ensures the light switches on and illuminates your front porch when anyone approaches. This helps avoid tripping injuries, and can deter theft and break ins – keeping your family safe without the need for expensive cameras. Rustic, modern, and minimalist options abound, so there’s no doubt you’ll find one that works for your decor style.

Sconces aren’t limited to the front stoop, either! They work great on any exterior wall to bathe a space in light and add a chic touch.

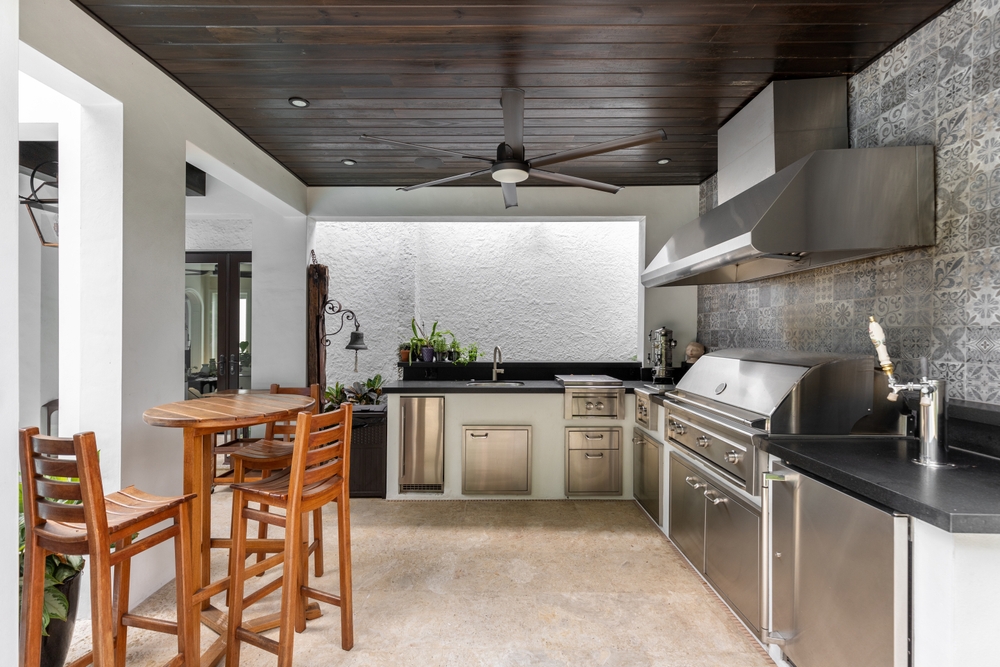
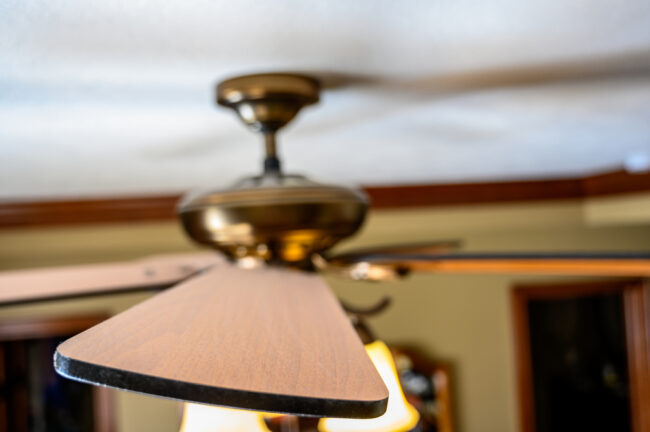
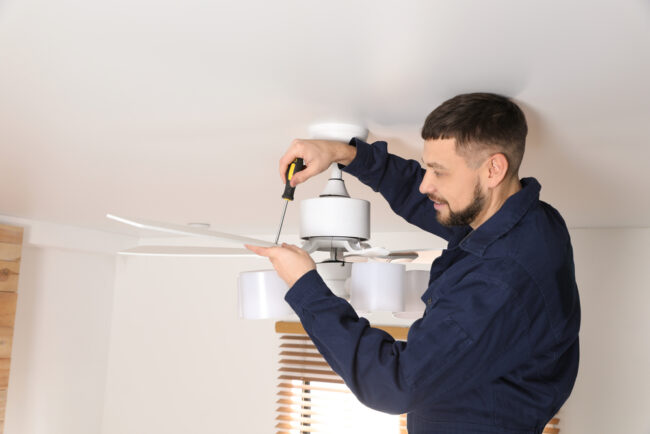
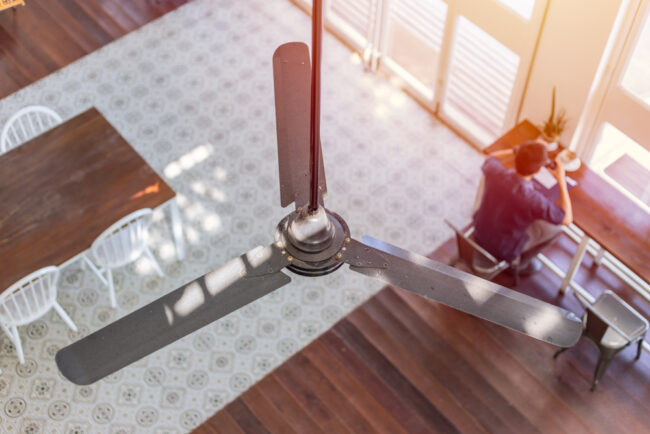
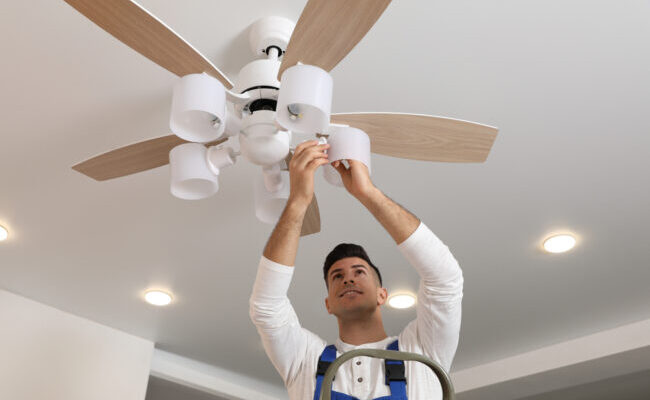
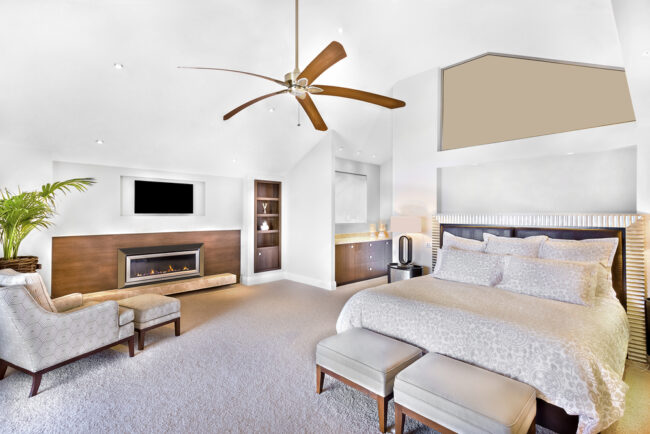
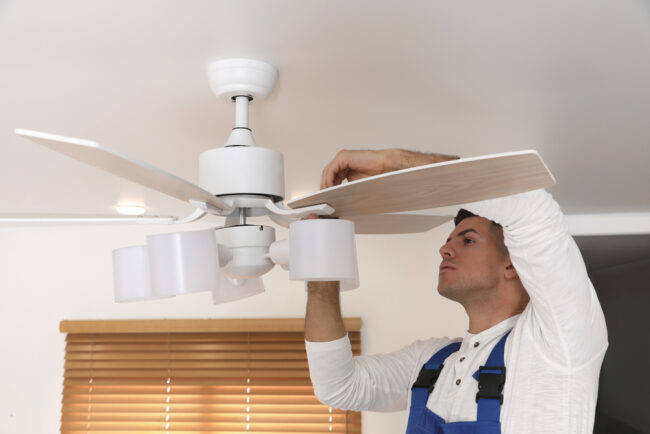
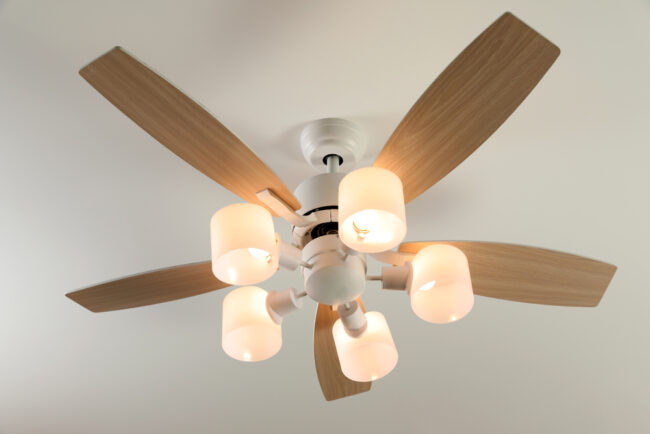
Outdoor Ceiling Fans

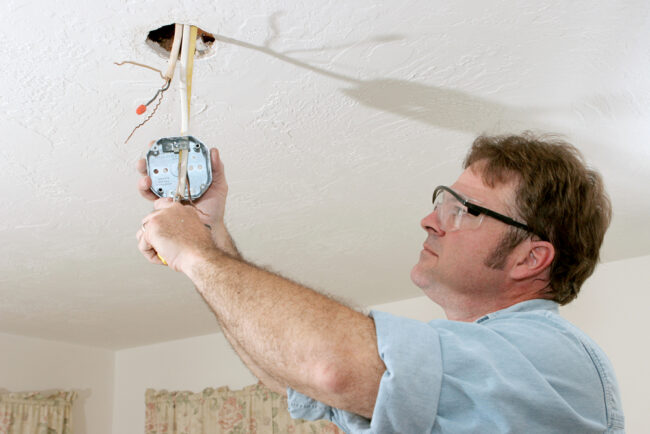
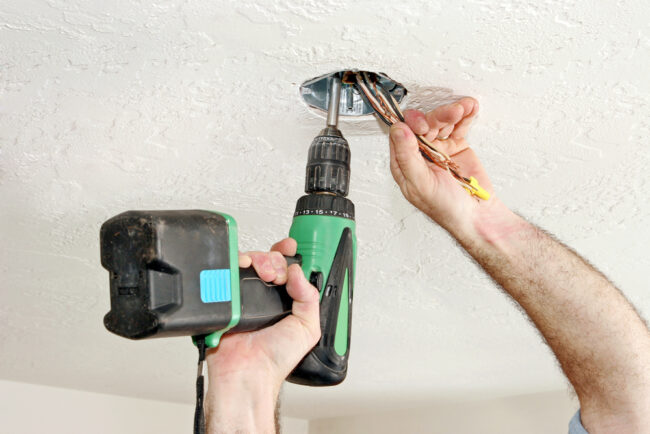
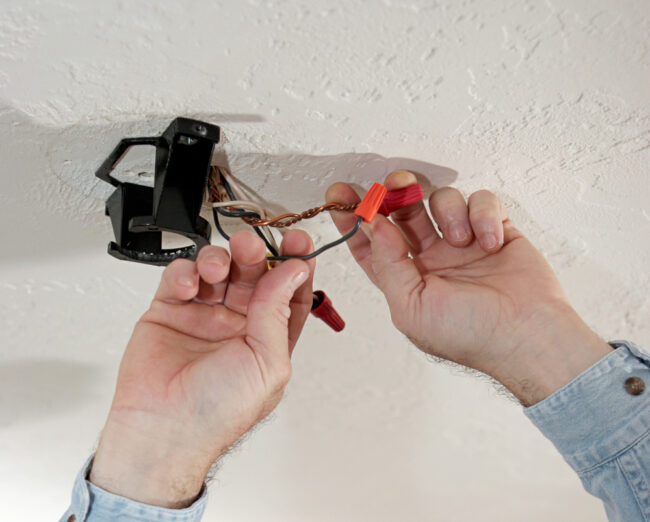
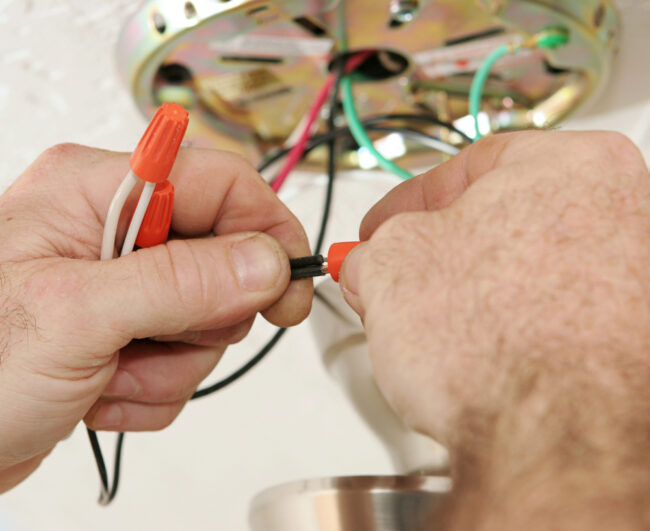
Even when the peak of summer has come and gone, it’s never too early to plan for the warm days ahead. Exterior ceiling fans can circulate air to keep you cool on even the hottest days. They can help keep flying pests at bay, and are safe for kids and seniors who might trip over bulky floor fans or hazardous cords. Installing a fan is a complicated task best left to an experienced electrician – be sure to ask a lighting specialist for recommendations!

In recent years, ceiling fans have gone from practical eyesore to beautiful, useful fixtures. A minimalist design can blend right into your exterior deck ceiling, or you can go big and bold with a statement fan that’s as eye-catching as it is beneficial. 

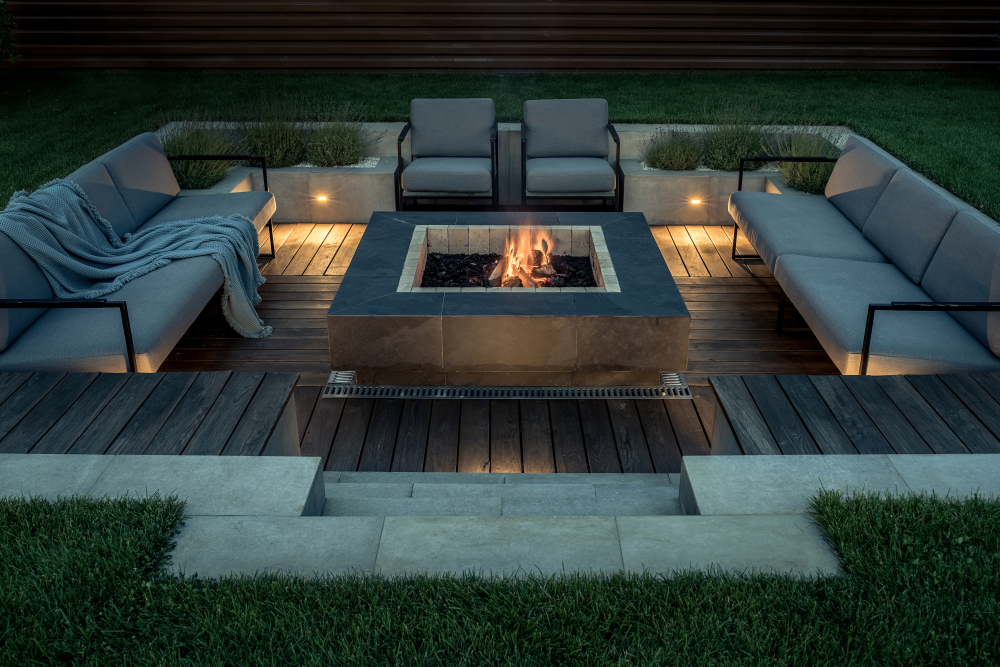
Pro Tip: Ceiling fans aren’t just for hot months! Paired with an outdoor fireplace or fire pit, they can help circulate warmer air, keeping you cozy for outdoor movie nights or snuggling under the stars. 
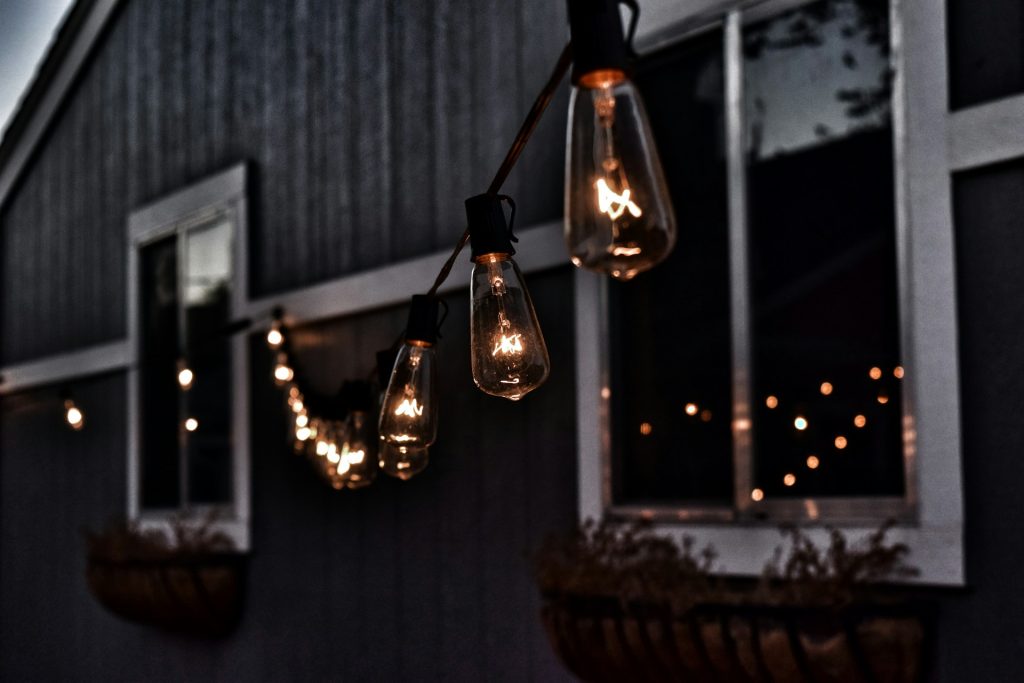
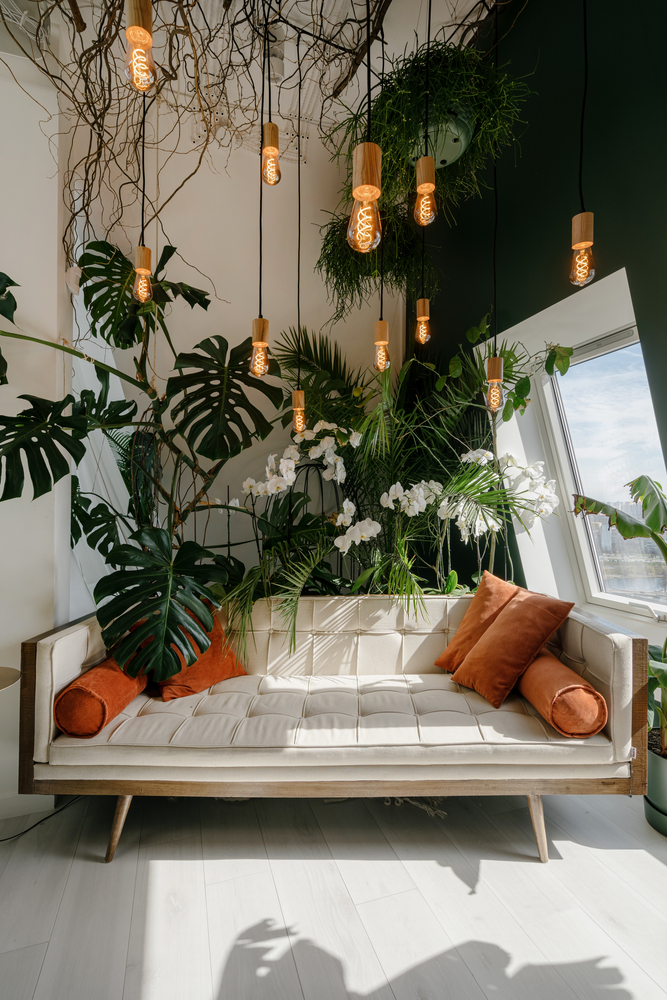
String Lighting

String lights, also known as cafe lights, continue to be popular with homeowners, for good reason! They’re affordable, versatile, and create a magical ambiance in any outdoor space. Strung from trees, porches, and across pools, they make even the most mundane evening activities feel a little more special. Look for high quality, wet-rated outdoor lights from a reputable brand to ensure that they’ll stand the test of time.
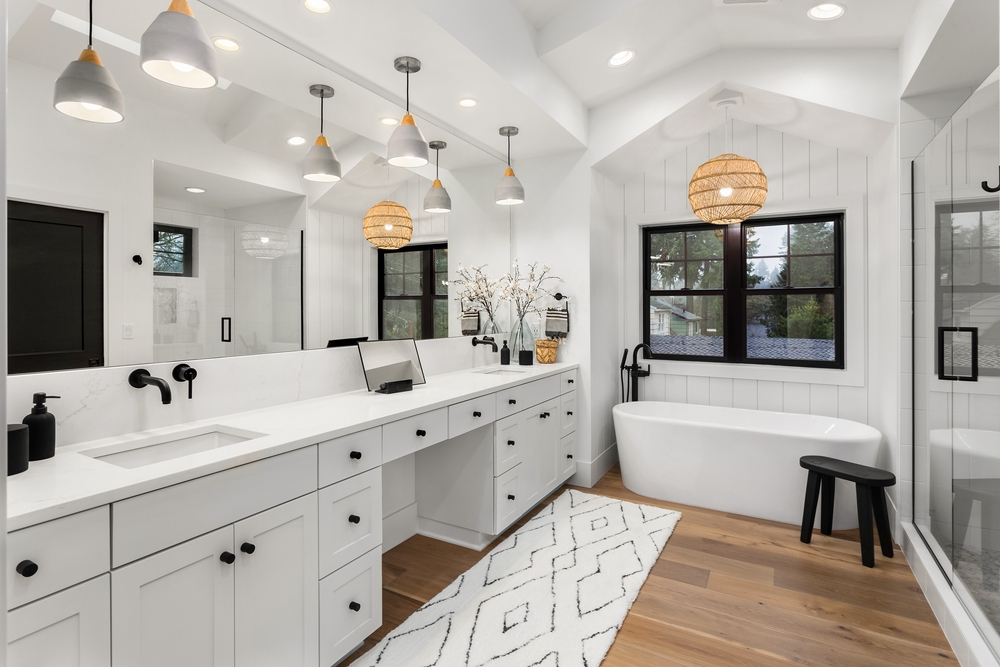
Recessed Lighting

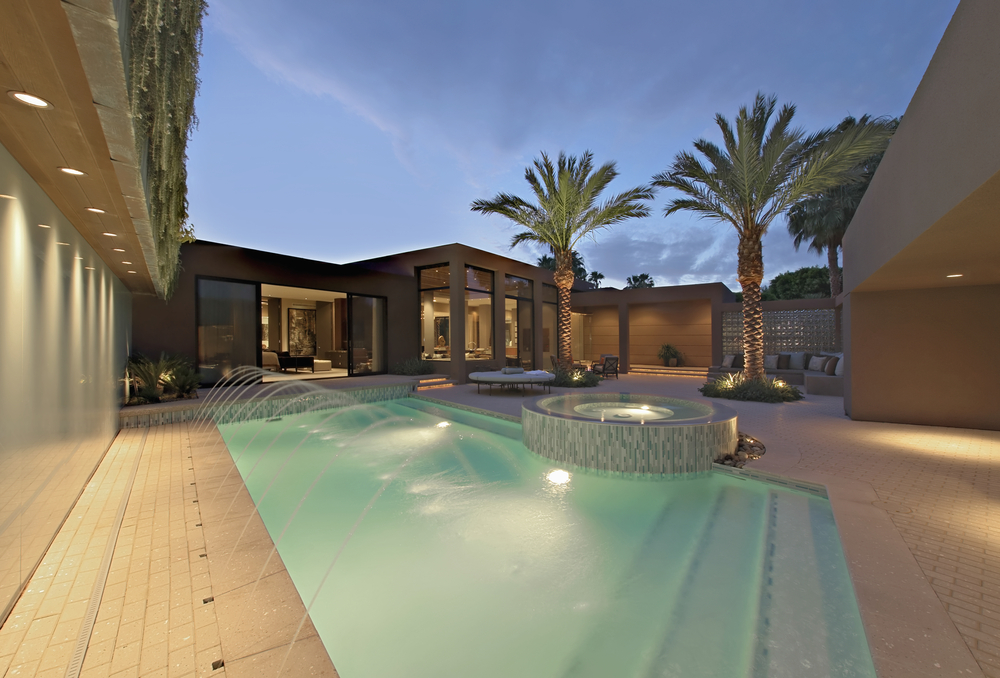
If you believe firmly in the “less is more” axiom when it comes to exterior lighting, outdoor recessed lights might be the perfect choice for you! This style of light blends seamlessly with your exterior ceilings (and even floors!) for practical illumination that requires very little maintenance. 

Like the look of recessed lighting, but don’t want the hassle of in-ceiling installation? Several brands offer low profile lights that can be fitted into existing light electrical boxes, saving you money and time. 

Recessed lights can also be use together with more decorative pendants or sconces to give your statement pieces room to shine while also ensuring that your exterior spaces will be well-lit for any activity or event.

——————-

Having quality exterior lights on your home isn’t just a matter of showing off for the neighbors. Attractive, practical exterior lighting expands your square footage, creating more living space for your family to enjoy all year long. It’ll improve curb appeal, deter crime, and keep your friends and family safe long into the evening hours. What more can you ask for? 

Still overwhelmed by the options? Stop by our showroom to talk to one of our lighting experts. We’ll help you find beautiful lighting for your outdoor spaces – without the hassle of spending hours of time online researching, only to put it off for another day. You don’t have to wait to make your home look great, we’ll help you get started today!

Filed Under: 2024, Outdoor Lights

Brighten Up Your Outdoor Spaces: Exploring Light Bulb Color Temperatures

Brighten Up Your Outdoor Spaces: Exploring Light Bulb Color Temperatures

by admin · Dec 6, 2024

As the sun sets and the world dims, outdoor lighting takes center stage. Lighting is a powerful tool that can beautify and protect your most precious spaces – your yard and home exterior included! And one important thing to consider when illuminating your outdoor areas is the color temperature of your light bulbs.

In this blog post, we’ll talk about outdoor lighting and go over the best light bulb color temperatures you can use to enhance the beauty, functionality, and safety of your outdoor spaces. 

The Basics: Color Temperature

Color temperature is a measurement that describes the appearance of light coming from a light bulb. It is measured in degrees of Kelvin (K) and uses a scale between 1000K to 10000K, with the majority of residential bulbs being between 2000K-6500K. Light bulb temperature determines whether the light appears warm or cool. Warm light has a lower temperature (around 2200K to 3000K), while cool light has a higher temperature (around 5000K to 6500K). Generally, 2000K-3000K is the sweet spot for most outdoor lighting situations as bulbs in this range give off a soft white, almost yellow, glow. But there are some situations where other temperature ranges work better. 

Fast Fact: The color of the natural light changes throughout the day. At midday, the light outside on a sunny day has a Kelvin temperature of around 5000K. Dawn and dusk have much warmer temperatures, around 3500K. This is one reason why you’ll see often see exterior lighting in warmer colors – it feels more natural to have lighting that mimics dusk than midday when enjoying a late evening outside.

So, let’s chat about some different areas of outdoor lighting!

Entryways: Inviting Warmth

Your entryway is the first impression guests have of your home. To create a warm and welcoming atmosphere, choose light bulbs with a color temperature of around 2700K to 3000K. Soft white or warm white bulbs work best here, giving off a cozy glow. Consider using wall sconces or pendant lights that diffuse the light for a softer and more inviting ambiance. It also looks great (and improves safety) to light the pathway/sidewalk leading up to your entry with a similar warm white light. 

Patio Spaces: Versatile Lighting

Patios serve many purposes, so it’s important to have versatile lighting options. You can get creative and use different types of lighting and light bulb colors to set the mood you want. For intimate gatherings, dimmable LED bulbs with a warm color temperature (2700K-3500K) can create a relaxed and cozy atmosphere. You could also hang some strand lights above the space to provide some ambiance. For lively outdoor parties, you can play around with colored bulbs to add a playful touch.

Outdoor Fireplaces/Kitchens: Cozy and Functional

Outdoor fireplaces and kitchens are perfect for entertaining and spending time with loved ones. In these areas, you need a balance between functionality and ambiance. For task lighting in outdoor kitchens, use cool white light bulbs (around 4000K to 5000K) to ensure clear visibility while cooking. To create a cozy and inviting atmosphere around the fireplace, choose warm white bulbs (around 2200K to 2700K). These add a touch of warmth and comfort that won’t be distracting. 

Security Lighting: Bright and Deterrent

Security lighting is important for the safety of you, your family, and your guests and goes a long way to deterring potential intruders. Properly lighting your pathways and stairs allows easy navigation of your property and minimizes any dark areas. Choose bright white light bulbs with a color temperature of 5000K to 6500K. These bulbs emit a cool white light that provides maximum visibility and clear surveillance. Consider installing motion sensor lights in strategic locations around your home, including entry and exit points and around sheds and other storage areas, to enhance security and discourage trespassing.

Pro Tip: Bright white refers to a light bulb’s color, not the amount of light it gives off. Bright white bulbs come in a variety of strengths, measured in Lumens, from dim to blinding. For security purposes, bright white bulbs with a high Lumen count are generally the best way to go. 

Landscape Lighting: Enhancing Beauty

Well-planned landscaping spotlights can transform your outdoor space. Use light bulbs with a color temperature of around 3000K to highlight the natural beauty of your plants and decor elements. This warm white light creates texture and adds depth to your landscape. Experiment with different angles and intensities to achieve an eye-catching outdoor lighting display.

Outdoor lighting can be just as important as indoor lighting. Choosing the best outdoor lighting color temperature depends on what you are looking to illuminate and the look you are trying to achieve. Beauty, functionality, and safety should be your goals. 

————–

Need help coming up with some bright ideas for improving your property’s outdoor lighting? The experts at Lit Living are happy to meet with you to bring your vision to life!


Filed Under: 2024, Outdoor Lights

Embracing Nature: Illuminating Offices with Biophilic Design

Embracing Nature: Illuminating Offices with Biophilic Design

by admin · Sep 13, 2024

Walking along the beach, hiking a mountain trail, perusing a park, floating a river. Whatever your favorite method, there’s just something about the way that spending time outside in nature can make a person feel more at ease and centered. But, in the hustle and bustle of modern office life, a harmonious connection with nature often takes a backseat. However, as we strive to create healthier and more productive work environments, the concept of biophilic design is gaining significant traction. Imagine an office space that not only exudes elegance through its lighting but also seamlessly integrates elements from the natural world. Welcome to the realm of biophilic design, where offices are transformed into vibrant, invigorating spaces that blur the lines between indoors and outdoors.

The Biophilic Approach

Biophilic design is more than just a buzzword; it’s a philosophy that centers around human beings’ innate connection with nature. The term itself originates from “biophilia,” a concept coined by biologist E.O. Wilson to describe the inherent affinity humans have for the natural world. Biophilia is more than just an eco-friendly trend, it’s seen in all aspects of our life. People pay top dollar to live in homes that are near the ocean or a lake, that have an incredible view of the mountains or other scenery. Even in the heart of an urban city, the most coveted workspaces are always the corner office with a view – the need to connect with nature is in our DNA.

In the context of office spaces, studies have shown that biophilic design can improve cognitive performance, reduce stress, and increase perceived productivity. biophilic design seeks to integrate nature-inspired elements, such as natural light, indoor plants, flowing water, and earthy materials, into the architectural and interior design. It’s not quite as simple as adding a fake tree to the corner of your office space – it’s about finding ways to make you feel more connected to or in balance with nature while you’re there. 

Natural Light

Lighting is a cornerstone of biophilic design. Natural light is not only energy-efficient but also has numerous benefits for employee well-being. It regulates the circadian rhythm, boosts mood, and enhances productivity. When incorporating natural light into office spaces, consider large windows that allow ample daylight to flood the interiors. Take advantage of your view – simply making sure any plants or trees outside your windows can be seen from inside will enhance the design of your office space with minimal effort.

When altering windows isn’t an option, consider choosing window treatments that allow natural light to enter where possible. Use mirrors or reflective surfaces in strategic places to help reflect natural light throughout the space. 

Artificial Light

Complement your natural light with adjustable artificial lighting that mimics the changing qualities of natural light throughout the day. Choose light fixtures made from natural materials and have organic shapes. Consider making the swap to LED. LED bulbs are energy efficient, and they come in a wide range of colors that mimic natural light. Smart LED bulbs can be programmed to change throughout the day to help create a more natural feeling in the office than you can achieve with fluorescent tubes.

Indoor Greenery

Plants have a remarkable ability to purify the air and infuse spaces with a sense of vitality. Including greenery in the office doesn’t just serve an aesthetic purpose; it also promotes cleaner air, reduces stress, and improves concentration. Vertical gardens, potted plants, and hanging planters can transform sterile office corners into lush oases, contributing to a more relaxed and creative atmosphere. Not all plants are created equal – be sure to choose varieties that will flourish in their location in the office, taking into account the natural light and care requirements.

While natural plants are always best, they can be difficult to keep in some office spaces due to light or care requirements. In these situations, high-quality artificial plants can help to fill out the space. Try mixing them in with live plants to get the same look with less maintenance.

Organic Materials

The materials used in office interiors play a vital role in biophilic design. Wood, stone, and other natural textures evoke a tactile connection to the environment. Incorporating these materials into furniture, flooring, and decor elements can instill a sense of warmth and grounding. Such an environment fosters a feeling of comfort and tranquility, helping employees feel more connected to their workspace.

Look for practical ways to upgrade what you have – opt for wood furniture rather than wood veneers, ceramic over plastic pots for plants, stone tile over vinyl, natural fabrics over synthetics, etc.

Water Features

The soothing sound of flowing water has a mesmerizing effect that can elevate the office experience. Incorporating water features, such as indoor fountains or reflecting pools, can contribute to a sense of calmness and serenity. The gentle sounds of water can also mask unwanted noises, creating a more peaceful working environment.

Not all fountains are created equal – keep the overall soundscape of your office in mind. A noisy fountain in a small space will cause sensory overload for employees rather than boost moods.

Soundscape

In the realm of biophilic design, sound is a vital piece of nature-infused workspaces. The soft murmur of indoor fountains and cascading water walls can soothe and enhance focus, while subtle nature soundtracks can help foster creativity. It’s all about striking a balance, blending work-related noises with nature-inspired sounds, and creating an environment where tranquility and functionality can coexist seamlessly.

Thoughtful acoustic design will refine the soundscape by managing noise levels. Use sound-absorbent materials throughout the office to minimize echoes and avoid sound overlap that can drown out important conversations or interrupt a creative process. One of the most common complaints of workers in an office environment is noise levels – so fine-tune your soundscape carefully to achieve a good balance for each section of your workspace.

Creating Balance

Biophilic design emphasizes nature, but it’s crucial to remember that the main focus isn’t just to bring the outside in – it’s to create balance. You can’t just fill an office with plants and call it a day – the key is to strike a balance between natural and technological elements. Remember to pay attention to the less visible environmental elements as well – look into integrating technology for air quality monitoring and humidity control to ensure that the indoor environment remains comfortable and healthy. 

Biophilic design represents a paradigm shift in how we perceive office spaces. By merging the principles of nature with innovative lighting solutions, interior design, and sustainable materials, we can craft work environments that prioritize human well-being and productivity. As we embrace the concept of biophilia, we move closer to a future where offices aren’t just places of work but also sanctuaries of inspiration and vitality. So, let nature’s light shine through your office windows, and watch your workspace transform into a biophilic marvel.

Remember, at Lit Living, we’re passionate about creating lighting solutions that align with the principles of biophilic design. Step into our showroom to discover a world where technology and nature coexist in perfect harmony, illuminating the path to a greener, more inviting office space.

Filed Under: 2024, Styles & Trends

20 Stylish Ways to Incorporate Oversized Pendant Lighting in Your Home

20 Stylish Ways to Incorporate Oversized Pendant Lighting in Your Home

by admin · Aug 30, 2024

In this post, we invite you to explore 20 eye-catching rooms, each featuring unique, oversized pendant lighting. Whether you’re seeking inspiration for a home makeover or simply appreciate beautiful interior design, this photo collection will ignite your creativity and leave you ready to illuminate your own living spaces with incredible statement lighting.

But first, what exactly is a pendant light? 

Pendant lights are fixtures hung from the ceiling that generally feature one light bulb (unlike a chandelier which features multiple bulbs). Pendant lights have been most commonly used in kitchens, but the recent increase in available styles means these lights are making their way to every room of the home – and we’re here for it! 

Oversized pendants can make a bold statement in a small space, or help to create balance in a large space. While the definition of “oversized” varies, it’s generally used to describe pendants measuring 16” or more wide. Oversized pendants are popular for good reason – fit into any design style, and create a gorgeous focal point in a space. 

Without further ado, let’s tour 20 beautiful spaces featuring oversized, statement pendant lighting. We hope you find some inspiration for your own spaces!

Make a bold statement in your kitchen with an industrial-inspired oversized metal pendant light like the one hanging above this beautiful kitchen island. This fixture combines a utilitarian look with an urban style that blends in seamlessly with many types of home decor.


Take inspiration from this ultra-modern, monochromatic kitchen by grouping three ultra-oversized pendant lights above your kitchen island. These glossy black pendants seamlessly blend into modern decor and provide a striking focal point that highlights the high ceilings. 

Set the mood in your kitchen or dining space with a pair of oversized pendants featuring a double-layer cage design and brushed brass hardware. These striking fixtures would take center stage in any space you hang them, especially if you put them on a dimmer. 

Illuminate your kitchen with elegant, minimalist oversized dome lights. The golden interior of these fixtures warms up any space, which is exactly what this white and gray kitchen needed. 

The clean, simple lines of these large cone-shaped pendants create a dramatic focal point for this open floor plan kitchen and dining area. Choosing a light fixture finish (such as the matte black seen in this photo) that matches your kitchen hardware creates a cohesive look that harmonizes the space.

Dramatic rooms demand dramatic lighting! This expansive living room, filled with art and an ample amount of natural light, just wouldn’t pack the same punch without the oversized, textural pendant light hanging from the high ceiling. 

Pendant lights are a great way to define different spaces in your home. This geometric wire pendant fixture adds an instant focal point and visual appeal to an otherwise understated living room. 

Create a seamless blend of nature and comfort in your casual living area with a nature-inspired, bamboo pendant. The collection of organic elements, such as the plants, wood accents, and relaxed lighting creates a soothing and inviting atmosphere.

A woven, black rattan pendant adds a relaxed vibe to this bohemian living room and creates a focal point that works wonderfully with the other decor pieces in the room. Even a seemingly simple piece can really pack a visual punch.

Hanging oversized pendant lights helps to fill the vertical space in this relaxed, modern living room. The scale of these fixtures command attention and make the room feel more complete and well-proportioned. If you’re lucky enough to have high ceilings in your home, consider hanging pendant lights to create a great sense of balance. 

This duo-tone contemporary dining room is brought together with a simple yet striking black metal pendant light. The unique lines of the table and chairs play well with a low-hanging light. This mix of black finishes and wood is a classic design trick that gives rustic warmth to a space with a modern edge.

When a room has a lot going on – like this dining room that features a floor-to-ceiling bookcase, glass door, and colorful chairs – utilizing a simple light fixture is often the way to go. The oversized and understated white shade on this pendant is the perfect fit to tie everything together. Sometimes your lighting needs to take a back seat to your decor and that’s perfectly fine.

Make a bold design statement in your entryway with a large sculptural pendant light, showcasing an eye-catching silhouette that leaves a lasting impression on everyone who sees it! While this oversized pendant might feel overpowering in some spaces, it looks perfectly suited for this vaulted stairwell. 

Add a touch of bold style to any room with a large pendant featuring a geometric shape. A fixture of this type works especially well in an industrial, modern space with clean lines and where decor is at a minimum. Although, when  the fixture itself becomes an artistic decor piece, it’ll fit into any art lover’s decor.

It’s all about the curves in this chic and elegant bedroom. The pastel-colored dome pendant breaks the mold with an unexpected punch of color, and its shape mimics the arches of the headboard. 

This large, textured pendant pairs well with a bold wallpaper in this primary bedroom. Including unexpected materials and patterns in your bedroom can help to draw visual interest and elevate the space.

This free-spirited, earthy bedroom brings a touch of nature indoors with organic-inspired, oversized rattan pendant lights to infuse the space with a warm and inviting ambiance.

Don’t be afraid to mix several styles and materials of light fixtures in one space – such as seen here in this farmhouse-style bathroom. The woven, oversized rattan sphere pendant contrasts beautifully with the more modern metal pendants suspended above the sinks and countertop.

Turn your primary bathroom into a spa-like retreat with the sleek and modern design of this oversized yet understated pendant light, adding a touch of refined glamor and creating a tranquil, spa-like oasis. 

Transform your children’s toy room into an adorable wonderland with this grouping of pendant lights, featuring a fun domed shape and pastel colors that inspire imagination and play. Children’s bedrooms and play spaces are a wonderful place to feature fun lighting pieces!

As we wrap up our exploration of these beautiful spaces featuring oversized pendant lighting, it’s clear that these fixtures have the power to showcase your personal style and create a focal point for your spaces. From kitchens and living rooms to dining areas and even bedrooms, oversized pendant lighting can be the perfect finishing touch that ties the room together. So, don’t be afraid to think big and incorporate this stunning lighting option into your next design project.

For expert advice on how you can incorporate unique and eye-catching pendant lighting throughout your own home, give Lit Living a call today!

Filed Under: 2024, Styles & Trends

Elevate Your Home: Embracing the Latest Interior Design Trends

Elevate Your Home: Embracing the Latest Interior Design Trends

by admin · Aug 23, 2024

In the fast-evolving world of interior design, staying up-to-date with the latest trends can feel like a full-time job. It can be hard to tell which trends are here to stay, and which ones will be gone by next month.  Here are seven long-lasting trends that have been making waves in the world of home interiors.

1. Sustainable Design: A Green Revolution

Sustainability isn’t just a buzzword anymore – it’s become a way of life. Homeowners are basing their designs on sustainability for a number of reasons, ranging from a sense of responsibility to future generations to wanting a lower energy bill each month. Sustainable design doesn’t have to be an eyesore, the goal is to create a home that’s both eco-conscious and elegant. 

Sustainable design involves choosing materials and products that have a reduced impact on the environment. It’s about choosing quality over quantity, glass over plastic, repair over replace,  and homemade or home grown over convenience. These shifts in purchasing decisions also help to promote ethical production practices and encourage the production of energy-efficient technologies.

It’s easy to get lost in a spiral of internet research, trying to determine which products are best (and worst) for the environment. We always encourage learning, but it’s also important to remember that you don’t have to know it all before you can act. The easiest way to start thinking more sustainably is to find ways to reuse and repurpose. Opt for reclaimed wood for your furniture (or refinish a thrifted piece), choose items made from renewable materials, and repurpose rather than throw out your home decor items when you’re ready for a change. 

Beyond the environmental benefits, sustainable design is also about creating a healthier environment for you and your family. It reduces exposure to harmful chemicals found in many traditional building materials. Choosing energy-efficient building materials makes it easier and less expensive to keep your home comfortable year-round. Additionally, indoor plants, a popular element of sustainable decor, improve air quality and add a touch of nature to your interior.

One of the easiest ways to make your home more sustainable is to invest in energy-efficient appliances and light fixtures. Appliances and fixtures that use less power are better for both the environment and your power bill each month. Replace old light bulbs with LEDs, and look for the Energy Star logo when buying new fixtures.

2. Embracing Maximalism: Where More is More

In a departure from the ubiquitous minimalist trend, its opposite, maximalism, has taken the interior design world by storm. Maximalism is all about embracing the bold, the vibrant, and the extravagant. Think rich colors, intricate patterns, and an abundance of decor elements. In a maximalist space, every inch is an opportunity to showcase your unique style and personality.

Gone are the days of strict simplicity; maximalism encourages you to fill your space with the things you love, creating a sensory feast for the eyes. Layering textures, mixing patterns, and displaying collections are key elements of this trend. It’s about celebrating your passions and curiosities, resulting in a home that feels rich, warm, and incredibly inviting.

Incorporating maximalism into your home allows you to tell a story through your decor. It’s an opportunity to showcase your travels, your interests, and your love for art and culture. Don’t shy away from combining bold colors, ornate furniture, and eclectic accessories. Embrace the challenge of balancing diverse elements to create a cohesive, visually stunning environment.

3. Biophilic Design: Bringing Nature Indoors

We live in an age defined by urban living and digital connectivity, but this is relatively new in the history of humanity. For thousands of years, we relied on living in harmony with our environment to survive. In a sea of high rises and work-from-home offices, we’ve lost our connection to the thing that our species has relied on for millennia. In fact, our innate craving for a connection with nature has only intensified, which is the driving force behind a significant rise in biophilic design.

Biophilic design isn’t just adding plants to make a room “look outdoorsy”. It’s about creating a space that promotes wellness and tranquility by giving all of your senses a reminder of the outside world. Imagine the gentle rustle of leaves, the soothing sound of flowing water, or the warmth of sunlight on your skin  – these elements create a sensory experience that resonates with our primal instincts, reducing stress and increasing overall happiness. 

To add a touch of biophilic design to your home, consider incorporating natural materials into your decor, like wood, stone, ceramics, and natural fibers such as cotton, jute, wool, or silk. You can introduce the sounds of the outside with an indoor fountain gently trickling water or a well-placed speaker playing subtle, soothing nature sounds. You can add natural scents to your home with fragrant plants such as lavender or jasmine, or a scented candle.

One of the key principles of biophilic design is maximizing natural light. Sunlight brightens up your space and provides essential vitamin D, which is crucial for mental and physical health. If your home is short on windows, using strategically placed mirrors can help to reflect natural light deeper into your home.For the darker evenings and mornings, invest in quality LED bulbs that can mimic natural daylight, which will give your home lighting a more comfortable and natural glow. Avoid using cool-toned light bulbs in the rooms that you use in the evenings, as the can disrupt your circadian rhythm. 

For those with a green thumb, adding indoor plants to your home is an easy way to bring the outdoors in. Creating living walls, vertical gardens, or a small indoor herb garden can bring the vibrancy of nature to your home. A vining plant like pothos (seen on the right in the image below) is easy to care for and can grow up to 10 feet long indoors – these vines can be carefully attached along a wall or ledge to carry more greenery throughout the space without having to add more plants. These living elements can help to purify the air and give your home a refreshing energy, creating a sanctuary that rejuvenates both the body and the soul.

Pro Tip: If you struggle with keeping houseplants alive, give a snake plant a try before you call it quits on all things green. Snake plants (seen on the left in the image above) actually thrive when neglected! They are perfectly content away from windows and prefer to go for long periods between watering, which makes them a great choice for beginners or busy homes and offices.  

4. Smart Homes: Where Technology Meets Design 

In today’s fast-paced world, smart technology seamlessly intertwines with interior design, offering unparalleled convenience, security, and energy efficiency – without having to sacrifice on style. Imagine a home where your lights adjust to your mood, your thermostat learns your preferences, and your security system keeps you safe – all with a simple touch or voice command. Smart homes not only make daily tasks effortless but also enhance the overall ambiance of your living space.

Smart home accessories all aim to make your life easier or better in some way. Smart thermostats can learn your routines and optimize your heating a cooling to keep you cozy and save on your energy bills. Smart security systems make keeping an eye on things when you’re not at home easier than ever. Smart plugs and garage door openers are eliminating the need to turn around mid-commute “just to check” – you can turn off the curling iron or close the garage door from your phone.

We may be biased, but we think one of the best smart home technologies center around your lighting. Smart lighting systems can mimic natural daylight, promoting a healthy sleep-wake cycle, and can be dimmed or intensified according to your activities and preferences. Smart home theaters adjust the lighting and sound based on the movie you’re watching. Smart hubs can turn your lights on and off while you’re on vacation, helping to prevent theft by giving the appearance that someone is always home. Smart lights can be anything from an inexpensive color-changing rope light in a teenager’s room that they can change to fit their mood, to a professionally installed full-home solution, and anything in between. 

This trend isn’t going away – as technology continues to advance, the possibilities of smart homes are limitless. If you’d like to learn more about how to use smart lights in your home, stop by our showroom –  our lighting experts will be happy to show you the latest technologies available!

5. Mixing Materials: Creating Visual Harmony

The art of mixing materials has become a cornerstone of creating visually appealing and dynamic living spaces. Gone are the days of sticking to one (either yawn-inducing or visually overwhelming) material throughout a room.. Today’s designers and homeowners are blending different textures and materials to craft environments rich in depth and visual interest.

Consider the elegant contrast of a smooth marble countertop against rustic reclaimed wood cabinets in a kitchen, or soft, plush fabrics on a sofa juxtaposed with the sleekness of a metal coffee table in a living room. These combinations add tactile diversity and create a harmonious balance that captures the eye and invites touch.

The key lies in finding a cohesive theme or color palette that ties these diverse elements together, ensuring that the room feels curated rather than chaotic. Experiment with matte and glossy finishes, or intricate patterns with solid colors. Picture the warmth of a woven jute rug against the coolness of a glass-top dining table, or industrial metal pendant lights paired with the earthiness of terracotta planters. Don’t be afraid to experiment with combinations. Mix wood and metal, stone and fabric, or even leather and glass.Mix and match metallic colors throughout a space, or find fixtures that feature more than one tone, like a matte black sconce with copper accents. 

When done right, mixing materials can transform your home into a space that tells a story, evokes emotions, and captivates the senses, leaving a lasting impression on anyone who enters.

6. Bold Colors: Making a Striking Statement in Your Home

While neutral tones have long been the safe choice in interior design, the return of bold colors is ushering in a new era of creativity and self-expression… and we are here for it! Vibrant hues, from jewel-toned emeralds and deep sapphires, to earthy oranges and deep reds, to moody blacks and rich browns, are taking center stage. Gone are the white on greige on white interiors, bold colors are transforming rooms into bold and captivating spaces that are full of life.

Bold colors add instant personality to a room, reflecting your individuality and creating a unique atmosphere that is as dynamic and vibrant as you are. When choosing bold colors, consider the psychology of hues. Rich blues and greens evoke tranquility and depth, making them ideal for spaces where relaxation is key, such as bedrooms or reading nooks. Yellows and oranges radiate warmth and energy, making them excellent choices for social areas like dining rooms or kitchens, encouraging lively conversations and culinary adventures.

You can experiment with adding bold colors in many different ways. Picture a scarlet couch anchoring a neutral-toned living room, an emerald accent wall highlighting a contemporary art collection, or a cozy hallway with the walls and ceiling painted a soothing shade of sage green. These daring choices add plenty of visual interest by establishing a focal point, drawing the eye, and setting the tone for the entire room.

For those who are not ready to fully commit to vibrant wall colors, incorporating bold hues through furnishings, artworks, or textiles provides a perfect compromise. Think about incorporating colorful throw pillows, rugs, or curtains. These elements can be easily swapped or updated, allowing you to experiment with different shades and combinations over time.

7. Vintage and Artisanal Pieces: Adding Timeless Charm and Personalized Elegance

In a world dominated by mass production, there’s a growing appreciation for the craftsmanship and uniqueness found in vintage and artisanal pieces, making them a breath of fresh air in interior design. Incorporating these items into your decor not only adds a touch of historical significance but also infuses your space with a sense of character and individuality that can’t be replicated by modern, off-the-shelf furniture.

Vintage pieces, whether it’s a weathered farmhouse table or a carefully restored mid-century armchair, tell stories of the past (and they make great conversation starters). They carry the marks of time, adding depth and nostalgia to your home. Scouring antique shops or flea markets for these treasures can be a fun experience, allowing you to discover items that resonate with your taste and history. 

Handmade ceramics, woven textiles, or intricately carved wooden furniture are not just objects; they are works of art. In contrast to mass-produced items, artisanal pieces are meticulously crafted by skilled hands, showcasing a level of craftsmanship that is unparalleled. Supporting artisans not only sustains traditional crafts but also brings a sense of authenticity to your home. Each handmade piece carries the unique touch of its creator, adding a soulful quality to your space.

One of the greatest advantages of incorporating vintage and artisanal pieces is the opportunity for personalization. Your home becomes a canvas where you can mix and match eras, styles, and textures, creating a space that reflects your eclectic tastes and passions. Picture a modern living room adorned with vintage posters or a sleek, minimalist kitchen accentuated by handmade, colorful tiles. These combinations add layers to your decor, making it uniquely yours.

When decorating with vintage and artisanal pieces, the sustainability aspect cannot be overlooked. Repurposing existing pieces reduces the demand for new production, minimizing your ecological footprint. And, in a world inundated with mass-produced items, integrating artisanal pieces into your decor is a celebration of the exceptional, the unique, and the enduring. It’s a testament to your appreciation for heritage, craftsmanship, and the human touch. 

Incorporating these trends into your home doesn’t mean undergoing a complete overhaul. Small changes, like adding a reclaimed piece of furniture, introducing a bold accent color, or switching to smart bulbs can make a transformative difference. We’ll never advocate for having a home ruled by trends  – they can be fickle and fleeting. The important thing to remember is that you need to feel like you in your home – so latch onto the trends that spark your soul and make your home a place where you’ll love to be. 

Need help lighting your home? A fully curated room is still incomplete without adequate lighting. Don’t get stuck scrolling for hours trying to find the perfect light, only to have it break during shipping or fall apart right after the return window. Stop by our showroom or give us a call, and let our lighting experts help you find quality fixtures and make the perfect plan for your home’s lighting needs.

Filed Under: 2024, Styles & Trends

How to Fix a Noisy Ceiling Fan

How to Fix a Noisy Ceiling Fan

by admin · Apr 12, 2024

Ceiling fans can change your life – or at the very least your outlook on life – with just a flip of the switch on a hot, stuffy, muggy day. There’s something magical about the way they can change the entire way a room feels, making it comfortable in seconds. 

But what happens when this miracle-worker of a ceiling fixture starts affecting the ambiance in ways it shouldn’t? A noisy, squeaky ceiling fan will make the room it’s in unbearable no matter the temperature. If your noisy ceiling fan is making you miserable, it might be easier to fix than you realize. With just a little investigation and willingness to tinker, you could be on your way to cooler days ahead. 

There are a number of reasons your fan may be making more noise than it should – we’ll go over some of the most common issues and what you can do to bring back the peace and quiet.

1. Problem: Dirt

Just like every other surface of your home, your ceiling fan collects dust over time. This is especially true if your fan sits idle over the winter months, but even a fan that’s on 24/7 will get dirty over time. 

Take a damp rag and wipe down your ceiling fan, starting from the top. Be sure to wipe all sides and edges of the blades. If dirt was the culprit, you’ll notice right away that your fan is quieter once you’re done. 

2. Problem: Damaged Blades

Over time, some fan blades may warp. This is especially true for fans that have blades made of cheap composite materials, fans in humid environments, and extra-wide fans. Look at each blade from the side – each blade should be tilted at the same angle and lay flat. If you find a blade that is bent or wavy, it could be throwing off the balance of your fan, causing it to wobble.

If you can, carefully bend the blade back into shape. If it’s not fixable, you may be able to order a replacement blade from the manufacturer. 

3. Problem: Loose Parts

When your ceiling fan is in use there are a lot of moving parts, but if a part that shouldn’t be moving has come loose, you’ll hear a rattling sound. Thoroughly check your fan for loose screws. Common pieces that come loose include the canopy (the piece against the ceiling), the light kit (some fans may not have lights), and the fan blades.

Using a screwdriver, carefully tighten each screw you can find. Be careful not to over-tighten any screws, as it could damage your fan. If your fan has parts that snap into place, like a light cover, make sure those parts are seated properly. 

If you’ve checked all of the above and your fan still seems to be rattling or unstable, you may need to remove the canopy and double-check that the mounting screws attaching your fan to the ceiling are secure.

4. Problem: Grinding in the Motor

If the simple fixes above don’t resolve your noisy fan woes, it’s possible that the motor in your fan is running without sufficient oil. Ceiling fan motors and bearings need lubricant to run smoothly – without it, you may notice a sound that’s more like a buzz than a rattle. Each ceiling fan has different requirements for the proper way to add oil to the motor. We recommend checking your manufacturer’s user manual for specific instructions. 

If you’re not comfortable with taking your fan apart to get to the motor, this task might be a good place to bring in a professional.

Turning on your ceiling fan on a hot day should be a dream come true, not your worst nightmare. The good news is – most noisy ceiling fans can be fixed with nothing more than a thorough cleaning and a checkup with a screwdriver. In less than an hour you can be back to enjoying a blissful breeze in the comfort of your home.

If your fan is still making noise after you’ve checked for dirt, loose parts, and damaged blades, and oiled the motor, it might be time for a new, quality ceiling fan that can keep you cool for years to come. 

Before you go out and buy the first fan you see – stop by our showroom and ask around. Our lighting experts can help you find what you’re looking for, and we guarantee that our fans won’t start squeaking at the first sign of a heatwave!

Filed Under: 2023, Ceiling Fans, Ceilings Lights

How to Safely Install a Ceiling Fan

How to Safely Install a Ceiling Fan

by admin · Mar 29, 2024

Installing a new ceiling fan is a cheap way to save on energy costs all year without compromising on comfort. In the summer, ceiling fans cool down the house by creating a breeze. In the winter, they help circulate the heated air to warm the whole room evenly. 

Putting in a ceiling fan is a win-win for your comfort levels and your budget – and it’s a pretty simple DIY project for homeowners. Plan on giving yourself a few hours (depending on the type of fan and your experience level with lighting DIYs), and grab a friend that can help you hold things in place while you work.

If you’re buying a ceiling fan new, it should come with thorough installation instructions. We always recommend following those instructions exactly to be sure that your fan is installed safely and properly. If you’re installing a secondhand fan, you may be able to find the installation guide online by searching with the model number on the fan. Either way, we’ll walk you through the basic steps here so that you can prepare. 

1. Preparation

Before you break out your tool belt, make sure you have a good plan in place. There’s nothing worse than being in the middle of a project and realizing you don’t have everything you need to complete the task.

Tool Checklist

Before you take on a ceiling fan installation project, make sure you have all the tools you need so you don’t have to rush off to your local hardware store for a last-minute purchase. To install a ceiling fan you’ll need to have a:

  • Voltage Tester
  • Ladder
  • Measuring Tape
  • Screwdriver
  • Ceiling Fan-Rated Junction Box
  • Fan Brace
  • Wire-Cutter/Stripper
  • Light Bulbs
  • Globes/Shades if they aren’t included
  • An extra-long downrod if you’re installing on a sloped ceiling
  • Ceiling Fan and Kit

Choosing the Right Fan Size

Measure the room you’re working in before you start. Not all fans are created equal, so pick one that will fit. Use the following guidelines to help. 

  • For rooms smaller than 75 square feet (like bathrooms), pick a fan with blade spans of less than 36 inches.
  • Blade spans between 36 and 42 inches are ideal for rooms up to 144 square feet. 
  • A 44-inch span is perfect for rooms up to 225 square feet, like a dining room.
  • For rooms that are 225 square feet or larger (a large living room, for example), you’ll need a fan with a 50 to 54-inch blade span.
  • The more space between the ceiling and the fan, the better! The ideal ceiling fan height is 8-9 feet above the ground. 
  • If your ceiling is less than 8 feet, you’ll most likely need to install a flush-mount fan (no downrod).
  • High pitched ceilings typically require you to buy an extra-long downrod (so that the blades won’t hit the sloped ceiling), so check your ceiling height and angle before choosing your downrod.

Pro Tip: Once your fan is installed, the tips of the blades should be at least 30 inches from the walls, and the bottom edges of the blades should be at least 7 feet above the floor. 

Other Important Tips

  • Ceiling fans are heavy! They need to be anchored properly to an electric ceiling box designed to hold the weight of the fan. Inspect the electrical box to ensure it’s fan-rated. There should be an inscription on the box to indicate this. If it’s not, you’ll also need to purchase a fan box before you get started.
  • Check to make sure the light switch you’re using is wired appropriately for the fan. If it isn’t, you may need to call a professional to get the job done.
  • Check the ceiling joists for any wiring or plumbing pipes that may be in the way.
  • If you’re adding a new fan where one didn’t exist, check local building codes to determine if you need a permit.
  • Always check your installation guide for any additional requirements that are specific to your fan. For some expert help choosing the perfect fan for your space, give us a visit or a call and we’d be happy to help.

2. Safety

Now that you’re ready to begin, head out to your circuit breaker and turn the power off for the room where you’ll be installing your fan. Also, make sure all of the wall switches in the room are safely in the “off” position. Do not rely on a wall switch alone to protect you from electrical shock! Always use a voltage tester to be sure the power is off before handling wires.

Pro Tip: Place some electrical tape over the switches you’ve turned off on the circuit breaker. This will prevent anyone from switching it back on while you’re working.

3. Remove Your Old Fixture

Let’s get started! First, you’ll need to take down the existing fixture. Most fixtures have easy-to-find attachment points, like screws or twist-off caps. Remove accessories like light bulbs, shades to get down to the base of your fixture, then unscrew the base from the ceiling.

If you’re removing an existing ceiling fan, remove the light bulbs and globes first. Then, take down the light kit (if needed – some fans have them, some don’t). Unscrew and remove the fan blades next. At this point, you may need to enlist a helper as the full weight of the fan base and motor can be heavy. Pull off the canopy (metal cover at the base of the fan). The last step is to remove the mounting bracket with a screwdriver!

Once you have the base of your fixture dropped away from the ceiling, unscrew the wire nuts connecting it to the electrical box. Be sure to test the wires with your voltage tester first!

4. Install a Fan Box

Before you start, check your existing electrical box. If it isn’t rated to support the weight of your fan, you’ll need to install a new one. To see if your existing box is rated to hold a fan, just take a look at the label! If you can’t find a label, err on the side of caution and get a new one. 

You’ll have to do a little bit of homework here to figure out what will work best for your project. Fan boxes are easiest to install if you have open access, like in the attic or an unfinished ceiling. If you won’t have easy access you may need to widen your drywall hole a little, but you can usually find a brace that will slip through the existing hole. 

Take a look at your rafters to determine the best way to install your fan box. Fan boxes can be attached directly to the rafter with a side bracket. If your new fan won’t be right next to a rafter, look for a brace that will span the space between two rafters. These braces can be a little trickier to install through a small hole in the ceiling, but they’ll give you a lot more breathing room when it comes to getting your fan box in the right place. 

5. Install the Mounting Bracket

To secure the mounting bracket to the fan box, start by threading the wires through the mounting bracket. If the fan has a slide-on bracket, leave the bolts on the junction box, slide the bracket over the mounting hardware, and tighten the screws. For fans without a slide-on bracket, place the bracket over the mounting bolts that poke through the bracket. Then, secure it using the provided nuts. If your fan is a flush mount, pull the wiring through the canopy (the part that covers the wiring/mount bracket) and skip to step 7.

6. Install the Downrod

To set the downrod, you’ll want to find a flat work surface. Slip the canopy onto the downrod and pull the primary wires through the hollow downrod. Then, connect the downrod to the fan base. With the downrod and base assembled, attach the other end of the downrod to the mounting bracket. 

7. Wire the Fan

Next, it’s time to wire! Hang the downrod – or canopy, if you’re installing a flush mount fan – on the hook on the mounting bracket. If there isn’t a good place to hang it, phone a friend to hold the fan up for you to free up your hands while you connect the wires. 

Before you start, check to make sure all your wiring (and the wire nuts) will fit in the ceiling. Use your wire cutters to trim down any wires that won’t. This will also keep them from vibrating against the canopy when the fan is on. Use wire strippers to expose the copper of the wires on the new ends. 

Connect the corresponding wires using the provided wire nuts. Your installation guide will have a diagram to follow, but, generally speaking, the fan’s green wire connects to the ground wire, the fan’s black motor wire connects to the black supply wire, and the fan’s white wire connects to the white (or neutral) supply wire. 

Double-check your work against the diagram, then gently push the wires into the junction box. Lift the fan into position, then clip it to the mounting bracket and secure the screws.

Pro Tip: Some fans come with additional wires for extra features, like having a separate switch for the light and fan. If your switches or wires don’t match the diagram, you might need to check in with an electrician or a lighting specialist at our showroom to help you get things set up correctly.

8. Blades and Bulbs

Now it’s time to install the fan blades. Every fan is a little bit different – but most fans will have an arm or bracket that you’ll need to attach to the blade and then to the base using a screwdriver. Some fans have quick-install blades that speed up the process using keyhole slots that slip over the fan’s mounting screws and lock into place with a little tug. 

Some fans have reversible blades – so make sure you’re checking each time that you have the correct side pointed down!

By now, you should be seeing the light at the end of the tunnel – so let’s install the bulbs! For fans with a light kit, refer to your guide to ensure everything goes in place correctly. Generally, you’ll just need to install the shades, globes, or light cover. If your fan did not come with bulbs, make sure the bulbs you install have the correct base type and wattage 

If your fan came with a remote, don’t forget to install the remote control holder!

9. Lights… Fan… Action!

Last, but not least, it’s time to test out your new ceiling fan! Go back to your circuit breaker and turn the power back on. Try switching your fan and lights on and off using the light switch or remote control. Test all of the speed settings to make sure your fan is secured properly and doesn’t wobble or rattle.

Most of the time, installing a ceiling fan is a pretty straightforward DIY project. Occasionally, an odd issue can crop up due to things like old wiring. If you run into any trouble, be sure to give us a call right away, or call an electrician that can help you troubleshoot the issue.

—

Congratulations DIY master! Now that you’ve successfully installed your new ceiling fan, get ready for a fresh breeze to blow your way–and some savings too. With all that extra cash blowing around, come visit us and we’ll help get you started on your next project. 

—————————-

DISCLAIMER: Be sure to follow all the manufacturer’s installation instructions and take all recommended safety precautions. Check before installing to see if you need a permit and be sure all building and electrical codes are observed. If you have any questions or are unsure about installing the fan yourself, contact a licensed electrician or Lit Living for more help.

Filed Under: 2023, Ceiling Fans, Ceiling Lights, How to, Informational, Wellness & Safety

Next Page »

Copyright © 2025