• Skip to primary navigation
  • Skip to main content

All Phase TC

  • Buying Guides
  • Styles & Trends
    • Bathroom Lights
    • Ceiling Fans
    • Ceiling Lights
    • Lamps
    • LED Lights
    • Outdoor Lights
    • Smart Lights
    • Wall Lights
  • Wellness & Safety
  • Shop Products

admin

5 Easy Steps to Create a Modern Minimalist Interior

5 Easy Steps to Create a Modern Minimalist Interior

by admin · Jan 5, 2024

With an intentional lack of furniture and decorations, minimalist design can sometimes come off as cold and uncomfortable. Over the past few years, as we’ve spent more time in our homes than ever before, the need for comfort in a home design has been made crystal clear.


Today’s modern minimalism prioritizes simplicity with a decluttered and uncomplicated aesthetic, while also emphasizing the need for comfort in a space. You’ll see more color and accessories than the minimalist interiors of the past had, but they’ll be thoughtfully chosen extras that provide warmth and life to the space without going overboard. 

Whether you’re interested in adopting a minimalist lifestyle or just love the simple yet dramatic design aesthetic, modern minimalism is an achievable aesthetic for just about anyone! 


To help you get started, we broke down the basics of modern minimalist interior design into a handful of easy steps you can use to confidently focus on the right essentials. 


1. Create an Open Floor Plan

Focus on creating as much connected open space as possible. Obviously, taking out walls is the easiest way to create an open floor plan. But if you’re not in a place where you can tear down walls, there are some simple and subtle tricks you can use to make adjoining spaces feel more connected. 


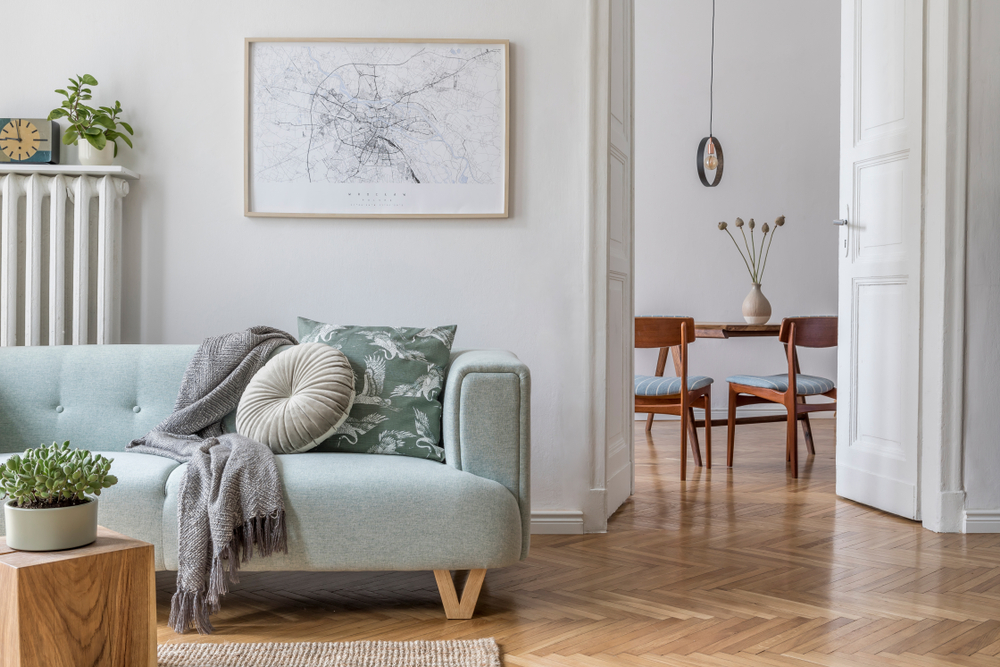
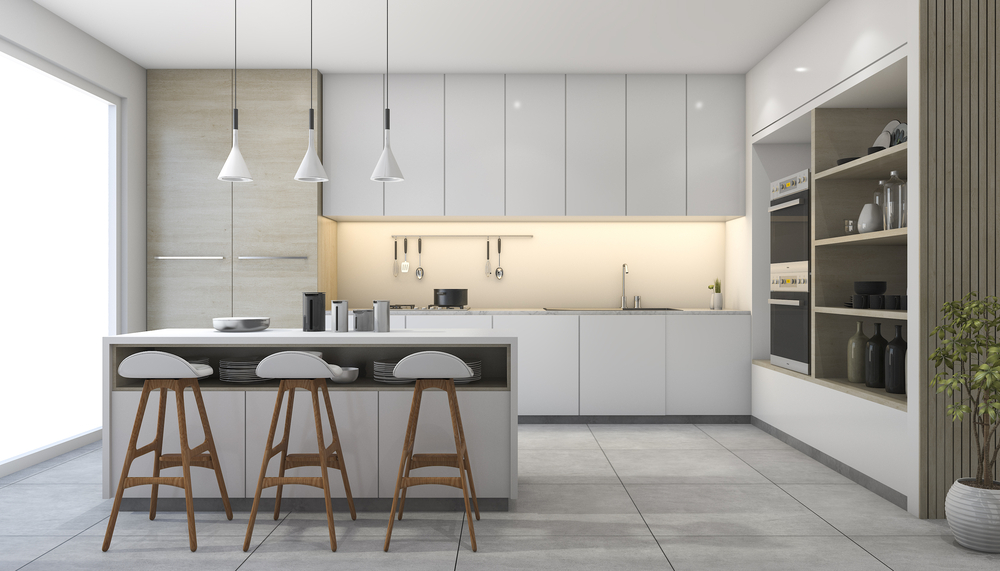
One way to connect spaces in your home is to use the same flooring and wall paint colors for the entire space. This will make rooms look like they belong together, even through a doorway. 

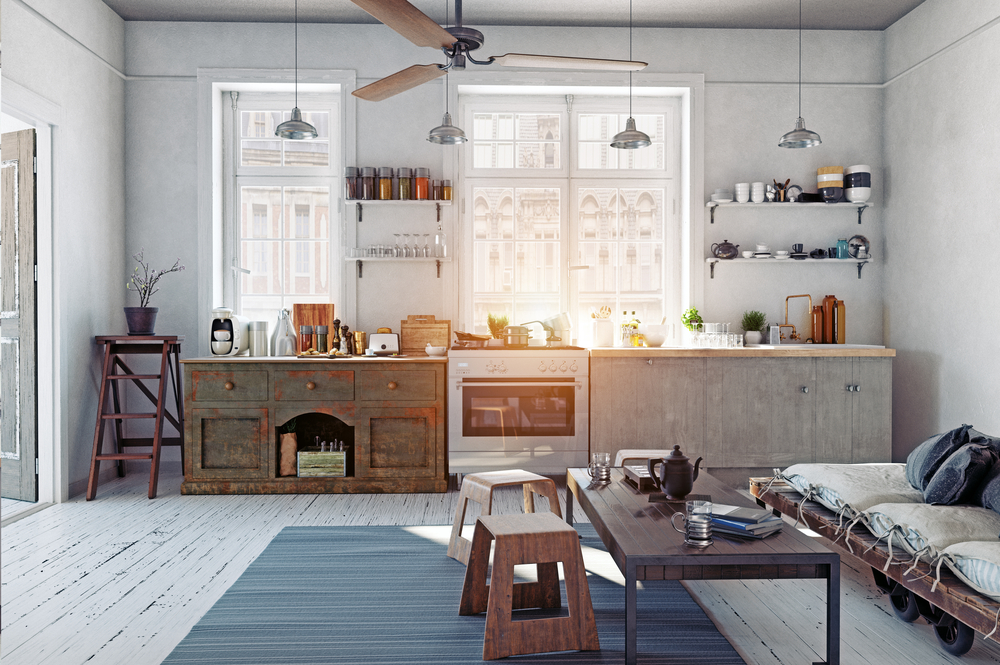
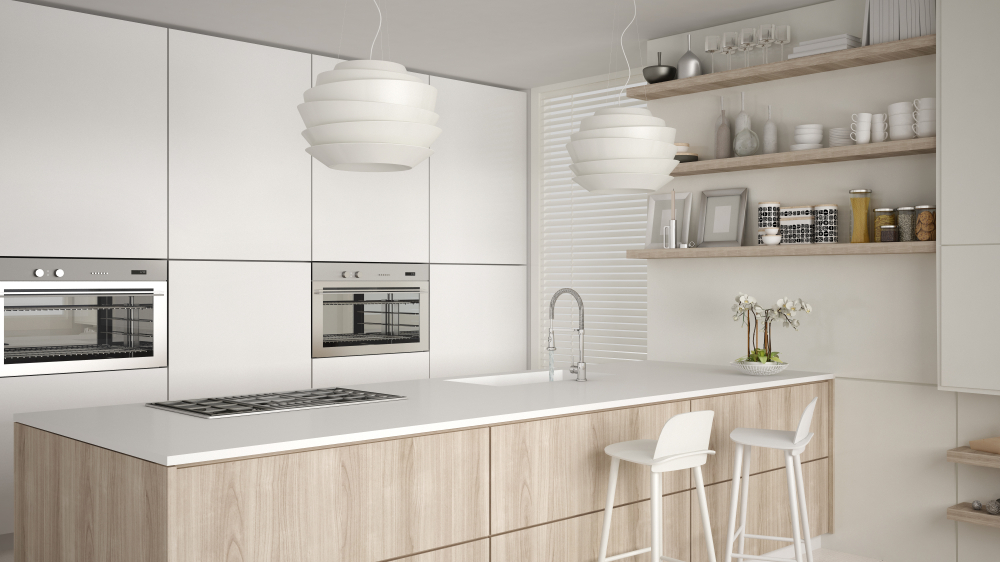
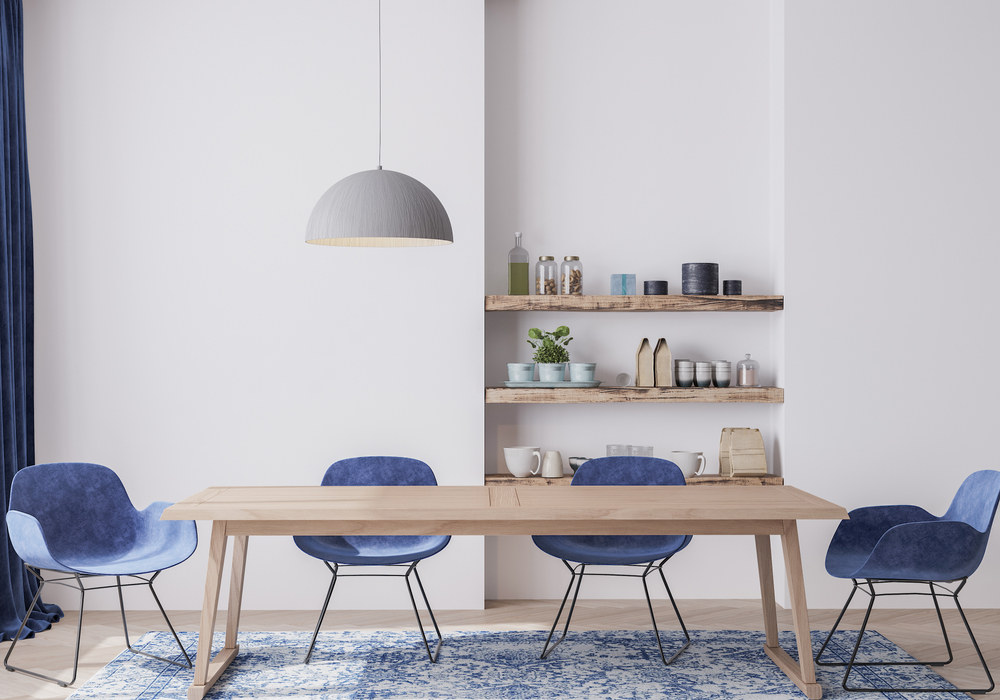
A unique accent, like this minimalist pendant light, grabs your attention through the doorway from across the way, which helps your brain perceive the two spaces as one.

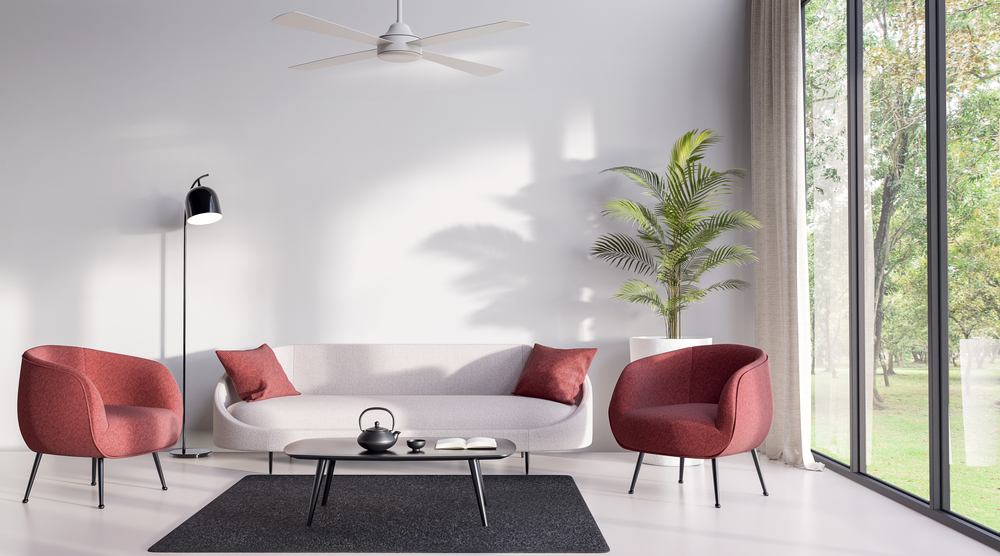
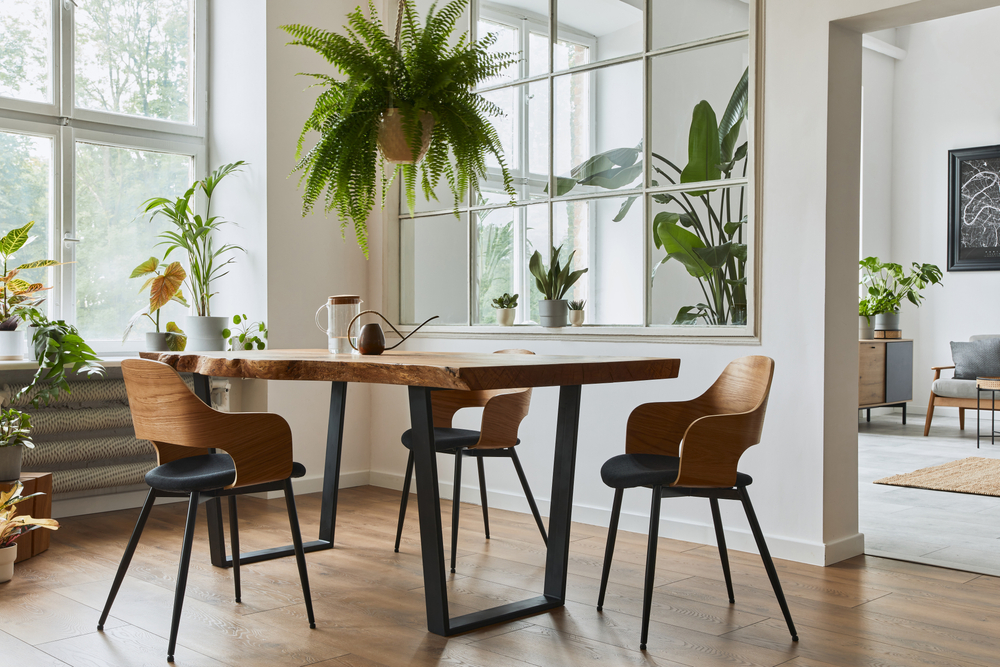
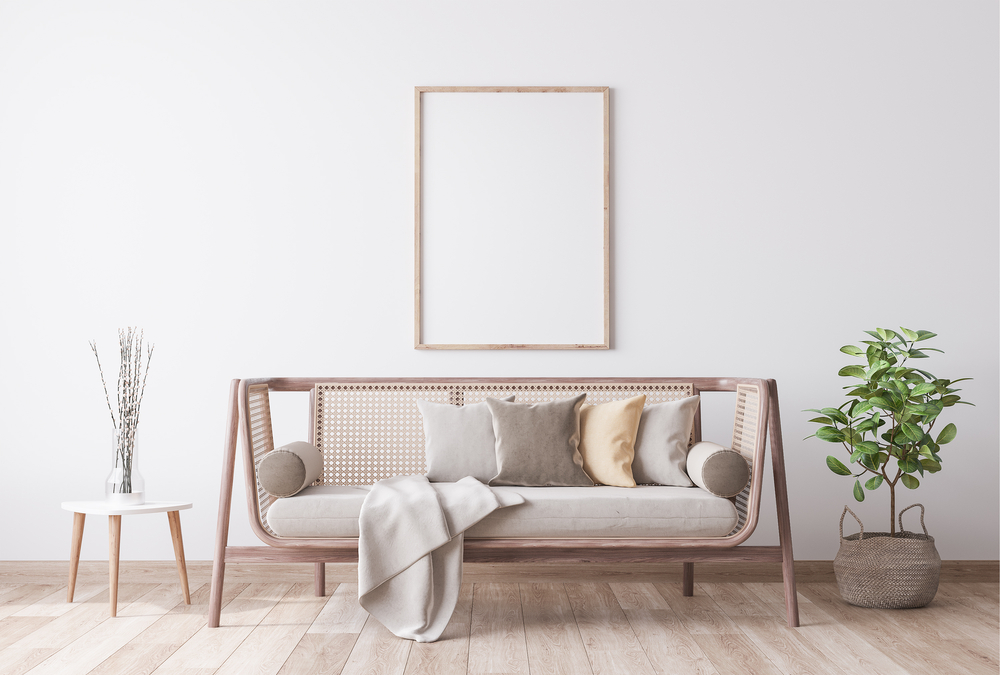
Finally, play around with your furniture placement to maximize your space. In smaller spaces, this often means keeping large furniture close to the walls to keep open pathways throughout but don’t underestimate the power of a simple, low-profile, floating sofa used to define a space.

2. Choose a Small Color Palette

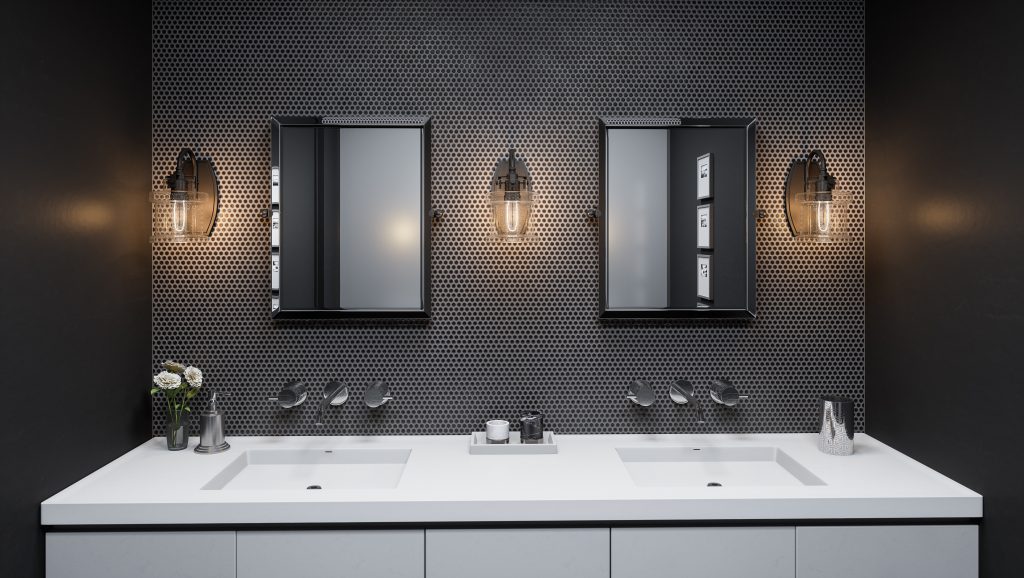
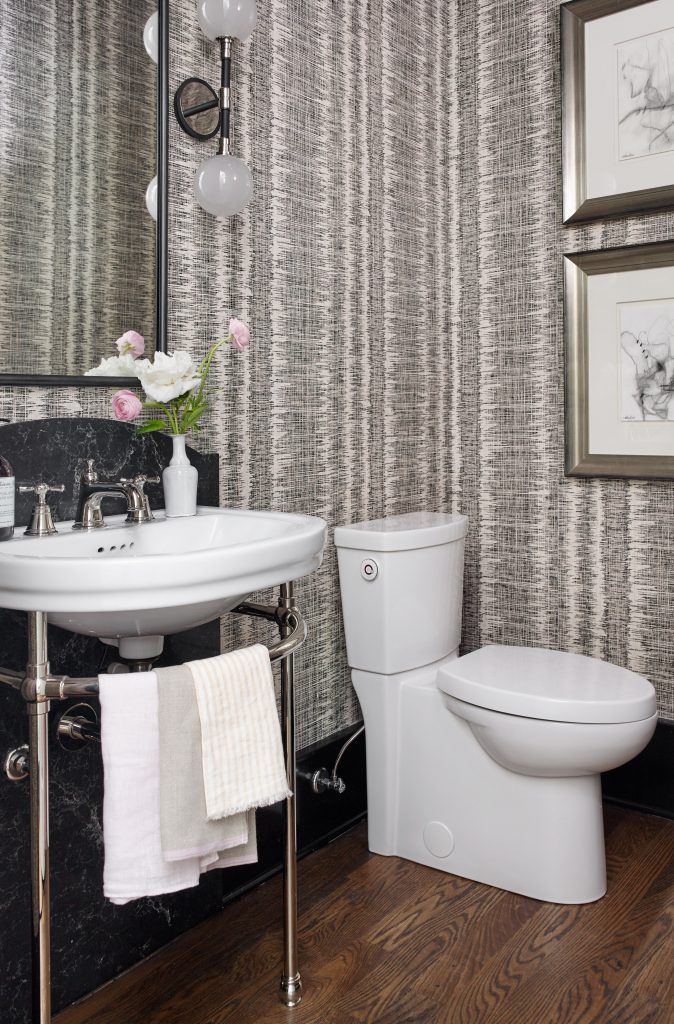
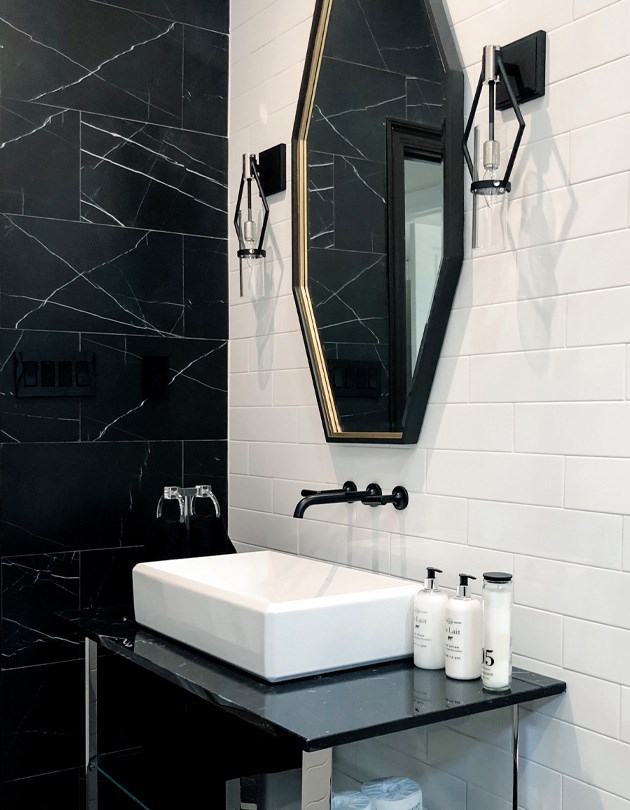
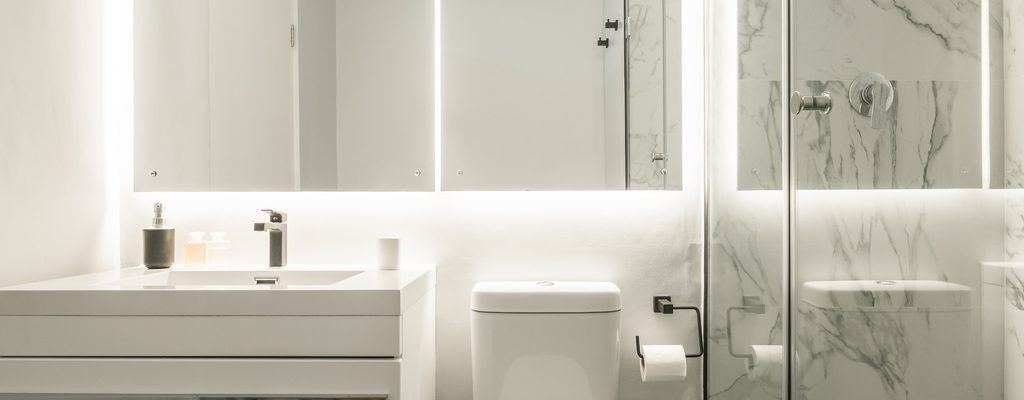
A classic hallmark of minimalist design is a neutral monochromatic color palette, typically in warm grey, white, or beige tones. Contrast is important – add dimension and balance with a mix of darker and lighter shades within your color palette.

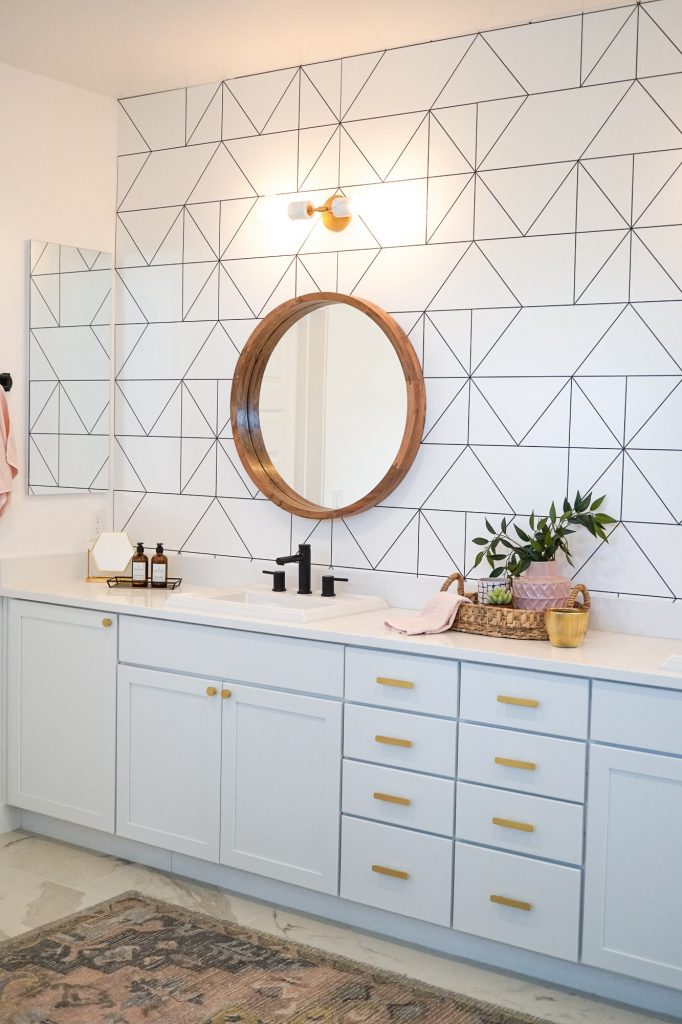
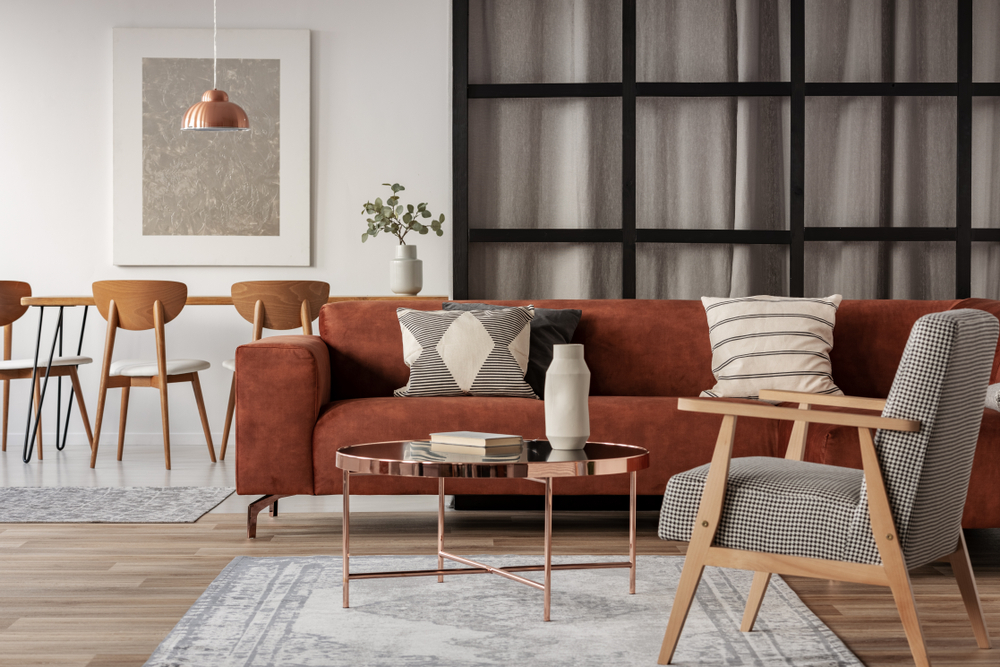
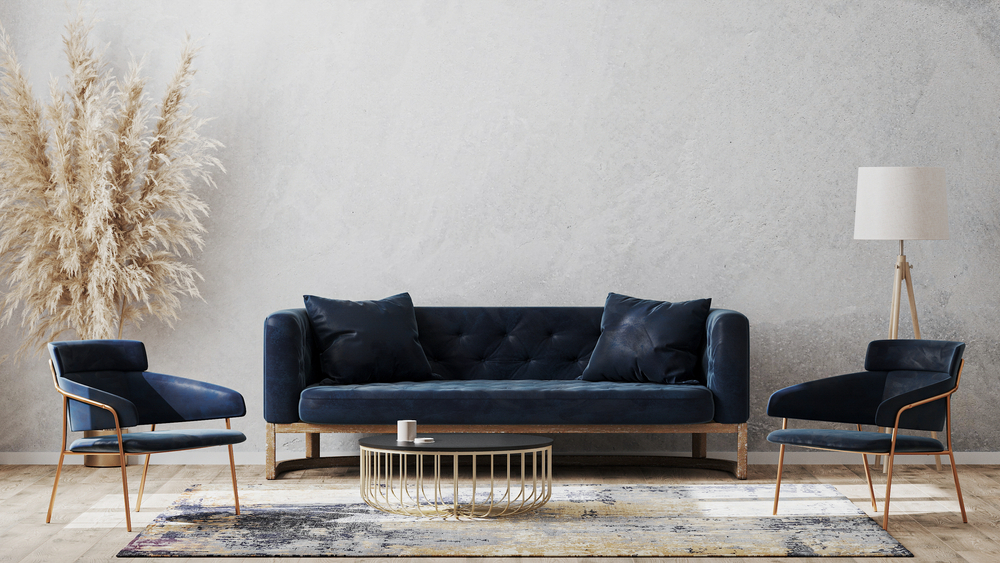
If an all-neutral color palette just isn’t your thing, you can still get a modern minimalist look with color – you just need to stick to a small palette. Keep most of the colors you use very light, to increase the feeling of airiness and reflect light best. 

3. Functional Design is Key

It doesn’t matter how pretty a room is, if it’s inconvenient or difficult to use you’re not going to be happy with it. When you’re trying to adopt modern minimalism, understanding how to pare down to only the essentials can be hard. When you’re going through your room, ask yourself:


 “Does this serve a purpose?”   “Do I already have something that serves this purpose?”   “Is there a multipurpose option that will serve this purpose and others?” 

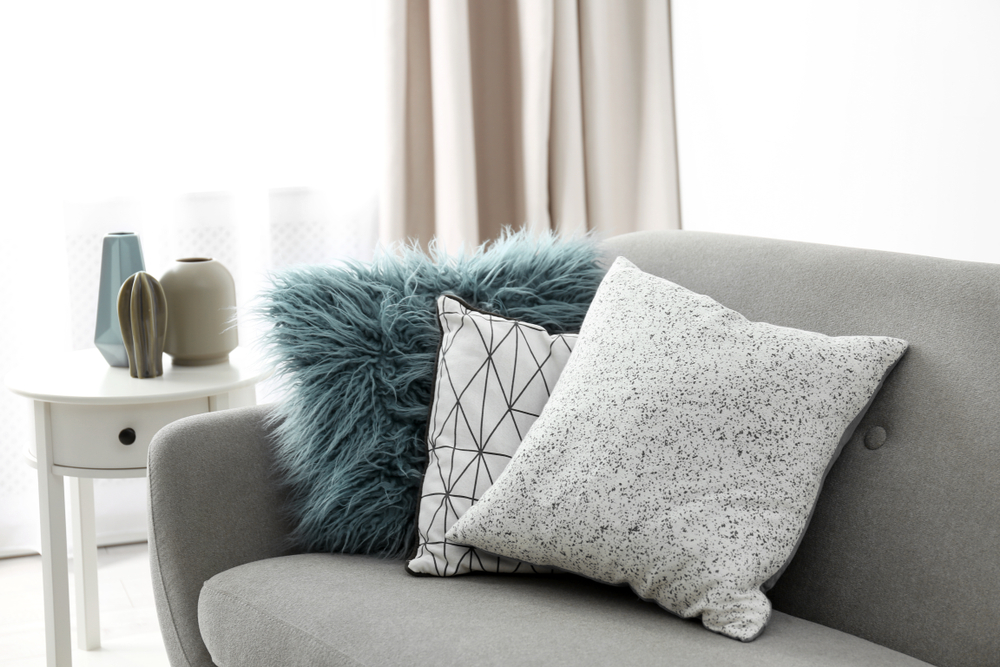
Just remember, there’s no hard and fast rule for what it means to be “functional” – and you don’t need to justify every item you love to keep it in your home. A funky decorative pillow that makes you smile when you see it is serving a purpose (and it’s making your couch more comfortable – so it’s multifunctional!) 

A huge part of functional design is organization. Decluttering for a modern minimalist space involves reducing “visual clutter” too! Things not actively being used should have a home where they can be tucked away until they’re needed. 


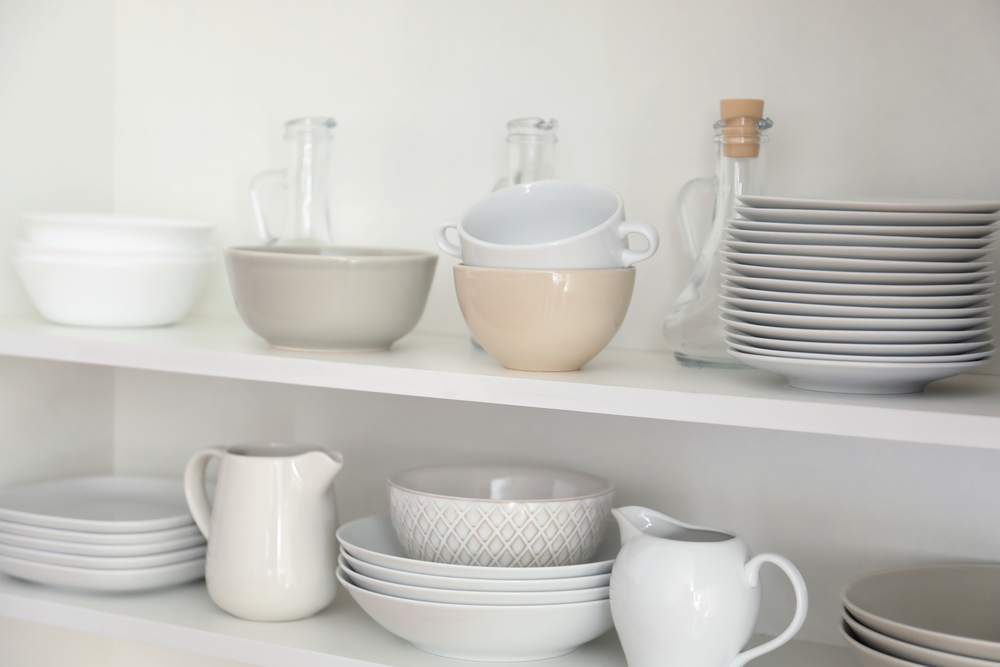
Opt for storage options that have doors that will hide the things you’re not using.  When styling open shelving, choose items that match your color palette, leave plenty of open space, and use boxes or baskets to organize and hide loose items.

Don’t be surprised if you get down to the basics and you aren’t in love with what you have left. You’ll likely need to start making smart trades here and there to end up with a set of basics that you love.

4. Add Light – Lots of It

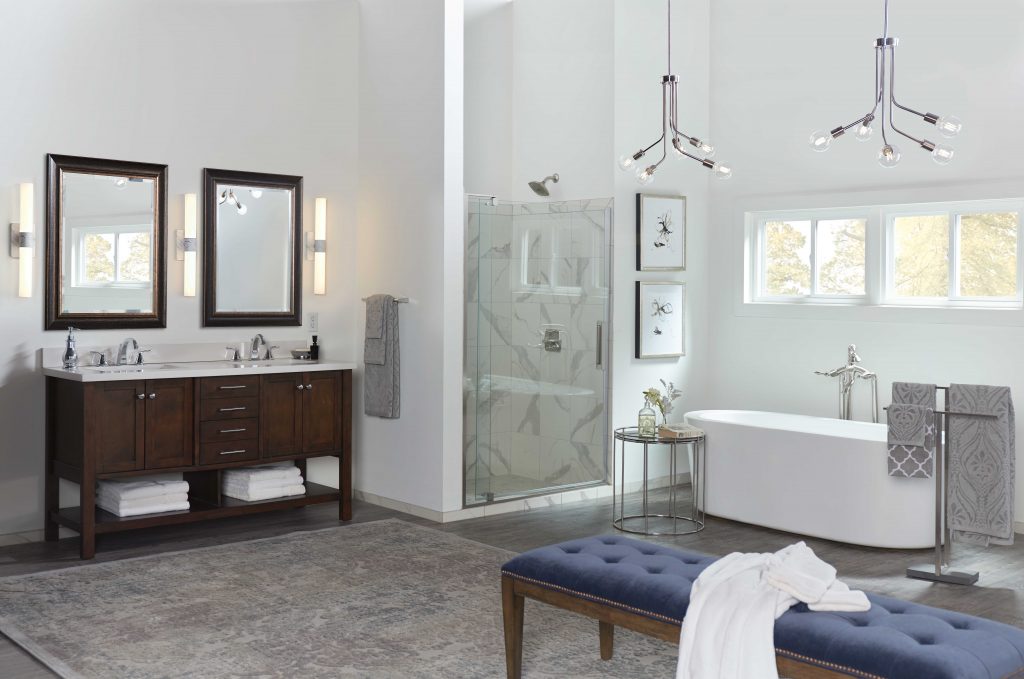
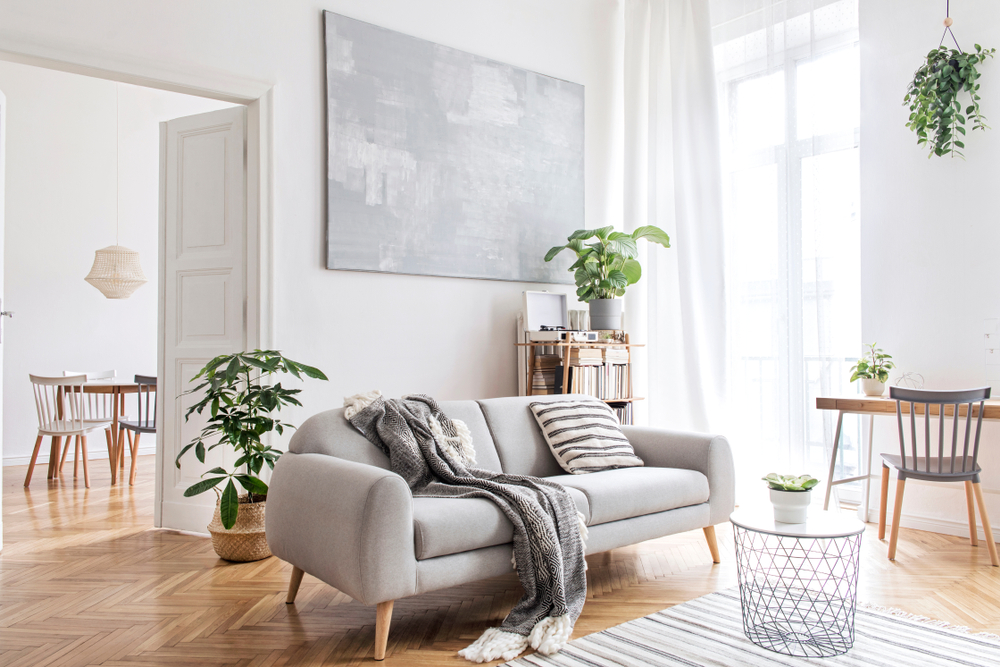
Like most modern design aesthetics, modern minimalism focuses on filling the space with light. Where possible, introduce as much natural light as you can. The light colors on your walls and floors will reflect it – making your room feel open and airy. 

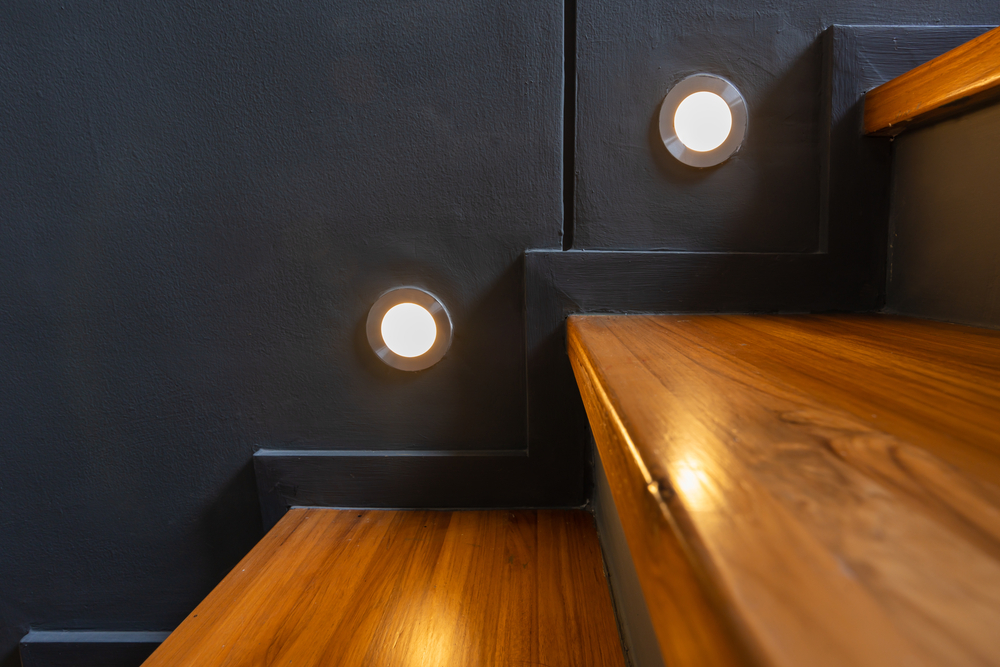
In addition to natural light, a modern minimalist space needs a well-thought-out interior lightscape. Make sure your general ambient light is bright without being harsh, and add extra lighting in dark corners and over workspaces. Hidden lights, like LED strips under a cabinet, are an expensive DIY trick with a big payoff! 

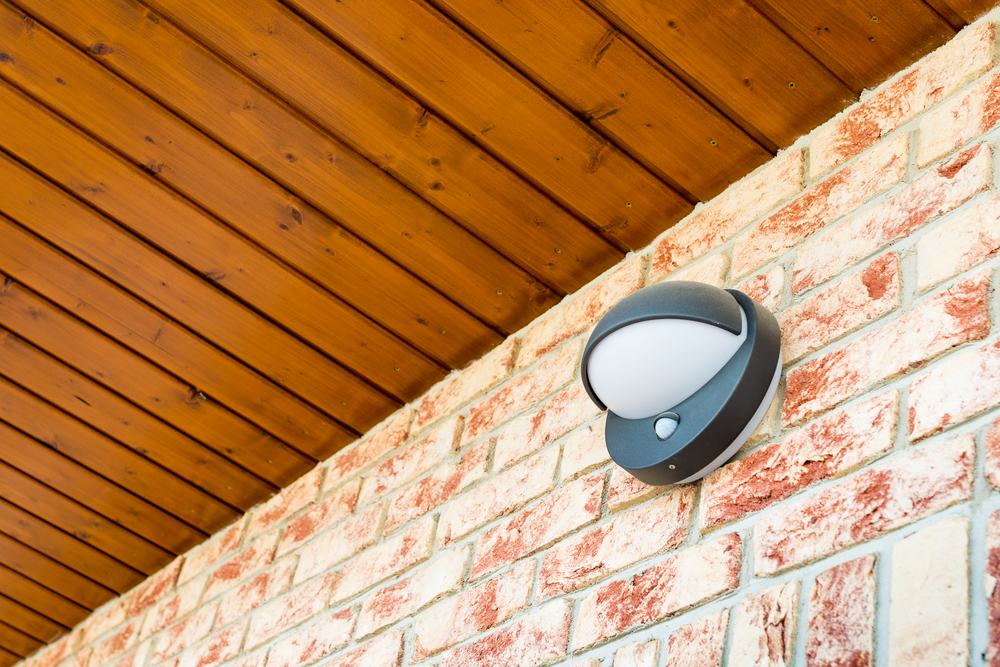
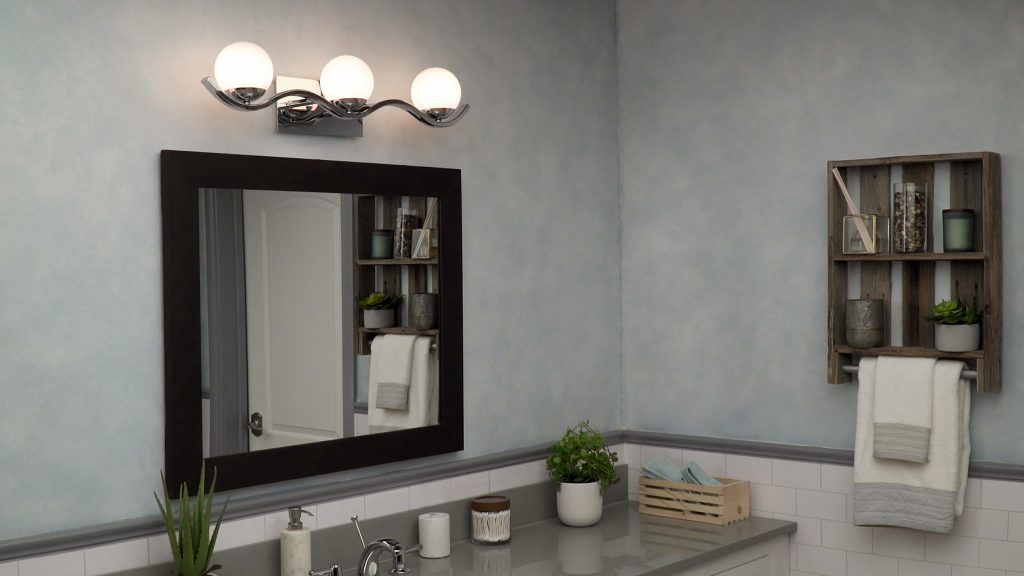
Because minimalism is all about doing less with more, it’s okay to be choosy about how you add light to your space – you don’t want to clutter up your home with a floor lamp in every dark spot! When you’re shopping for fixtures, stick to simple shapes that can double as design elements.

5. Finish it Off With Thoughtful Accents

Little pops of color and texture are what take a modern minimalist space from blah to wow. You can do this in a number of ways, but remember to keep it simple. Start with just one color or texture and see how it feels before committing to more. 


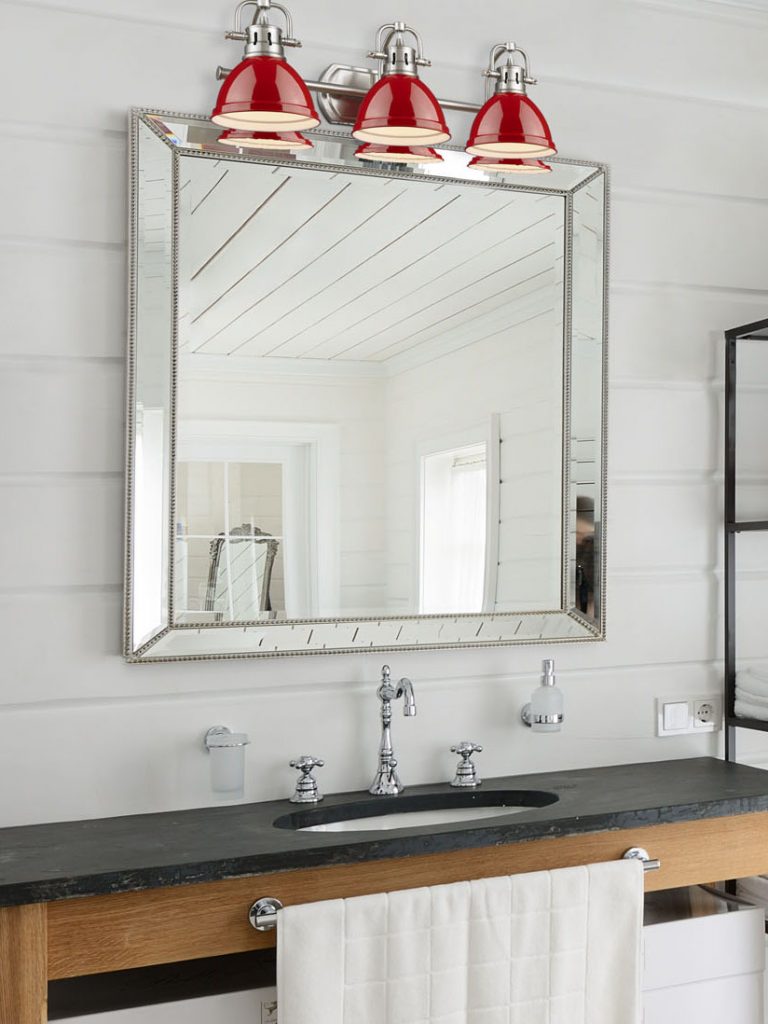
When possible, look for ways to upgrade your existing decor rather than adding extra items. Look for functional pieces that you need in your space, but feel a little lackluster, and find a more interesting alternative. Replace an old, overstuffed sofa with a simpler version in a deep color (as long as it’s in your color palette!), or give an old end table new life with a coat of paint.

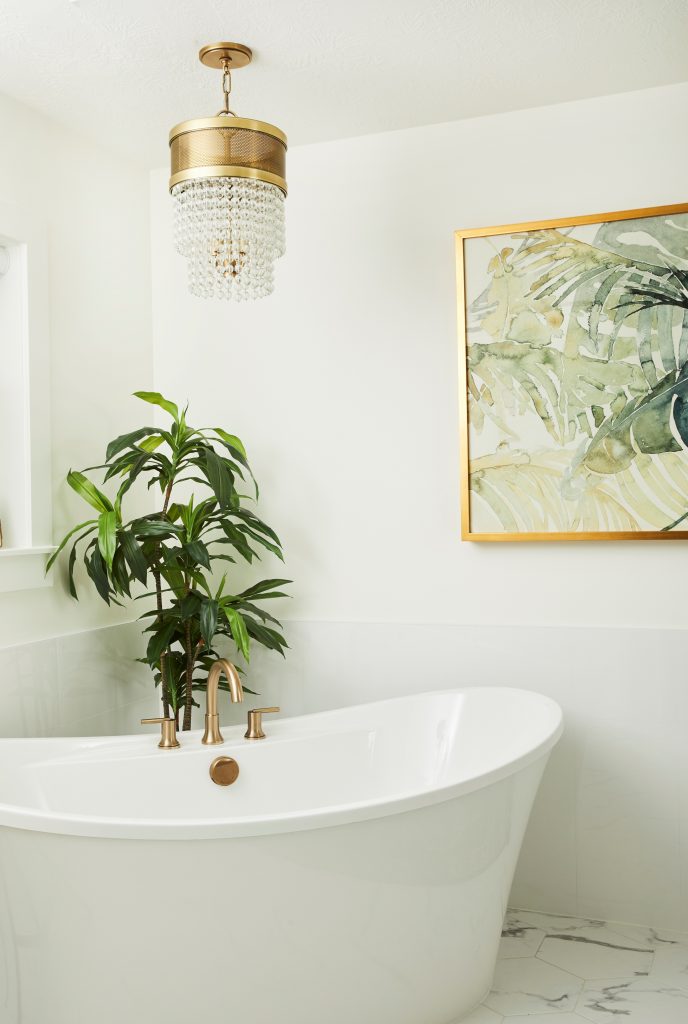
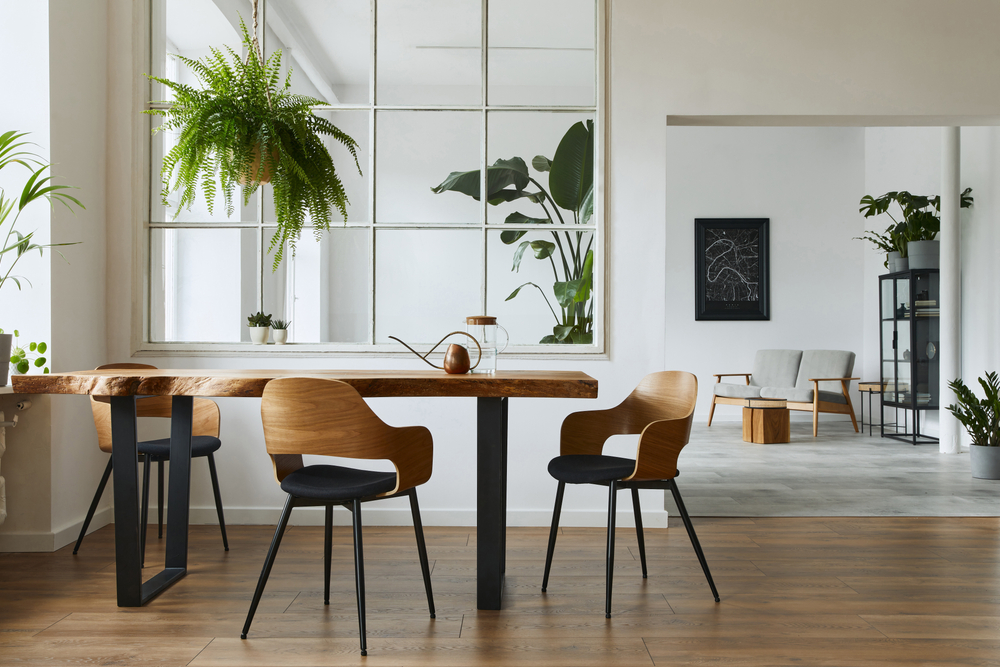
Pro Tip: If have a hard time committing to color, consider using houseplants! They introduce a vibrant green color and soft, organic textures, which can balance out a minimalist design quite nicely.

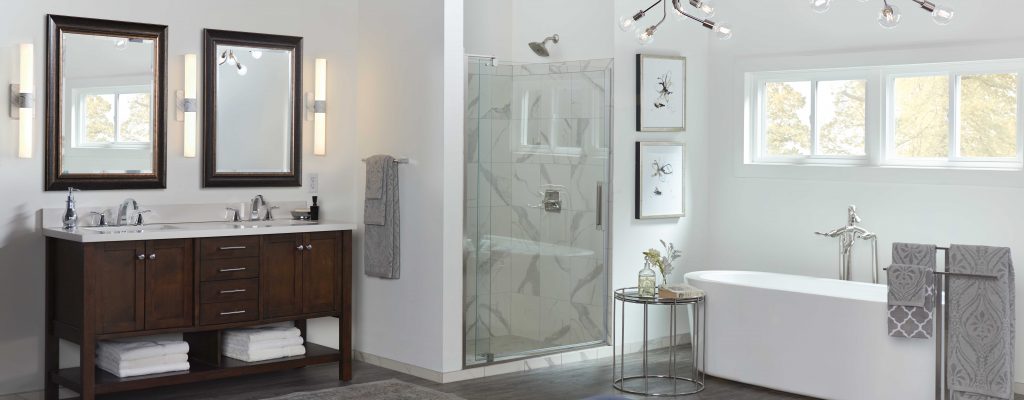
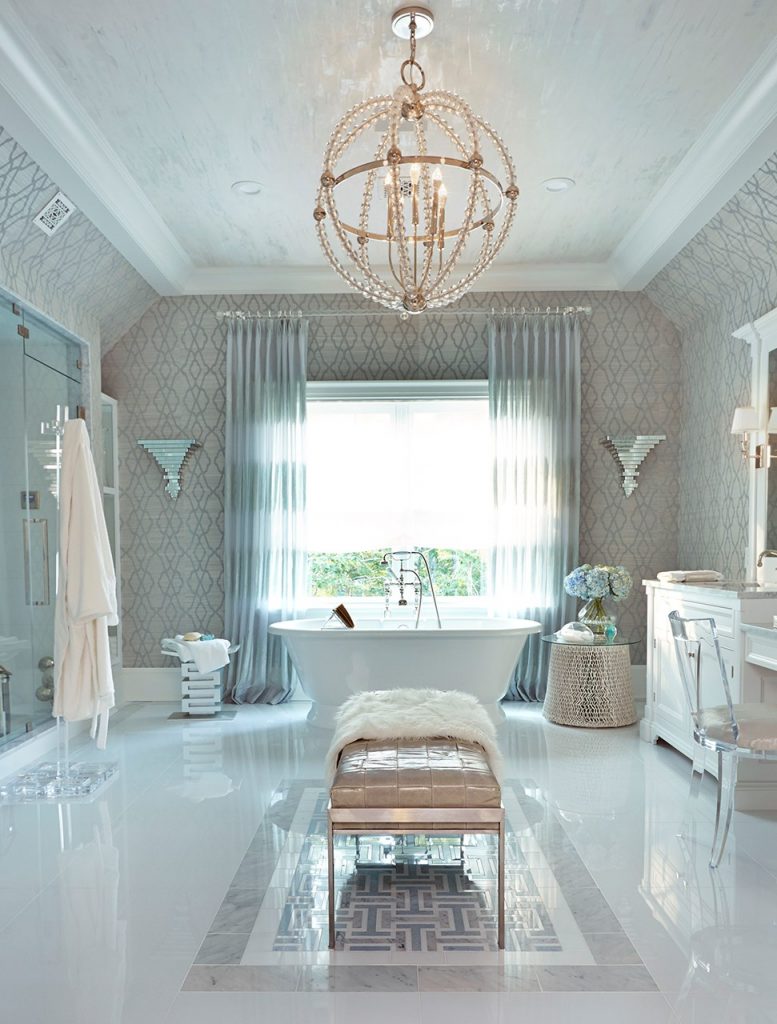
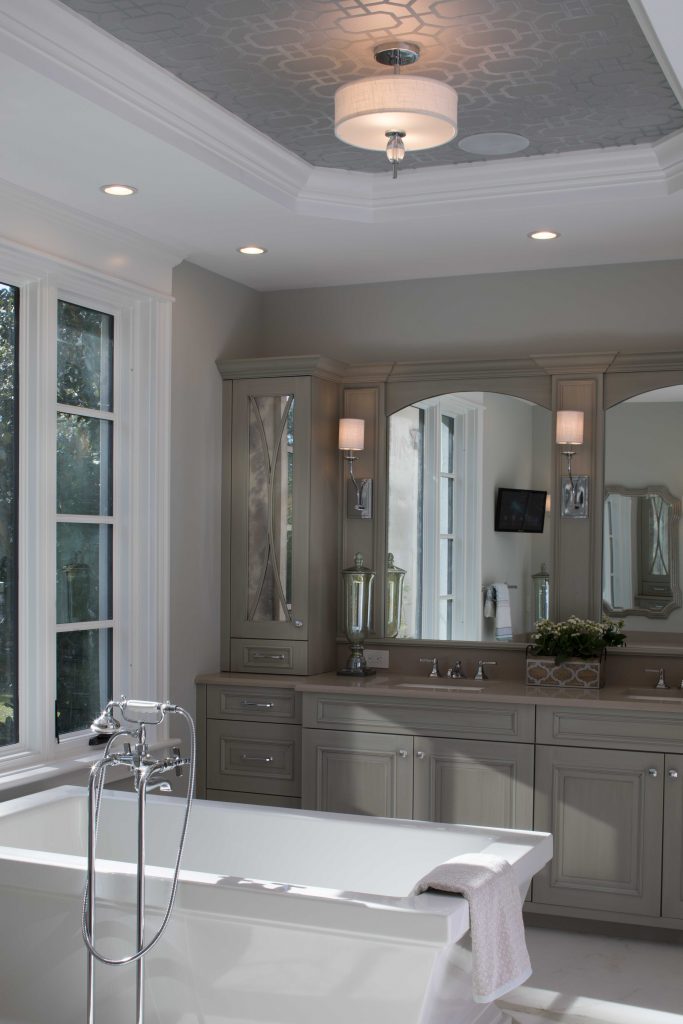
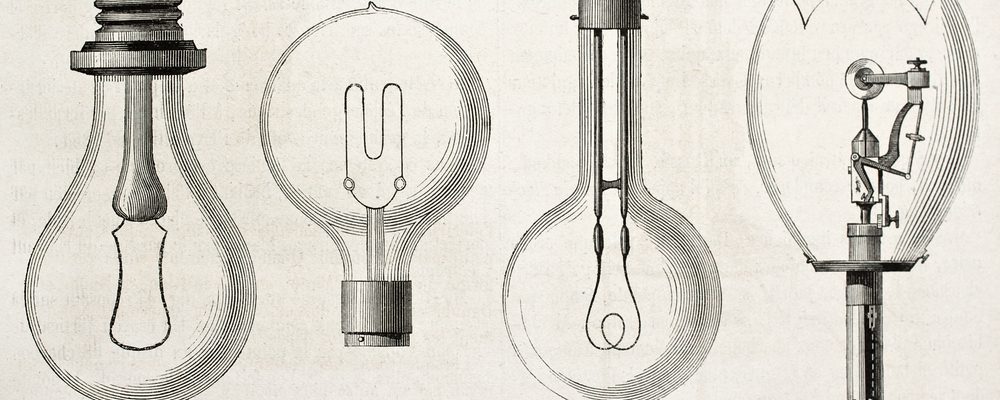
By far, one of the most effective ways to accent a modern minimalist design is with an interesting light fixture. Your room will always need light, so it might as well be an integrated part of the design! 


A stunning ceiling light with a simple shape will stand out as a piece of art against a minimalist backdrop and elevate the entire design of the space. 

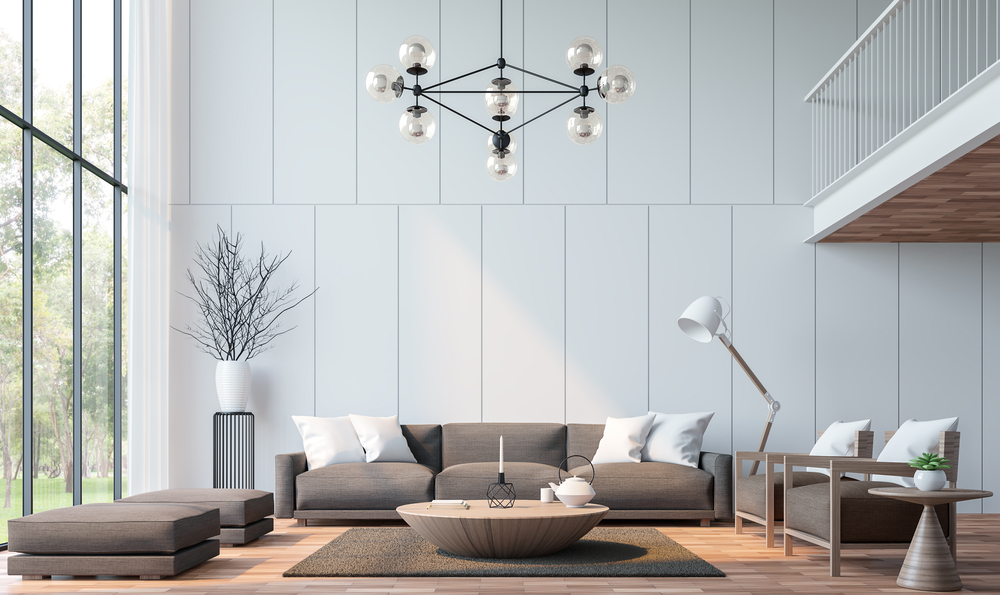
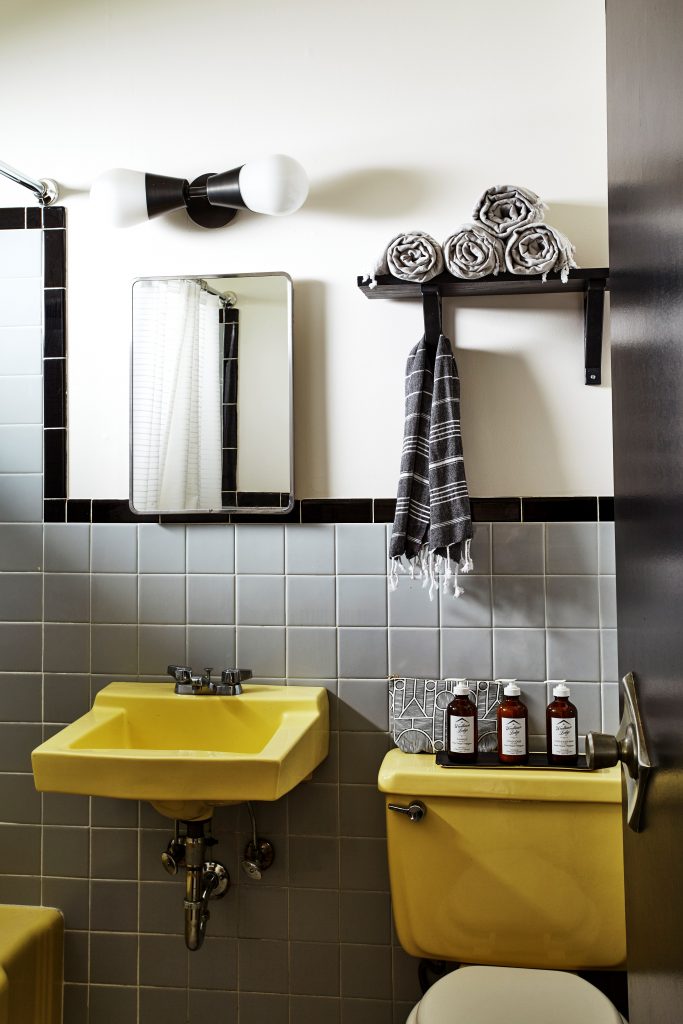
Pendant lamps are popular in modern minimalist design because they come in simple shapes with lots of finish options, so it’s easy to find something that will match your aesthetic. 

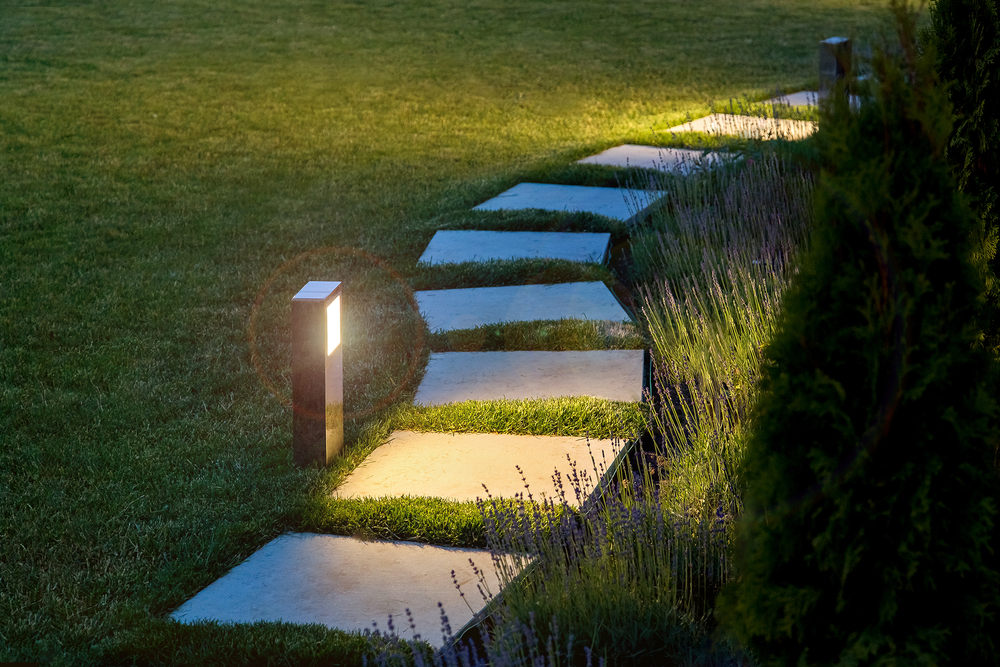
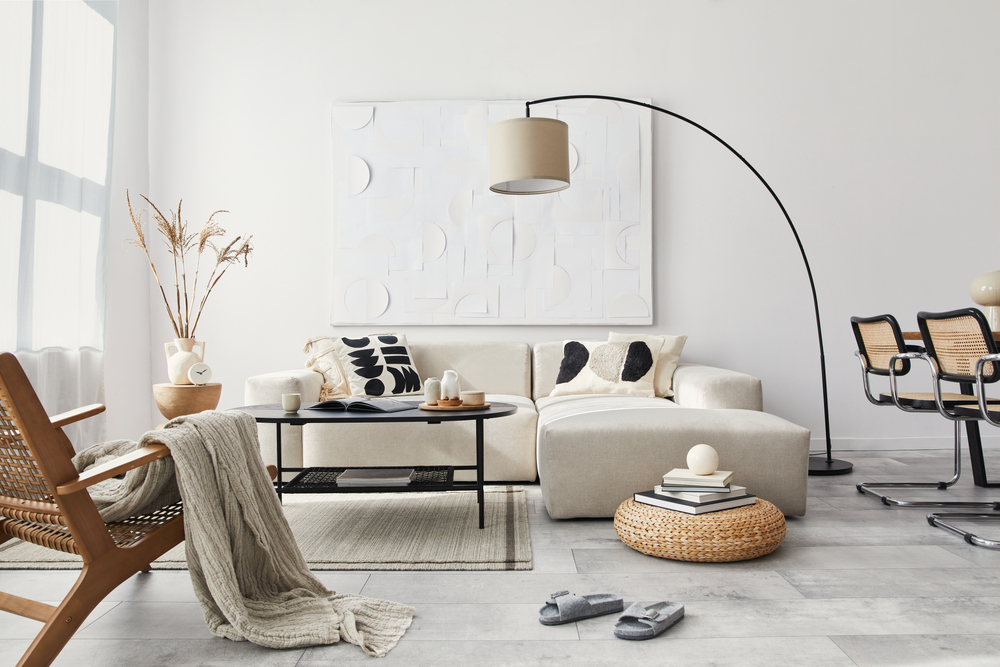
If replacing a ceiling fixture isn’t an option, you can get a similar impact with a carefully chosen floor lamp! Lamps are the MVP of accent lighting for a reason – they’re easy to move, replace, and rearrange, and come in a HUGE variety of styles. You can go for something small that blends in, but we also love the way a large, yet simple, lamp like this one makes a statement without taking over. 

That’s all there is to it! Just to recap, here are the 5 Easy Steps to Create a Modern Minimalist Interior: 


  1. Create an open floor plan – tie separate spaces together with color and materials, and rearrange furniture to maximize your space.
  2. Choose a small color palette – neutrals are your friend, but it’s okay to add in a little bit of color to make your space feel like you.
  3. Functional design is key – use multipurpose furniture, and organize, organize, organize. Store things that aren’t being used so that they’re not cluttering up your space.
  4. Add light – having lots of natural and indoor lighting is what makes your space feel open and airy. Light up dark corners and workspaces.
  5. Finish it off with thoughtful accents – Don’t over-accessorize. Pops of color and texture give life to a space, but try to incorporate these add-ons with the functional elements of your space – like a colored sofa or an upgraded light fixture.


——–


Modern Minimalist design can be a difficult concept to balance, but it’s very forgiving and so beautiful when done correctly. If you need help finding the right lighting for your Modern Minimalist home, the experts at Lit Living can help!

Filed Under: 2022, Decor & Home Accents, Styles & Trends, Styles and Trends

Your Bathroom Lighting May Be Ruining Your Look- Here’s How You Can Fix It

Your Bathroom Lighting May Be Ruining Your Look- Here’s How You Can Fix It

by admin · Dec 29, 2023

Picture this: You wake up early on a workday (a feat to be proud of). You don’t necessarily have to, but you’ve got the time, so you decide to spend some of that extra time on your makeup. After one last quick check in the mirror, you head out the door, feeling yourself and the look that you’ve created. Then, on a bathroom break at the office, you take a peek in the mirror and are surprised to see that your face here looks nothing like it did at home. What happened? Sure, the lighting isn’t great at the office, but there’s no way it could do all of this… right?

If this sounds familiar to you, take heart. Your makeup skills are probably not to blame – it’s more likely that your makeup lighting at home isn’t right – and it’s messing with your look.

Unfortunately, most standard bathroom lighting types aren’t a great help for flawless makeup. You might need to tweak the lighting set up at home to get it working for you instead of against you. This article will compare some of the common pitfalls of builder-grade lighting, and tell you exactly what you need to look for to upgrade your makeup space. 

Remember, the purpose of makeup lighting is to show your face as true as possible, so you know how the look will translate outside of your home.

NO: Windowless Rooms

Hopefully, your home was built with windows in the bathroom to help balance the lighting. However, if your bathroom doesn’t have a window and it’s not in your budget to install one, we recommend you get ready for the day by your bedroom or office window. Not only will this improve your makeup accuracy, but it will add dimension to the styling of your bedroom.

YES: Natural Light

Expert makeup artists all agree that natural light from the sun is the best light for doing makeup. If you can do your makeup facing a bright window, this is the best choice. However, many people do their makeup early in the morning or don’t have a windowed area suitable for makeup.

———————–

NO: Fluorescent and Colored Lighting

Fluorescent Light

Everyone knows that fluorescent light is the most unflattering possible. While many spend days under fluorescent light in the office, it is typically offset by some natural light coming through windows. Bathrooms are often windowless, completely isolating the makeup artist in the worst lighting possible.

Yellow Light

While warm, yellow light could be soothing for a home spa experience, it exaggerates flaws in the mirror. The yellow glow will bring out yellow and green tones in your skin, often making you appear sickly or washed out when you aren’t. This effect commonly results in putting too much makeup in the wrong places and then looking cakey once you step out onto the street.

Pink Light

Pink or rosy light has the opposite effect of fluorescent and yellow light― it hides flaws! This might feel good while applying makeup, but you may notice that you failed to cover certain areas as soon as you get to the office.

YES: Warm White Light

Warm white light is the best artificial light for doing makeup. It most closely mimics the effect of the sun, so what you see in the mirror will match what everyone else sees in the office or at dinner. Many experts recommend backlighting your mirror with LEDs to achieve this effect.

———————–

NO: Light From Above or Below

Kids love to make scary faces at sleepovers by shining a flashlight upwards from their chin. Overhead makeup light can create the same results (although not as dramatic). As the light shines down your face, it will naturally exaggerate certain features, like shadows under the brow, nose, and mouth. It can also catch more harshly on wrinkles. Once again, the results are too much makeup in the wrong places.

YES: “Face-forward” Light

“Face-forward” light shines directly towards your face rather than shining down on you. When your lighting is set up this way, it will reduce false shadows, making it easier to decide where to apply makeup. Many add LEDs around their mirror – it’s is an easy, inexpensive way to customize your makeup table and get the truest lighting for your look.

Pro Tip: If you’re renting and can’t replace your bathroom lights, a ring light is a solid option. They come in a wide range of prices and sizes, so it won’t be hard to find one that will fit both your counter and your budget. Position a smaller ring light around face height. Larger ring lights are designed for you to look through them, so the light shines on your face from all sides to eliminate shadows, as seen below:

———————–

Kick that Crappy Lighting to the Curb

Replacing, or adding to, your bathroom lighting isn’t as difficult as it sounds. Swapping out an old fixture with a new one is a relatively simple project that won’t cost much to have done. It’s also very beginner DIY-friendly – most homeowners can do it on their own. (Just remember to turn off the breaker first!)

A simple lighting upgrade can totally transform your makeup experience, and give you the confidence to trust that what you see in the mirror at home will translate across to the rest of your day. Whether you have a full makeup studio or you’re sharing a small vanity with a partner, you’ll be surprised at how a small change can make such a big difference. 

If you want some help choosing the best lighting upgrade for your makeup area, stop by our showroom and take a look at the options we have available. You’ll be able to see for yourself how you look in different lighting, and our experts can help you find the right options to dress up your space. Stop by, or give Lit Living today for a free consultation! 

Filed Under: 2022, Bathroom, Life & Style

Top Tips to Keep Your Home and Family Safe

Top Tips to Keep Your Home and Family Safe

by admin · Dec 22, 2023

Household accidents cost time, money, and suffering. From burns to falls, break-ins to credit fraud, it can feel overwhelming to protect your home and family. 

In this article, we’ll cover some top tips to keep your home and family safe. In this article, we’ll cover some top tips to prevent household accidents. The good news is that you’re probably already doing most of these – and many of the fixes are low-maintenance and low-cost.

Fire Safety 

Parents often think of the stove or oven when they think of fire hazards (we’ve all heard the Thanksgiving turkey mishap stories!), but forgetting to maintain fire prevention measures in the home is just as dangerous.

Fire Extinguishers & Smoke Alarms

Since people rarely need to put out a fire in their home, many homeowners forget where their fire extinguisher is, and it ends up buried in the back of a closet or cupboard. Fire extinguishers need to be replaced about every 12 years, and often need recharging as soon as six years. Be sure that your extinguishers are ready to go and that your family knows where it is and how to use them. 

Smoke alarms should be replaced after 10 years. Keep batteries on hand and replace them once a year. It’s best to test them once a month – it’s a great opportunity to do a family fire drill! Set up a meeting place and practice getting out of the house quickly so that kids will know what to do in case of an emergency. 

Candles

Candles are fun for mood lighting, but they are also a fire hazard. Never leave a candle unattended! For safer mood lighting, consider switching to softer light bulbs and dimmer switches. Color-changing LED bulbs are a fun option – some can be controlled by an app that lets you customize the lighting in your room with just the touch of a button.

Old Wiring

Electrical wiring is encased with a plastic or silicone coating to prevent fires, but that coating wears off over time. Electric codes also change over time, so many older homes may already have outdated and unsafe wiring. If your circuit breakers trip regularly, your lights flicker, or you hear a buzzing sound by your outlets, you should have your wiring professionally checked. Need a recommendation for a good electrician in the area? Give us a call!

———————

Childproofing 

Homes are filled with hazards for curious little ones― washing machines, driers, water heaters, and even daily toy messes can lead to serious injury. Here are a few simple ways to keep kids safe!

Appliances 

Appliances are everywhere, and kids love to help grownups with laundry and cooking. Make sure the washer and dryer are in their own enclosed space and that the doors are sturdy. Help your children know that the laundry room isn’t a place to play or hide. In the kitchen, simple tools like burner locks ensure that little chefs don’t start cooking on their own. There are also locks to ensure that oven doors can’t open either.

Toy Clutter

Tripping over toys is another leading cause of falls― bumped heads, sprained ankles, and avoidable tears. Keep walkways clean by confining toys to bedrooms or toy rooms. Encourage cleanliness by installing low shelves or get kid-friendly storage containers!

Lamps and Sockets

Most parents know that electrical sockets need to be covered – it’s childproofing 101. But what is there to do with the outlets in use? Most homes use lamps in one form or another. They’re great for adding a little extra light in a dark corner and for giving soft light in calm spaces, like a child’s bedroom. To childproof a floor lamp, place it behind a large piece of furniture so that it can’t be pulled over. For table lamps, make sure it’s out of reach up high and that the cord is inaccessible. 

———————

Prevent Trips and Falls

Falls are the leading cause of injury worldwide in adults over 60 years old. Although falls are most serious for the elderly, all ages are at risk of injury from falls. Every homeowner should review common fall zones to protect family and guests.

Banisters

Make sure that all stairways have a banister for support. A sturdy banister can be the difference between a simple slip and a broken leg. Ensure that all banisters are secure and won’t pull away from the wall when yanked on.

Stair Lights

Simple stair lights help you see where you’re going, even when the overhead lights are off. Installing them can be a large or small project – it just depends on your budget and willingness to DIY. LED strip lights and motion-sensing stick-on battery lights are easy beginner projects that will make your stairway safer. You can also hire a contractor to hardwire lights to a switch if you don’t want to worry about replacing batteries. 

Loose Carpets or Rugs

Loose flooring is another common tripper― whether it’s your kindergartener running at full speed or your partner with a tall load of laundry, rugs should not get in the way. If you notice your carpet is pulling up at the edges, contact a professional to help reinstall it or find a DIY method. Only use rugs with flat edges and avoid ones that curl upwards.

Safeguard Personal Information

From hackers to natural disasters, it’s essential to keep personal information safe. Here’s some basics:

Computer Safety

Be sure to keep security software updated, so you have the best protection possible. Update your passwords regularly and avoid using the same password for multiple accounts. It’s also a good idea to keep computers out of sight when you’re out of the house― you never know who’s checking for valuables when you’re away.

Credit Monitoring

Hackers are everywhere. The 2017 Equifax Data Breach showed how important it is to monitor our credit reports. Many monitoring services are easy to use. Some lock your social security number so that no one but you can use it. Safely store or destroy documents with bank account information or social security numbers.

Prevent Fire or Water Damage

Birth certificates, titles, and passports are important documents – and you don’t want to be without them in an emergency. The best practice is to store these documents where they’ll be safe from fire or water damage. Small home safes are an excellent option for most. For high-value items, getting a security box at your bank may be necessary for peace of mind. Whatever your preference, make sure you’re housing your documents safely.

Intruder Prevention

Did you know that 34% of burglars simply walk in through an unlocked front door? Or that most break-ins occur between 10 am and 3 pm when houses are usually empty? A few simple tools and habits will keep you well prepared against burglary.

Lock Your Doors and Windows

It’s always a good habit to keep your doors and ground-level windows locked. Most robberies are the result of opportunity, not a criminal master plan. A simple fix here would be to upgrade your deadbolt or add a second lock up higher on the door. 

Security Alarms

Security alarms and smart doorbells have become much more popular in middle-class homes. There is a wide range of security systems and providers. Many security systems pair with apps so you can alarm or monitor your home from anywhere. Finally, most security providers will give you signs with the security systems. Posting that you have a security system may be one of the most effective deterrents to theft.

Motion-activated Lights

Keep the exterior of your home well-lit to discourage nighttime crime. If you use video surveillance, it’s important to make sure you don’t have blind spots in your lighting. No matter what, it’s a good idea to have lights on your property’s front, sides, and backyard, especially near the entrances. Motion-activated lights are a great option for most people – they conserve power (which lowers your electricity bill), and they’ll often scare away potential intruders when the light turns on.

Outdoor Safety

Summer nights are a fun time to be together as a family. A few tips and tricks will create quality memories without emergency room visits.

Outdoor Lighting

Proper outdoor lighting will make your yard safer, no matter the time of day. Whether it’s a powerful light on the driveway for evening basketball games or soft lights on the back patio for an outdoor dinner, consider the ways you use your yard and choose lights that will make it the safest for you and your family to enjoy.

Pool

The CDC states that there are an average of 33 drowning incidents per day in the United States. To keep your home’s pool safe, maintain a sturdy fence around the pool area if you have young children or pets. Always have a buddy whenever someone is in the pool, and always have life vests on hand. Keep pool maintenance chemicals in a safe location.

Landscaping

Maintaining a yard is a lot of work, and it comes with a lot of tools. Keep play areas and walkways clear by trimming back bushes and trees, and consider lighting well-used walkways (like the path to your front door or to your backyard shed) to make them safe after dark. Store yard tools somewhere safe when not in use, and make sure chemicals like gasoline and pesticides are either up high or behind a lock. 

Expert Help

We understand that making your home safe is of the utmost importance. The lighting in your home should play a central role in both safety and comfort! For help choosing lighting that will make your home and family safer, stop by our showroom or give us a call to speak to our lighting experts!

Filed Under: 2022, Life & Style

7 Ways to Transform Your Bathroom

7 Ways to Transform Your Bathroom

by admin · Dec 15, 2023

Your living room shouldn’t be the only room in your home that showcases your style – it’s time to show your bathroom a little love too! Wondering how to get started? Here are 7 tips, and plenty of inspiring examples, to show you how you can transform your bathroom into a space that you can be proud of!

1. Use Striking Wall Colors

Coloring with contrasts make for a striking match with any vanity set. A simple, yet functional brass light fixture ties the whole look together, while still providing the bright light you need to get ready every morning.

Sometimes, simplicity makes for the best design. Matte black task lighting, bright yellow bulbs, and a textured black backdrop create a truly showstopping combination, adding a dramatic effect that’s sure to leave any guests talking.

2. Color-Coordinate Your Hardware

Make any vanity look luxe with gold features. Coordinate your drawer handles, faucets, and light fixtures for a put-together feel. Especially when paired with simple blacks and whites, these accents really shine!

This bathroom uses a brilliant geometric design as a wall accent, then simplifies the space with a clean-cut, over-the-mirror light fixture in a pretty accent color. The result is an engaging, but not overly busy, bathroom look.

3. Use Chandeliers to Make a Statement

Create a primping room fit for a Hollywood A-lister by using some surprisingly simple décor essentials: a classic vanity, glamorous chandelier, and patterned walls. The result? A bathroom with a touch of flair, lots of style, and a slight air of drama. We love it!

Want a more understated room with just a touch of glitz? You can still lounge in luxury as you soak beneath a dazzling chandelier.

4.  Mix Natural and Modern Elements

Bring all of the soothing spa vibes to your own bathroom while still keeping it chic. Here, natural wood elements are balanced with sleek, simple light fixtures and mirrors that provide an understated modern touch.

This bathroom makes a great use of natural touches with wooden shelves and small potted plants. To top it off, the light fixture’s wavy, modern design sends an organic “go with the flow” impression that matches the tone of the room’s décor.

5. Choose Bold Color Accents

If you want a pop of color in your bathroom, but you aren’t willing to commit to a full accent wall, try colorful light fixtures! These red lights are a bright spot in a white room that draw attention and add style without being overwhelming.

If you’ve got some fun color elsewhere, like this vintage yellow toilet and sink, that’s great! This black fixture blends with the style and lets the colorful toilet and sink truly shine.

6. Embrace Classic Elements

If you’re looking for a simple, sophisticated bathroom, this one will suit your tastes. The vanity set and walls have subtle detailing, while the silver light fixtures boast clean lines and an elegant silhouette. 

Here, a large, gorgeous vanity takes center stage. Combined with modest, shaded light fixtures, the overall effect is timeless and elegant.

7. Play Around with Interesting Shapes

Hoping to create a quaint, charming wash room? A minimalist vanity, pretty wall pattern, and small vase of flowers are a good way to start. The light is a beautiful finishing touch: it’s simple enough to highlight the other design elements, but the double-sided fixture is unique enough to add some extra flair.

In this bathroom, diamonds are everyone’s best friend. Flanking the mirror with unusual diamond-shaped light fixtures creates a distinctive, fashionable element, making this space seem subtly one-of-a-kind.

While the task lighting on each side of the mirrors is straightforward, it’s the unusual shape of the overhead lighting that commands attention in this modern bathroom. The overall effect? A bathroom that’s stylish, sleek, and unique.

Feeling inspired? Transform your bathroom into a space that’s truly yours with any of these simple tips. Whether you add an accent wall, a colored fixture, some interesting shapes or natural elements, we’re sure you’ll love the effect! Best of luck from us here at Lit Living.

Filed Under: 2021, Bathroom Lights, Styles & Trends

 How Light Bulbs Changed the World

 How Light Bulbs Changed the World

by admin · Dec 8, 2023

Imagine waking up to the light of the sun in 1850. It’s summertime, around 6 am. You go downstairs, stoke the fire and get breakfast together as your children start to wake. Outside thunderhead clouds are heading towards you, darkening the land. Lighting a few lamps, you prepare for a quiet afternoon inside, knitting and sewing with your daughters while the boys wrestle in the flickering light. It rains all day. You’re running low on kerosene oil, so off to an early bedtime. Maybe tomorrow will be brighter, less restricted.

In a world of modern conveniences, it’s easy to take something like our control of light for granted. Did you know that lightbulbs have been around for less than 150 years? Revisiting the history of home lighting may inspire you to see your home with new eyes.

Before the Light Bulb

For thousands of years, humankind has lived according to the cycle of the sun and moon. The earliest humans relied on fire and learned to control it over time. Wax and oil made fire portable and practical through the use of torches, candles, and lamps.

This “domestication” of fire spurred innovation. There were more hours to use in the long dark winters, which gave humans time to craft and study. Still, firelight wasn’t nearly as bright or even as the sun. It produced a lot of heat, required care to keep alive, and created black smoke and soot. 

Fire was far from a perfect lighting solution. Inventors around the world continued to pursue a better solution without much success. It wasn’t until the 19th century that inventors saw progress with electricity and light. 

The Invention of the Light Bulb

The first successful version of electric light was achieved in 1835. This bulb, called the arc lamp, was invented in London and was popular in street lighting. Although it was a huge step forward in the development of electric light, there were still plenty of technical problems to solve. The arc lamp was extremely bright and hot, so it had to be on high towers for safety. The glaring light made it impossible to use in the small rooms of private homes. Even in the 1800s, critics were wary of the invasion of technology into private life. More work needed to be done.

More than forty years later, Thomas Edison successfully created a light bulb that wasn’t excessively hot or bright. He invented the first incandescent bulb in 1879 in New Jersey. These bulbs used electricity and gas to sustain the slow burn of filament. The light was powerful enough to light a room. 

The incandescent bulb changed the world. The ability to have consistent, clean light on demand meant that hospitals, schools, governments, businesses, and the public could control their work. Its use was able to increase health, safety, and productivity. 

It wasn’t until the mid-20th century that incandescent bulbs were commonly used in middle-class homes, decades after the death of the brilliant inventor Edison. The evolution of electric light was far from over. As incandescent light bulbs became commonplace, energy consumption greatly increased and we began to record harmful effects to the climate. Once again, we needed a new light solution.

Evolution of EcoFriendly Bulbs

Now imagine it’s 1950. You’ve moved into a new home in “Leave it to Beaver” suburbia. White picket fences, green lawns, neat houses, all wired to the now publicly available electricity network. You pause and think back on your childhood, the challenges of life before this technology. You smile. This is a new world for your children. You flip the switch on in the family room to spend some quality time together.

As the general population adopted the use of electric light, energy consumption skyrocketed. This increase in demand for energy production started to impact the environment, as the most common energy production was the burning of coal and natural gas. The effects of global warming came to a head and we looked for ways to reduce our impact on the world. Although the groundwork for fluorescent and LED bulbs was laid long before our awareness of global warming, they turned out to be the key to energy-efficient lighting. 

Fluorescent Bulbs

Several inventors got to work on fluorescent lighting, the process of passing electricity through the gas to create light. Even Thomas Eddison had a version of fluorescent light, although his was never mass-produced. George Inmann of General Electric finally secured a patent for a commercial version of the fluorescent light. This light was first sold in 1938, around the same time the incandescent light became a common household appliance. 

Fluorescent light bulbs were first designed as long tubes, typically used in offices. A modified design adapted them for home use: a slim spiral tube the size of an incandescent bulb. These bulbs grew popular in the early 2000s. Fluorescent bulbs are much more energy-efficient than incandescent bulbs. Yet, many were wary of their use in homes because they contain mercury. Many families wanted to avoid the risk of broken bulbs.

LED Bulbs

The technology behind LEDs (light-emitting diodes) began back in 1907, when a British man named Henry Joseph Round experimented with a cat’s whisker and silicon carbide, somehow generating light. Several other inventors tried to harness LEDs, first succeeding in creating invisible infrared LEDs, then finally achieving visible red light in 1962.

LEDs have evolved to emit every color, are highly adaptable, and maintain popularity today. LEDs use a microchip to produce light instead of burning filament or gas, and are popular in both bulbs and strip lighting. The microchip design means LEDs are colorful, adding “fun” and “versatility” to “eco-friendly”. And, no mercury!

Light in Creating a Home

Back to today. Your home is custom lit in every space. It’s a beautiful summer night. The kids are in bed, the soft, warm glow of fairy lights giving them comfort. You lock the front door and see your walkway lit by solar-powered footlights. You turn off the lights in the kitchen, except for the cabinet lighting, which offers a gentle glow into the living room. You snuggle up with your partner to catch up on your favorite show.

We live in an era of ultimate convenience. Gone are the days when the weather or seasons dictate what we do. Modern technology has allowed us to use light to optimize health, safety, and design.

Despite all of the incredible things the light bulb has done for us, we will never fully be able to remove ourselves from the influence of the cycles of the sun and the moon. Much like our ancestors who lived life by the firelight, our bodies still rely on the cues of daylight and dusk to regulate our hormones and sleep cycle.

Modern innovators have developed a spectrum of bulb “temperatures”. The temperature, or wavelength, of light mimics either sunlight or firelight. Bright, cool light acts like the sun and is excellent for workspaces, like kitchens and home offices. Softer warm light sources are closer to firelight, and help our bodies to relax and prepare for sleep. It’s excellent for bedrooms, reading lamps, and by bathtubs. 

The right light sources also help to protect our family and home from accidents and theft. Strip lighting along stairs is great for preventing falls. Motion-activated lights outside have protected families for decades by preventing nighttime theft.  

Beyond function, light design controls the feel of your home. Two hundred years ago, pioneers and frontier families had the same, functional log cabin. Today light gives us all the opportunity to customize our homes to our family needs and interests. Simply upgrading the existing, builder-grade lights makes your home feel like it’s yours. Strip LEDs under your kitchen cabinets increase visibility, make it feel bigger, and upgrade it to a first-class workspace. Installing pendant lighting in the bedroom increases style and decreases chord clutter. A unique chandelier brightens your home office and helps you relax in a space that’s really you.

It’s incredible how much light has changed the world.

——————–

Talk with the Pros

With all the technology and styles available to you, it can be hard to know how best to take advantage of this era of light. Lit Living offers a great selection of not just bulbs and fixtures, but also professional lighting advice from experts in the lighting industry. If you’re ready to start lighting your home, stop by our showroom and we’ll help you find exactly what you need.

Filed Under: 2022

Ceiling Fan Terminology Explained

Ceiling Fan Terminology Explained

by admin · Dec 1, 2023

A Helpful Glossary of Common Ceiling Fan Terms

If you’re shopping for ceiling fans and it’s starting to feel like the descriptions are written in code, don’t worry! We’re here to solve the mystery with a list of basic terms you’ll need to know when looking for the right ceiling fan.

Ceiling Fan Types

Ceiling fans are most often categorized by their motor type, mount type, and/or weather rating. 

Motors

AC and DC Motors

AC motors (alternating current motors) are the most popular ceiling fan motor. They’re typically less expensive than DC motors, which is great for budget buyers. They are relatively energy efficient, are very reliable, and come with around three to four different fan speeds. 

DC motors (direct current motors) are a newer technology and often use a remote instead of a wall switch. DC motors make a quieter, more powerful fan with more speed options and are more efficient than AC motors. 

Dual Motor

Dual motor fans have two adjustable fan heads attached to a central motor. Each head is adjustable to its own speed and angle. 

High-Velocity Motor

A high-velocity fan is a powerful fan. It produces a higher-than-normal amount of airflow, providing you with a stronger breeze. 

Mounts

Downrod/Shank/Extension Rod

The multiple terms for this accessory are purely regional, and all mean the same thing– the rod or bar installed between the ceiling and the fan. Downrods can be used in many rooms but create the most impact in rooms with high ceilings. Not only do they pull the eye upwards and make the room feel bigger, but they also bring the air circulation closer to you.

Standard Mount

This type of mounting system is for level ceilings. Standard mounts usually come with a 3- to 5-inch downrod, so the fan slightly hangs down into the space.

Hugger or Flush Mount

These are perfect for low ceilings and tall people. Huggers are mounted against the ceiling and don’t use a downrod. Depending on the ceiling height, huggers or flush mount fans can help the ceiling seem higher while keeping your air circulated and fresh.

Low-Profile Fan 

For a fan to be considered low-profile, it must hang down less than 12 inches from the ceiling. Most low-profile fans are flush mounts, but some fans with short downrods are small enough to qualify as low-profile as well.

Sloped Mount 

A sloped mount is a mounting system that includes a downrod that allows the ceiling fan to be installed on a vaulted or slanted ceiling. The base is designed to let the downrod and fan hang at an angle when mounted so that the fan will be perpendicular to the floor.

Rating

Wet Rated or Outdoor Rated Fans 

Outdoor or wet rated fans are designed to withstand direct contact with rain and snow. Carefully read the packaging of your outdoor fan because not all fans can handle the same weather exposure. If you live in a particularly wet or stormy area, you’ll need a tougher outdoor fan.

Industrial and Commercial Fans

Industrial fans have powerful motors and curved blades, and they can run continuously, making them ideal for large, open areas like warehouses and gyms. Commercial fans are heavier-duty than standard fans and more aesthetically pleasing than industrial fans. They’re commonly found in schools, businesses, and restaurants.

Ceiling Fan Measurements 

This section covers the most common measurements used to describe a ceiling fan’s function and size.

Airflow (CFM)

Cubic feet per minute (CFM) refers to the amount of air moved by a ceiling fan, using the amount of air moved per cubic foot in one minute as the metric. The higher the airflow a fan uses, the more efficient your home can be as you recycle heated or cooled air. According to Energy Star, 75 CFM is the minimum airflow of an efficient ceiling fan.  

Blade Pitch 

The pitch measures the angle of the blades compared to the ground. Fan blades are slightly angled to push the air around. (If they were parallel to the floor, they wouldn’t do much!) The angle of blade pitches typically ranges between 10 and 25 degrees, but the most efficient is from 10 to 15 degrees. 

Blade Sweep or Span 

A fan’s sweep or span measures the diameter of the circle created by the blades. You’ll need to know the span of your fan to make sure it will fit properly in your room – if it’s too large it could scrape walls or snag curtains. On the other hand, it may be distracting and look out of place if it’s too small.

Motor Speed (RPM)

Revolutions per minute (RPM) refers to the speed of the blades as they rotate, measured by how many times the blades make a complete circle in one minute. High RPM fans move more air than low RPM fans of the same size, making them more efficient. 

Watt Equivalence

Some fans will require more electrical power (watts) than others, so it’s essential to have a good understanding of how much strain your new fan will put on the existing circuit. A good rule of thumb is the longer the fan blades, the more watts it will use. Expect your fan to use 55 to 100 watts.

Weight

Residential ceiling fans typically weigh anywhere from 8 pounds to 50 pounds. Keep in mind that lightweight ceiling fans are designed to hold their weight alone. You should never add anything to a ceiling fan that wasn’t in the original kit without carefully reading the manufacturer’s instructions. Some ceiling fans allow for customizable light kits. In that case, be sure to check the packaging for how much additional weight it can hold.

Number of Speeds

Most ceiling fans will have multiple speed settings so that you can control the amount of airflow and circulation in your space. Most fans will have three speeds (slow, medium, and maximum speed). You’ll also want to see if your fan can reverse direction– this will help pull warm air down from the ceiling during the winter and help to cycle your heated air.

Dimensions

You’ll need to check several measurements to ensure your fan fits correctly in the space. For example, both depth and width can refer to the blade span (or the size of the circle the fan will make). The width can also describe how wide the individual blades are. Finally, as mentioned earlier, the downrod is the pole that connects the fan to the ceiling mount. Together, these three dimensions will tell you how much space the fan will take up.

Pro tip: All fans are designed for specific square footage, meaning that some are designed to push air through large rooms while others are for small rooms. Fans designed for bigger spaces would be disruptive in a smaller room (and vice versa). The packaging of your fan will tell you the intended size of the room, so make sure to check the square footage of the intended space and match it to the appropriate fan. 

Parts and Accessories 

The final section describes potential upgrades and customization options to consider while shopping for your ceiling fan.

Light Kits

Many fans come with a light fixture attached (called an integrated light), but some can be purchased and attached depending on the fan. There are three different light kits that you can use with your fan: uplight kits which sit on top of the fan and point upwards, branched or stemmed kits use globes or shades that point up or down, but the most common light kit is the bowl or shade kit which attaches to the bottom of the fan. Keep in mind that some ceiling fans with an integrated light may not include a bulb– you may need to purchase bulbs separately.

Remote Control

Many fans available today are remote control or smart-home compatible. A remotely controlled fan may seem like a luxury, but it’s also very practical – especially for those with extremely high ceilings! Depending on the model and features, you’ll be able to adjust the lights, fan direction, and fan speed with ease. 

Reversible Blades 

Some fans allow for their blades to spin either clockwise or counterclockwise. This functionality helps to customize airflow according to the season. For example, the blades should turn counterclockwise in the summer to push the air down (a downdraft), providing cool breezes.  The fan blades should rotate clockwise to pull air upwards (an updraft) in the winter, efficiently recycling heated air without cooling the room. You can either toggle the switch on the fan or use a remote to change the direction of the blades. 

———————-

Ready to switch out your builder-grade fan or install a new one in the place of an existing light fixture? Now that you have a reference to all of the features and parts of a ceiling fan, you can shop confidently.

If you’d like additional information, a professional opinion, or installation assistance, contact the experts at Lit Living, and we’ll make sure you get exactly what you are looking for! 

Filed Under: 2022, Buying Guides, Ceiling Fans, Informational

6 Amazing Uses for LED Strip Lights

6 Amazing Uses for LED Strip Lights

by admin · Nov 24, 2023

Good lighting is about so much more than just light bulbs and switches. When it’s done right, lighting can transform any space, increase the value of any real estate, and even fuel your soul and energize your body. It’s a proven fact that using the right lighting can dramatically change your physical and mental well-being. Whether you’re building a valuable asset, setting the mood or pulling a late night, choosing the right lighting makes all the difference.

It’s time to use lighting better and LED light strips are one of the easiest ways. Take full advantage of modern lighting technology to change your home for the better by using LED strip lights to illuminate your surroundings. LED strip lights (often called LED tape or ribbon light) are small, flat, flexible, circuit boards with small LED lights embedded along the surface. They are an easy choice for DIYers of any level looking to upgrade their space because they come with an adhesive backing, can be cut to any length, and their low profile means they can be hidden or tucked into very small spaces.

LED strip lights are a great place to start when that can invigorate your senses, change the atmosphere in your home, and even increase your safety. Here are six unexpected ways you can use LED strip lights to energize and brighten your life!

Customize Your Kitchen

This may sound like an unusual place to start, but LED strip lights can really make your kitchen shine. All you need to do is place the strip under your kitchen cabinets! It will make your cooking area brighter and easier to use, give your kitchen a bright and custom-made feel, and create a soft glow for mood lighting to compliment your evening wind down.

pozitivo/Shutterstock.com

You can even line the inside of your kitchen cabinets or drawers with LED strip lights to make it easier to find exactly what you need.

Olga Prava/Shutterstock.com

Feature Your Collections

You’re displaying your prizes, pictures, and awards for a reason: you are proud of them! Why not give them the spotlight they deserve? By illuminating your shelving with LED strip lights, you’ll create the perfect glow that will make your special items pop.

LED strip lights also are the perfect medium for highlighting mirrors and artwork on your walls. Create a beautifully back-lit design by installing an LED strip around the perimeter of your mirror or art between it and the wall.

Myphotojumble/Shutterstock.com

Secure Your Staircase

The right amount of light can completely transform your dark or dangerous staircase into the beautiful bright staircase of your dreams. Add an LED strip across the bottom edge of each stair or even along the bottom of your handrail to make your staircase a bright and beautiful feature in your home. Not only will this add more character to your home, but it will also make your staircase much safer by properly lighting the stairwell and stairs for your treks up and down between floors. No more tripping on shoes or backpacks in the dark!

Catherine.Things/Shutterstock.com

Highlight Your Backyard

Your backyard is the place where you go to reconnect with the outdoors and to spend quality time with the people you love. Whether you like to read on your porch swing, play catch with the kids, or entertain guests around the firepit, take full advantage of your outdoor living space! Incredibly, LED strip lights can be used outdoors too! Liven up your backyard with LED strip lights by lining the patio, flower beds, or even your swimming pool. This will add an extra layer of cozy lighting for you to enjoy year-round.

zhu difeng/Shutterstock.com

Create a Relaxing Retreat

Getting the right lighting in your bedroom is arguably one of the most important things you need to do for yourself when planning your home design. At the end of a long day, you need a place where you can get the ambiance just right so that you can relax and unwind. Look for places that are easy to line with LED strips like a doorway, the perimeter of your ceiling, or your headboard or bed frame. Then you can turn off your harsh, overhead light and instead bask in a soft, ambient glow that will help you relax and recover from the day.

Nick Beer/Shutterstock.com

Travel In Style

That’s right: You can make your vehicle explode with light by adding LED strip lights to the inner and outer surfaces. Make your interiors feel custom and expensive by lining the seats, floor boards, dash, and ceiling to get a slick glow. On the outside, add LED strips to the bottom of the frame and around your tires as an added safety feature that comes with a serious wow factor.

Valeriy Surujiu/Shutterstock.com

If your ride has 2 wheels instead of 4, LED strip lights will be your best friend. Adding LED lights to your motorcycle or bicycle helps other drivers see you more easily on the road, making your night time travelling safer. For those that are more concerned about the cool-factor, line the bottom of your motorcycle with LEDs to make it look like you are floating, or you can line the entire frame of your bicycle and you’ll be the star on the bike path! Either way, you’ll have a conversation starter!

Alexander Mogilevets/Shutterstock.com

Please read up on the laws and guidelines in your area before adding LED lights to your vehicles, as some colors or installation locations might be outlawed if they’re distracting to other drivers.


With a little bit of help from LED strip lights, you can brighten your home and yard, show off your collections, get that sweet after-market look on your vehicle, and make your spaces a little safer. These lights really can be used almost anywhere, so don’t be afraid to explore the many different ways LED strip lights can enhance your life. You never know, what you find might surprise you! And, as always, if you have any questions about your next lighting project, contact All-Phasetoday. We are always willing and happy to help you get started!

Filed Under: 2021, LED Lights, Styles & Trends

« Previous Page
Next Page »

Copyright © 2025