• Skip to primary navigation
  • Skip to main content

All Phase TC

  • Buying Guides
  • Styles & Trends
    • Bathroom Lights
    • Ceiling Fans
    • Ceiling Lights
    • Lamps
    • LED Lights
    • Outdoor Lights
    • Smart Lights
    • Wall Lights
  • Wellness & Safety
  • Shop Products

admin

How to Fix a Noisy Ceiling Fan

How to Fix a Noisy Ceiling Fan

by admin · Apr 12, 2024

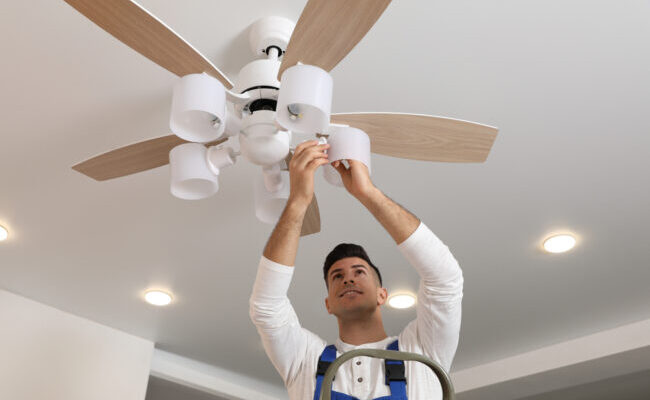
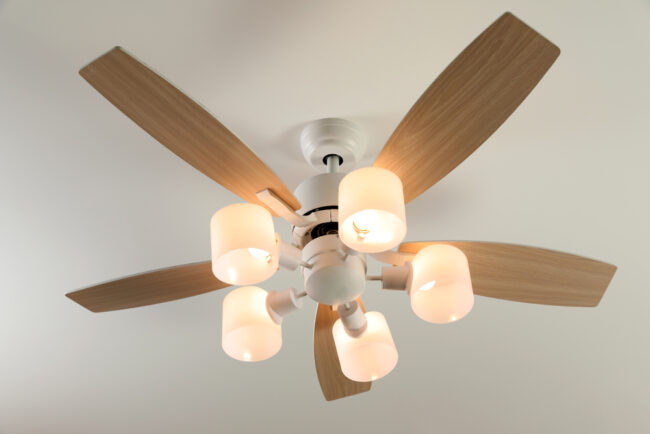
Ceiling fans can change your life – or at the very least your outlook on life – with just a flip of the switch on a hot, stuffy, muggy day. There’s something magical about the way they can change the entire way a room feels, making it comfortable in seconds. 

But what happens when this miracle-worker of a ceiling fixture starts affecting the ambiance in ways it shouldn’t? A noisy, squeaky ceiling fan will make the room it’s in unbearable no matter the temperature. If your noisy ceiling fan is making you miserable, it might be easier to fix than you realize. With just a little investigation and willingness to tinker, you could be on your way to cooler days ahead. 

There are a number of reasons your fan may be making more noise than it should – we’ll go over some of the most common issues and what you can do to bring back the peace and quiet.

1. Problem: Dirt

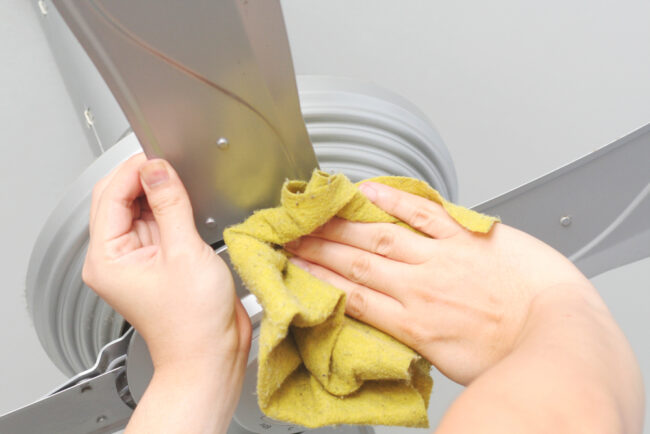
Just like every other surface of your home, your ceiling fan collects dust over time. This is especially true if your fan sits idle over the winter months, but even a fan that’s on 24/7 will get dirty over time. 

Take a damp rag and wipe down your ceiling fan, starting from the top. Be sure to wipe all sides and edges of the blades. If dirt was the culprit, you’ll notice right away that your fan is quieter once you’re done. 

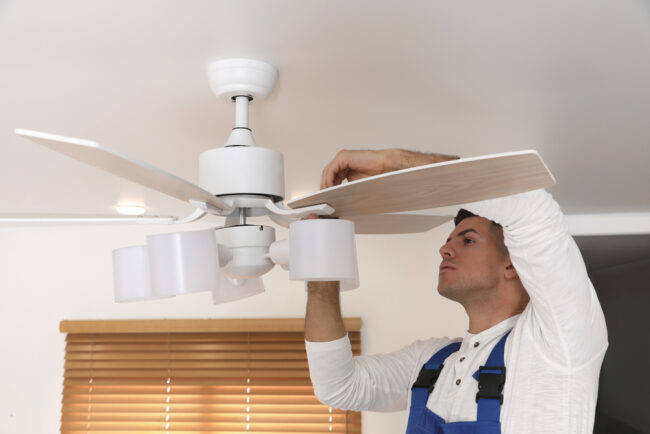
2. Problem: Damaged Blades

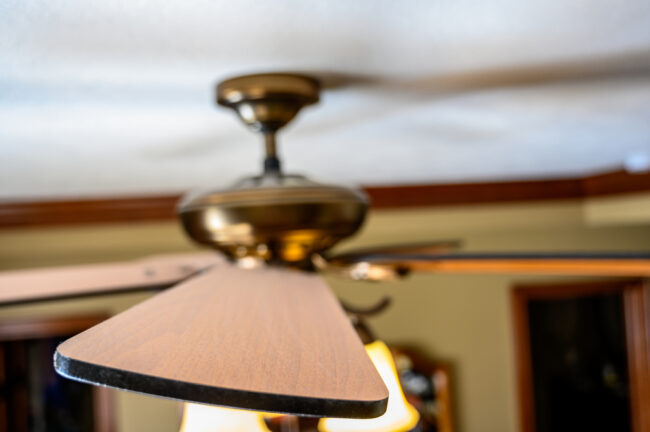
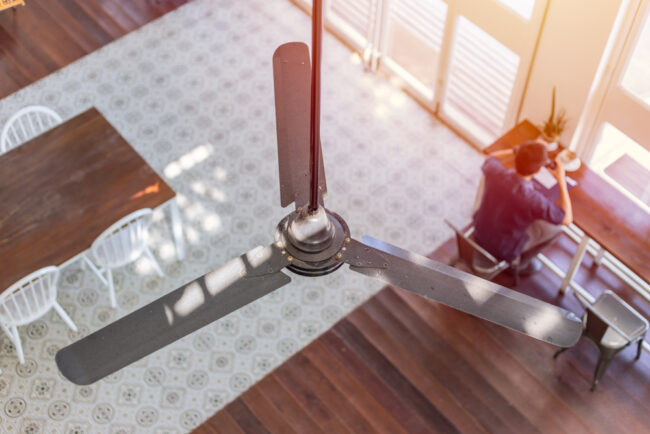
Over time, some fan blades may warp. This is especially true for fans that have blades made of cheap composite materials, fans in humid environments, and extra-wide fans. Look at each blade from the side – each blade should be tilted at the same angle and lay flat. If you find a blade that is bent or wavy, it could be throwing off the balance of your fan, causing it to wobble.

If you can, carefully bend the blade back into shape. If it’s not fixable, you may be able to order a replacement blade from the manufacturer. 

3. Problem: Loose Parts

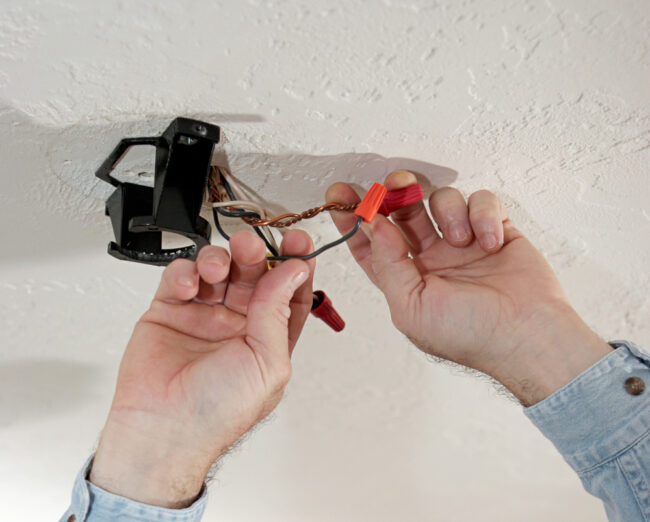
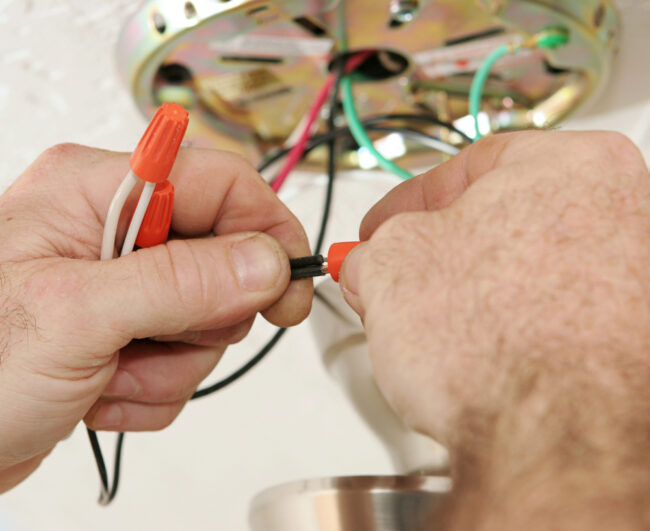
When your ceiling fan is in use there are a lot of moving parts, but if a part that shouldn’t be moving has come loose, you’ll hear a rattling sound. Thoroughly check your fan for loose screws. Common pieces that come loose include the canopy (the piece against the ceiling), the light kit (some fans may not have lights), and the fan blades.

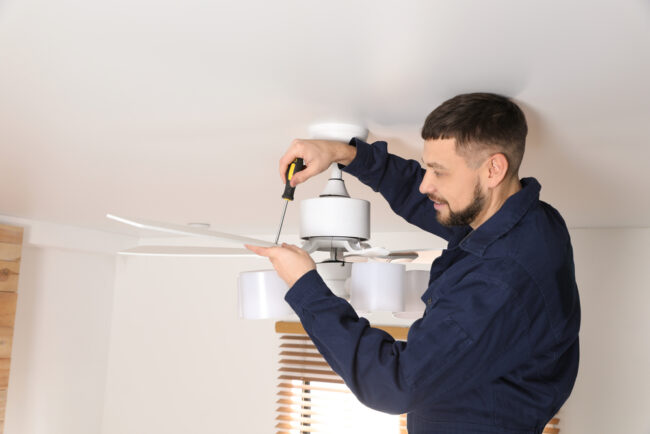
Using a screwdriver, carefully tighten each screw you can find. Be careful not to over-tighten any screws, as it could damage your fan. If your fan has parts that snap into place, like a light cover, make sure those parts are seated properly. 

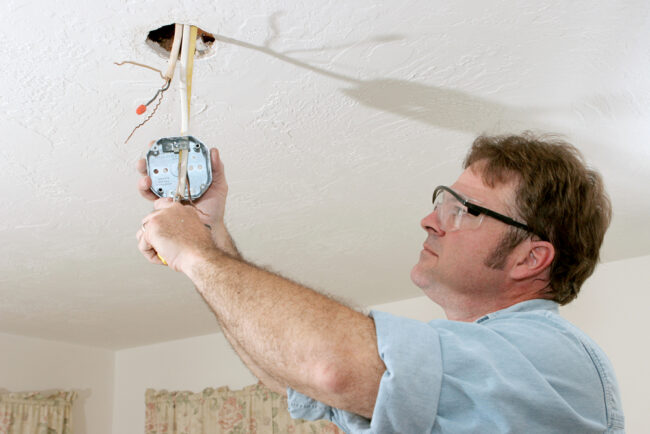
If you’ve checked all of the above and your fan still seems to be rattling or unstable, you may need to remove the canopy and double-check that the mounting screws attaching your fan to the ceiling are secure.

4. Problem: Grinding in the Motor

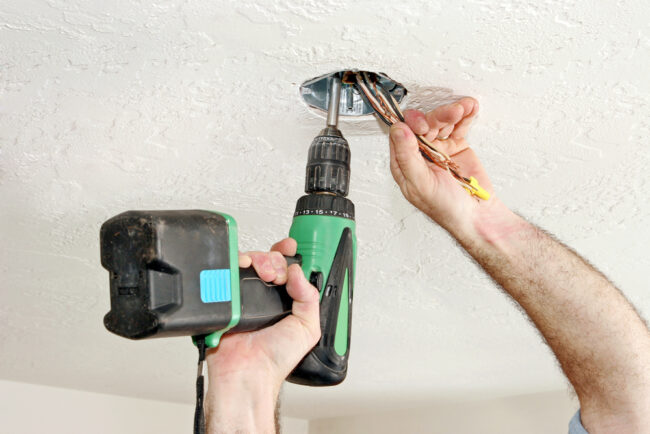
If the simple fixes above don’t resolve your noisy fan woes, it’s possible that the motor in your fan is running without sufficient oil. Ceiling fan motors and bearings need lubricant to run smoothly – without it, you may notice a sound that’s more like a buzz than a rattle. Each ceiling fan has different requirements for the proper way to add oil to the motor. We recommend checking your manufacturer’s user manual for specific instructions. 

If you’re not comfortable with taking your fan apart to get to the motor, this task might be a good place to bring in a professional.

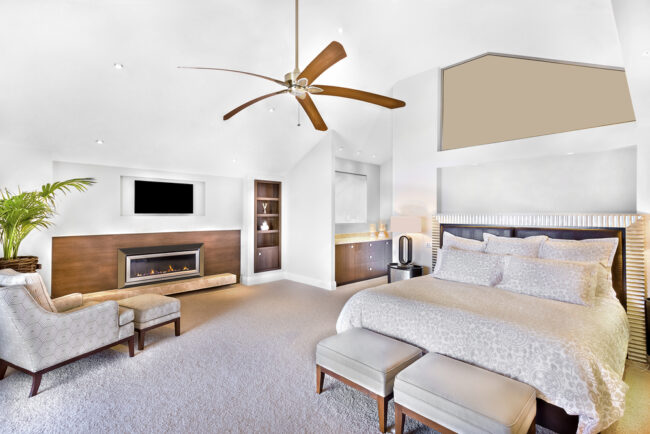
Turning on your ceiling fan on a hot day should be a dream come true, not your worst nightmare. The good news is – most noisy ceiling fans can be fixed with nothing more than a thorough cleaning and a checkup with a screwdriver. In less than an hour you can be back to enjoying a blissful breeze in the comfort of your home.

If your fan is still making noise after you’ve checked for dirt, loose parts, and damaged blades, and oiled the motor, it might be time for a new, quality ceiling fan that can keep you cool for years to come. 

Before you go out and buy the first fan you see – stop by our showroom and ask around. Our lighting experts can help you find what you’re looking for, and we guarantee that our fans won’t start squeaking at the first sign of a heatwave!

Filed Under: 2023, Ceiling Fans, Ceilings Lights

What to Expect When Visiting a Lighting Showroom

What to Expect When Visiting a Lighting Showroom

by admin · Apr 5, 2024

Have you ever purchased something online only to have it arrive looking very different than you expected it to, or it just didn’t look as good in your space as you thought it would? Have you ever purchased an item at the store based off the image on its packaging only to be disappointed by the poor quality once you got it home and unwrapped?

There’s no substitute for being able to see, touch, and try out an item before making a purchase. This is true for any purchase, but it’s especially important when you’re buying things for your home! Your home needs to be somewhere you’re comfortable and can feel relaxed – and good lighting is absolutely essential to creating that environment! 

Don’t leave your lighting purchases up to chance. If you’ve never been to a lighting showroom before, here are a few things you can expect to happen on your next visit. 

Huge Selection of Quality Fixtures

When you shop online, it can be overwhelming and frustrating trying to sort through all of the options to find something you like, and it’s always a gamble as to whether it will look right once you get it. 

Lighting showrooms specialize in one thing: getting you the perfect light for your home. We have access to thousands of lighting options, and our lighting experts can help you sift through it all to find exactly what you need – without hours of frustrating internet searches. 

Showroom owners are choosy about what they’ll offer to customers, so you won’t have to worry about getting a dud. 

See Everything in Person

When buying light fixtures, you’re usually trying to set up an entire room with balanced needs. Unless you are a trained interior designer (and even if you are), it’s very difficult to gauge style, size, space, and balance just from a picture. 

Fixtures look really different when they’re off and on, and the way they cast light can change the feel of a space. It’s also hard to see small details and textures on finishes. Being able to see the light in person before buying can save you the headache of having to return a dark brown fixture you thought was black or a lantern that casts shadows you weren’t expecting. 

Personalized Expert Advice

Most DIY homeowners and interior designers know what it feels like to thoroughly research and still feel dissatisfied with the end result. It doesn’t matter how many how-to videos you watch – the person on the other end can’t give you personalized advice specific to your project. 

With something as crucial to your design as lighting, it’s a really good idea to check over design plans with an expert on the topic before you get started. 

When you stop in at our showroom, our lighting experts can teach you how to select the right bulbs for your needs, get the best light fixture for your money, and instruct you on proper installation, all as a regular part of your shopping experience. You won’t get that level of personalized expertise anywhere else!

Better Value for Your Money

Many believe that lighting showrooms charge “boutique” prices that are much higher than you’ll find online or at the hardware store. This simply isn’t true. When you visit a showroom, you’ll find that showrooms charge comparable prices to other fixture suppliers, and they have higher quality pieces.

———————-

Let’s Recap

When it really gets down to it, if you’re shopping online or at a hardware store, you’re gambling on quality and not getting the best value for your money. 

The next time you’re shopping for lighting, make sure you include a lighting showroom in your process. When you shop at a showroom, you can see what you’re buying before you take it home. When you factor in the free expert advice, the higher quality fixtures, and the time saved, you’re actually paying less to get exactly what you need for your home. 

———————-

Ready for your showroom experience? Check us out at Lit Living! 

Filed Under: 2022

How to Safely Install a Ceiling Fan

How to Safely Install a Ceiling Fan

by admin · Mar 29, 2024

Installing a new ceiling fan is a cheap way to save on energy costs all year without compromising on comfort. In the summer, ceiling fans cool down the house by creating a breeze. In the winter, they help circulate the heated air to warm the whole room evenly. 

Putting in a ceiling fan is a win-win for your comfort levels and your budget – and it’s a pretty simple DIY project for homeowners. Plan on giving yourself a few hours (depending on the type of fan and your experience level with lighting DIYs), and grab a friend that can help you hold things in place while you work.

If you’re buying a ceiling fan new, it should come with thorough installation instructions. We always recommend following those instructions exactly to be sure that your fan is installed safely and properly. If you’re installing a secondhand fan, you may be able to find the installation guide online by searching with the model number on the fan. Either way, we’ll walk you through the basic steps here so that you can prepare. 

1. Preparation

Before you break out your tool belt, make sure you have a good plan in place. There’s nothing worse than being in the middle of a project and realizing you don’t have everything you need to complete the task.

Tool Checklist

Before you take on a ceiling fan installation project, make sure you have all the tools you need so you don’t have to rush off to your local hardware store for a last-minute purchase. To install a ceiling fan you’ll need to have a:

  • Voltage Tester
  • Ladder
  • Measuring Tape
  • Screwdriver
  • Ceiling Fan-Rated Junction Box
  • Fan Brace
  • Wire-Cutter/Stripper
  • Light Bulbs
  • Globes/Shades if they aren’t included
  • An extra-long downrod if you’re installing on a sloped ceiling
  • Ceiling Fan and Kit

Choosing the Right Fan Size

Measure the room you’re working in before you start. Not all fans are created equal, so pick one that will fit. Use the following guidelines to help. 

  • For rooms smaller than 75 square feet (like bathrooms), pick a fan with blade spans of less than 36 inches.
  • Blade spans between 36 and 42 inches are ideal for rooms up to 144 square feet. 
  • A 44-inch span is perfect for rooms up to 225 square feet, like a dining room.
  • For rooms that are 225 square feet or larger (a large living room, for example), you’ll need a fan with a 50 to 54-inch blade span.
  • The more space between the ceiling and the fan, the better! The ideal ceiling fan height is 8-9 feet above the ground. 
  • If your ceiling is less than 8 feet, you’ll most likely need to install a flush-mount fan (no downrod).
  • High pitched ceilings typically require you to buy an extra-long downrod (so that the blades won’t hit the sloped ceiling), so check your ceiling height and angle before choosing your downrod.

Pro Tip: Once your fan is installed, the tips of the blades should be at least 30 inches from the walls, and the bottom edges of the blades should be at least 7 feet above the floor. 

Other Important Tips

  • Ceiling fans are heavy! They need to be anchored properly to an electric ceiling box designed to hold the weight of the fan. Inspect the electrical box to ensure it’s fan-rated. There should be an inscription on the box to indicate this. If it’s not, you’ll also need to purchase a fan box before you get started.
  • Check to make sure the light switch you’re using is wired appropriately for the fan. If it isn’t, you may need to call a professional to get the job done.
  • Check the ceiling joists for any wiring or plumbing pipes that may be in the way.
  • If you’re adding a new fan where one didn’t exist, check local building codes to determine if you need a permit.
  • Always check your installation guide for any additional requirements that are specific to your fan. For some expert help choosing the perfect fan for your space, give us a visit or a call and we’d be happy to help.

2. Safety

Now that you’re ready to begin, head out to your circuit breaker and turn the power off for the room where you’ll be installing your fan. Also, make sure all of the wall switches in the room are safely in the “off” position. Do not rely on a wall switch alone to protect you from electrical shock! Always use a voltage tester to be sure the power is off before handling wires.

Pro Tip: Place some electrical tape over the switches you’ve turned off on the circuit breaker. This will prevent anyone from switching it back on while you’re working.

3. Remove Your Old Fixture

Let’s get started! First, you’ll need to take down the existing fixture. Most fixtures have easy-to-find attachment points, like screws or twist-off caps. Remove accessories like light bulbs, shades to get down to the base of your fixture, then unscrew the base from the ceiling.

If you’re removing an existing ceiling fan, remove the light bulbs and globes first. Then, take down the light kit (if needed – some fans have them, some don’t). Unscrew and remove the fan blades next. At this point, you may need to enlist a helper as the full weight of the fan base and motor can be heavy. Pull off the canopy (metal cover at the base of the fan). The last step is to remove the mounting bracket with a screwdriver!

Once you have the base of your fixture dropped away from the ceiling, unscrew the wire nuts connecting it to the electrical box. Be sure to test the wires with your voltage tester first!

4. Install a Fan Box

Before you start, check your existing electrical box. If it isn’t rated to support the weight of your fan, you’ll need to install a new one. To see if your existing box is rated to hold a fan, just take a look at the label! If you can’t find a label, err on the side of caution and get a new one. 

You’ll have to do a little bit of homework here to figure out what will work best for your project. Fan boxes are easiest to install if you have open access, like in the attic or an unfinished ceiling. If you won’t have easy access you may need to widen your drywall hole a little, but you can usually find a brace that will slip through the existing hole. 

Take a look at your rafters to determine the best way to install your fan box. Fan boxes can be attached directly to the rafter with a side bracket. If your new fan won’t be right next to a rafter, look for a brace that will span the space between two rafters. These braces can be a little trickier to install through a small hole in the ceiling, but they’ll give you a lot more breathing room when it comes to getting your fan box in the right place. 

5. Install the Mounting Bracket

To secure the mounting bracket to the fan box, start by threading the wires through the mounting bracket. If the fan has a slide-on bracket, leave the bolts on the junction box, slide the bracket over the mounting hardware, and tighten the screws. For fans without a slide-on bracket, place the bracket over the mounting bolts that poke through the bracket. Then, secure it using the provided nuts. If your fan is a flush mount, pull the wiring through the canopy (the part that covers the wiring/mount bracket) and skip to step 7.

6. Install the Downrod

To set the downrod, you’ll want to find a flat work surface. Slip the canopy onto the downrod and pull the primary wires through the hollow downrod. Then, connect the downrod to the fan base. With the downrod and base assembled, attach the other end of the downrod to the mounting bracket. 

7. Wire the Fan

Next, it’s time to wire! Hang the downrod – or canopy, if you’re installing a flush mount fan – on the hook on the mounting bracket. If there isn’t a good place to hang it, phone a friend to hold the fan up for you to free up your hands while you connect the wires. 

Before you start, check to make sure all your wiring (and the wire nuts) will fit in the ceiling. Use your wire cutters to trim down any wires that won’t. This will also keep them from vibrating against the canopy when the fan is on. Use wire strippers to expose the copper of the wires on the new ends. 

Connect the corresponding wires using the provided wire nuts. Your installation guide will have a diagram to follow, but, generally speaking, the fan’s green wire connects to the ground wire, the fan’s black motor wire connects to the black supply wire, and the fan’s white wire connects to the white (or neutral) supply wire. 

Double-check your work against the diagram, then gently push the wires into the junction box. Lift the fan into position, then clip it to the mounting bracket and secure the screws.

Pro Tip: Some fans come with additional wires for extra features, like having a separate switch for the light and fan. If your switches or wires don’t match the diagram, you might need to check in with an electrician or a lighting specialist at our showroom to help you get things set up correctly.

8. Blades and Bulbs

Now it’s time to install the fan blades. Every fan is a little bit different – but most fans will have an arm or bracket that you’ll need to attach to the blade and then to the base using a screwdriver. Some fans have quick-install blades that speed up the process using keyhole slots that slip over the fan’s mounting screws and lock into place with a little tug. 

Some fans have reversible blades – so make sure you’re checking each time that you have the correct side pointed down!

By now, you should be seeing the light at the end of the tunnel – so let’s install the bulbs! For fans with a light kit, refer to your guide to ensure everything goes in place correctly. Generally, you’ll just need to install the shades, globes, or light cover. If your fan did not come with bulbs, make sure the bulbs you install have the correct base type and wattage 

If your fan came with a remote, don’t forget to install the remote control holder!

9. Lights… Fan… Action!

Last, but not least, it’s time to test out your new ceiling fan! Go back to your circuit breaker and turn the power back on. Try switching your fan and lights on and off using the light switch or remote control. Test all of the speed settings to make sure your fan is secured properly and doesn’t wobble or rattle.

Most of the time, installing a ceiling fan is a pretty straightforward DIY project. Occasionally, an odd issue can crop up due to things like old wiring. If you run into any trouble, be sure to give us a call right away, or call an electrician that can help you troubleshoot the issue.

—

Congratulations DIY master! Now that you’ve successfully installed your new ceiling fan, get ready for a fresh breeze to blow your way–and some savings too. With all that extra cash blowing around, come visit us and we’ll help get you started on your next project. 

—————————-

DISCLAIMER: Be sure to follow all the manufacturer’s installation instructions and take all recommended safety precautions. Check before installing to see if you need a permit and be sure all building and electrical codes are observed. If you have any questions or are unsure about installing the fan yourself, contact a licensed electrician or Lit Living for more help.

Filed Under: 2023, Ceiling Fans, Ceiling Lights, How to, Informational, Wellness & Safety

How to Use Patterns and Textures in Every Room of Your Home to Personalize Your Space

How to Use Patterns and Textures in Every Room of Your Home to Personalize Your Space

by admin · Mar 22, 2024

Interior design trends seem to cycle back and forth every five to ten years. And right on cue, after a long stretch of neutral minimalism, maxalimist living has taken designers and influencers by storm!

The rise of maximalist design doesn’t mean you have to redo your entire home. But it gives you an excellent opportunity to touch up your existing space with bold patterns.

We’ll give you top ideas for incorporating patterns for any design aesthetic throughout your home! Then you can adapt these tips to your own style, budget, and space.

Kitchen

Your kitchen is the heart of the home, and so the style influences here will change how the rest of the house feels. 

So if you’re ready to change up the balance of your white cabinets and walls, try a few of these tips:

  • Custom backsplash: An easy way to increase the function and design of your home is by installing a backsplash that matches your unique style. With endless tile options, you can create a minimalist pattern or a loud mosaic impact with bright colors.
  • Runner rugs: Tired of aching feet and a crumby floor? Runner rugs make your home safer, cleaner, and prettier. Line your floors with patterned rugs to add dimension and enjoyment to your dinner prep.
  • Display plates and dishes: The shift to a more maximalist design includes incorporating personal touches to your decor. So display your inherited china or thrifted dishes for another layer of patterns and history.
  • Island pendants: Create a final dimension of patterns with light! Your pendant shades can create shadows, new colors, or bright spotlights to increase the variety of your home.

Bathroom

Bathrooms are often a tricky space to decorate– you want to enjoy your space, but you usually don’t have room to embellish much. With a little creativity (and courage) you can pack a punch with some washroom-approved patterns. 

Try adding some layers by updating your:

  • Wallpaper: Make an impact without taking up needed space with wallpaper. Add natural neutrals, bold art deco, or geometric modern to immediately glow up the area.
  • Tile work: Bathrooms offer so many opportunities to use tile. Redo your countertop, create a backsplash, touch up the floor, or renovate your tub and shower!
  • Vanity lights: The lighting around your mirror is another way to play with patterns. Whether it’s a custom shade or a unique number of lights, it’s another valuable investment that will significantly impact your bathroom. 
  • Textiles: Incorporate your towels, washcloths, and rugs into your design to save space and add beauty. Using contrasting colors and patterns, you can use these textiles as an accent layer in your design.

Hallways

Your hallways are a tricky spot– not much light, wall space, or floor space is available to show your personality. But these small, narrow spaces are a great place to incorporate some maximalist colors and patterns.

Some space-saving, high-impact design tips include: 

  • Sconces: Create a new rhythm for your hall by spacing out wall sconces along the way. You can add beauty and light to any hall, from DIY peel-and-stick to professionally installed hard-wired options.
  • Textured walls: Add interest to your walls with custom board and batten or wood strips. It’s easy to customize, install, and match to any color scheme.
  • Runners: Protect high-traffic walkways with a runner rug! You’ll extend the life of your wood or carpet floors and add another layer of color and exciting patterns.
  • Eclectic gallery: While most hallways don’t have much open wall, an eclectic gallery can fit the smallest spaces. You’ll add color, personality, and pattern with a few frames tucked between doorways!

Bedrooms

Your family bedrooms are a great place to match your unique personality. While the rest of the house may stick to one theme, this private space can be anything you want.

We recommend playing with:

  • Curtains: Layer curtains for a custom layout and better sleep. Blackout curtains usually have less design variety, but you can layer them with patterned sheer curtains for a daytime set.
  • Accent walls: Create the perfect focal point for your personal domain with wallpaper or use wood planks in a custom design.
  • Bedding: Use a floral, geometric, or playful bedspread to display your personality. Or, if you like to change your look often, use a white bedspread and rotate patterned throws throughout the year.
  • String lights: Create soft light patterns by stringing fairy lights around your room. For an added layer, swap fairy lights for color-changing LEDs!

Dining Room

Whether your dining area is a dedicated room or a nook off the kitchen, it should be defined as a separate space. Then you can leave the work of food preparation stress in the kitchen and switch to relaxation and connection as you eat. 

Define the space by:

  • Distinct wall treatments: Change the mood by using different colors and shapes for your dining walls. Patterned wallpaper is an easy way to get a professional finish without detailed work!
  • A bold divider: If your dining room shares the space with your kitchen, add texture and pattern with a wall divider. From eclectic to traditional, you’re sure to find the right touch for your space.
  • Unique lighting: Signal a mood change with your lighting choices. Using a different style of pendant or chandelier from the kitchen will disrupt the food-making pattern.
  • Playing with upholstery: Use a table runner, placemats, or statement upholstered chairs for an added layer of personality.

Living Room

From hosting parties to a quiet movie night, your living room provides a comfortable space to relax and enjoy. But relaxation doesn’t mean it has to be quietly predictable. 

Try some of these tips to maximize design in your shared “unwind” space:

  • Wallpaper the ceiling: Do a unique riff on traditional wallpaper by wallpapering the ceiling. You’ll create interest by adding pattern and color to an ordinarily neutral space.
  • Change neutral patterns with colored LEDs: Prefer a neutral room but want to up the anti for parties? Then try color-changing LEDs to turn your neutral wallpaper into something bright and playful.
  • Swap pillow covers: Even in the most neutral space, you can add pattern and dimension with new pillow covers. Corduroy, leather stripes, or soft florals will make your sofas look brand new.
  • Layer rugs: Layering rugs is a new standard for luxe-looking living rooms. You can keep it simple with a muted border or play up the patterns with a modern geometric display.

Home Office

More people than ever have a dedicated work space from home– but have you taken the time to craft a space that works best for you and your tastes? 

Create interest in your Zoom meetings (without lagging virtual backgrounds) with some of these tips:

  • Accent wall for the camera: Show your personality to your coworkers and clients with a beautiful accent wall in sight of your camera. It will beat your cubical or office walls anyways!
  • Interesting lamp shades: Create shadow or color with a unique lamp shade. You’ll improve visibility and do better work, too!
  • Computer mat: Keep your workspace clean, organized, and attractive with a patterned laptop mat. You can cover your entire desk for a comprehensive update or accent your space with a keyboard-sized mat.
  • Reading chairs: Add flavor to your room with an accent reading chair or two. Reading chairs offer an excellent opportunity to introduce new patterns to the room without going overboard.

After years of minimalist, copy-paste interior design, it’s time to breathe new personality and individualism into our homes with some playful patterns. Go for whatever suits you best. You keep your minimalist aesthetic and introduce a few subtle patterns and textures. Or, you can go all in on a complete redesign and bring bold, beautiful patterns and colors throughout your home! 

Whatever your style, there are endless ways to incorporate patterns and embrace your favorite designs.

Need Help?

Proper lighting is essential to a fully functioning home– but it can be challenging to nail balanced brightness, great fixtures, and a budget! Contact the experts at Lit Living for advice on your project!


Filed Under: 2023, Bathroom Lights, Ceiling Lights, Lamps, LED Lights, Styles & Trends, Styles and Trends, Wall Lights

3 Things You Need to Know About Recessed Lighting

3 Things You Need to Know About Recessed Lighting

by admin · Mar 15, 2024

Recessed lights can radically change the way your home looks and feels. Done right, they can bathe your space in soft light, highlight special features, and help you set the right mood. Done wrong, they turn your ceiling into a polka-dotted nightmare of harsh spotlights and awkward shadows. So, how do you get it right? 

We’ve put together three of our top expert recessed lighting tips based on our years of experience in the lighting industry to help you get it just right! 

Installation Know-How

If you’re building or remodeling, now’s the best time to be thinking about recessed lights. Recessed lights are easiest to install during construction. With the walls opened up, it’s not a big deal for an electrician to run the necessary wires and mount the lights. 

If your home is already finished and you’re really not ready to tear out the ceiling, don’t despair! The recessed lighting industry makes a whole line of specialty lights designed for non-intrusive updates. Look for lights that say retro-fit in the product description – this means they can be more easily installed in an existing ceiling. Canless recessed lights are ultra-thin (the same thickness as your ceiling’s drywall), which makes installing them the most DIY-friendly option for homeowners.

Placement is Paramount

One of the most common mistakes homeowners make when installing recessed lights is poor placement. Your recessed lights should wash your walls, not just the floor, with light. If your walls aren’t properly lit, your room will feel dim and dull no matter how your lights are installed. 


Wall washing spreads soft light evenly across a wall, and it will make your room feel bigger and more open. For example: the recessed lights in the image below (see upper left) cast soft light across the entire wall, which makes the room feel larger and brighter.

A close cousin, wall grazing (as seen below), occurs when recessed lights are placed close to the wall and the cone of light casts harsh lines of light and shadow. This is typically done to accent a design feature, not to provide ambient lighting for a room.

Wall washing is usually the goal in residential applications – it’s a good idea to talk to a lighting expert before you get ready to install to make sure you get them at the right distance from the wall.

A grid of soft white lights will give off a comfortable, all-over light, which is perfect for large rooms, but it’s not one-size-fits-all for every space in your home. Areas where you work, like your kitchen, should have more focused task lighting over countertops and work surfaces. 

Quick Tip: Space recessed lights away from ceiling fan blades or you’ll end up with a subtle strobing effect when both are on. Also, avoid placing bright lights directly over a seating area so that your guests won’t feel like they’re under a spotlight.


Zones and Dimmer Switches

Your lighting plan will be most effective if you can create zones based on how you use your space. Large spaces and multi-purpose rooms have different lighting needs throughout the space. If you strategically wire these areas independently, they can work together to give you more control over the way your room works for you. 

For example, a living room may have a row of wall-washing lights around the perimeter, a central grid of ambient lights, and a couple of spotlight lights to highlight a feature fireplace or some artwork. If each of these zones can be adjusted independently, you can transition a bright morning workspace to a cozy evening entertaining space with ease. 

Wherever possible, install each zone with a dimmer switch. Being able to adjust the intensity of light in your space is an essential part of creating the right mood. An added benefit of dimmable lights is that they last longer when not used at full power, so you can extend the life of your bulbs and entertain houseguests at the same time!

Installing recessed lighting is no small task, but it doesn’t have to be a big pain in the neck. Whether you’re a D.I.Y.er needing a few pointers, or if M.O.D.I.F.Y. is more your speed (Make Others Do It For You), we can help you find exactly what you need to get it done. Give us a call or stop by our showroom today!


Filed Under: 2022, Recessed Lighting

How to Safely Replace A Ceiling Light

How to Safely Replace A Ceiling Light

by admin · Mar 8, 2024

Ceiling lights are a must-have feature in any room. Whether you don’t like the previous homeowner’s taste or you’re just ready for an update, ceiling lights can revitalize your home space. It may be even easier than you think–just follow these steps to safely switch out those old light fixtures for a new look.

What you’ll need:

  • Screwdriver
  • Step ladder
  • Voltage detector 

You may also need:

  • Wire cutters
  • Wire strippers
  • Pliers
  • Painter’s tape
  • An extra set of hands 

Part 1: Remove Old Fixture

Step 1: Turn off power

Shutting off the electricity is important to your safety. Locate the switchboard for the room you are working in and flip the switch. If you’re not sure where the switchboard is, check the basement or garage. It might also be in the front of the house or near the entrance.

Once you’ve flipped the switch for the room with the ceiling light, go back into the room and flip the switch a few times to make sure the power is off. Then, leave the light switch in the off position. Make sure you lock the circuit box or leave a note indicating that you are working. 

Step 2: Remove cover and bulbs

Use a stable step ladder to reach your ceiling light. Hold the cover, or the visible, outside piece of the light fixture, in place with one hand. Loosen the screws with a screwdriver in the other. (For heavy or large fixtures, it’s best to have someone else hold on while you work on the screws.

Once the cover is removed, unscrew the light bulbs and set them aside.

Step 3: Lower the fixture base

With the cover removed, you will be able to see the base–the part of the light fixture that attaches directly to the ceiling. Typically, the base will have tabs or nuts and screws securing it. Loosen the nuts or screws, then lower the base to access the wiring (In the rare case you’re unable to find the screws, search for the installation manual online. You can also take a picture of your base and bring it into our showroom – we’ll take a look and help you figure it out!)

Until you have disconnected the wiring, you will want to lower the base but not remove it completely—an easy way to do this is by securing it with painter’s tape or having someone else hold it in place.

Step 4: Disconnect the wires

Once you have uncovered the space behind the old light fixture, there should be a junction box where wires are connected and stored. Start by removing the caps or tape covering the wire connections. The caps will come off when twisted counterclockwise.

 Pro Tip: Take a picture beforehand so you can remember exactly how everything was put together. 

Part 2: Connect the Wiring

Step 1: Test voltage

Test each exposed wire by touching it with the tip of your voltage detector. 

If the voltage detector lights up, there is a current running through, and the wire is unsafe to touch. Double-check your circuit box and ensure the switch is still flipped. 

Once you’re sure there is no electrical current, you are safe to continue working with the wires.

Untangle the wires and detach the fixture from the ceiling completely. Either hand off to someone below or carefully carry it down the ladder.

Step 2: Check wires

Frayed wires can be hazardous -if there is any fraying on the end of the wires, trim them down with wire cutters. Then, strip off any insulation on the outside with wire strippers. You only need to strip about ½ inch of insulation for the wire connection.

Pro Tip: Check your new fixture’s installation recommendations carefully. If you’re installing a heavy fixture such as a ceiling fan or chandelier, you may also need to install an additional support in the ceiling. 

Step 3: Match and Attach

Electrical wires are color-coded. Black or red are hot wires, white is neutral, and green or bare copper are ground wires. A grounding wire sometimes connects to a grounding screw instead of another wire. Look for a matching wire in your ceiling for each wire in your fixture.

Twist together each matching wire. Either by hand or with pliers, hold the exposed ends side by side with one hand and twist with the other. (This is where your picture of the original fixture’s wiring comes in handy.)

Now that the wires are connected, it’s important to cover the exposed ends again. Screw the wire caps on by twisting clockwise over the connected ends until they hold the wires tightly in place. If your original fixture didn’t have wire caps, you can use electrical tape as well.

Make sure to check the owner’s manual for specific instructions—for example, you might have an extra red wire that connects to a black wire. If you don’t have any instructions, generally you will be fine with just matching the correct wire colors.

Part 3: Install New Fixture

Step 1: Replace junction box

With all your wiring safe and sound, the junction box is ready to be put back into place. Tighten the screws securely against the bracket until  Fold the wires up into the box so they will be hidden behind the ceiling light.

Step 2: Attach new fixture

There are several different ways your new light fixture base could attach to the ceiling—these are the most common ways. As always, check the owner’s manual for anything specific or unique about your light.

Securely attach the light base by positioning it over the mounting screws. Place a metal nut on each screw and twist by hand until they are tightly holding the base in place.

If the fixture has a mounting bracket, connect the mounting bracket to the junction box first, then hang the base over the screws.

If it’s a keyhole shape, adjust the base so the screws slide into the smaller grooves and then tighten the screws with a screwdriver until they are holding the base securely.

Step 3: Install light bulbs

Now that your base is set, it’s time to add the light bulbs. Make sure you have the correct wattage—the fixture typically indicates its maximum wattage on the package or owner’s manual. 

When choosing which bulbs to use, the lower the wattage the safer. Most light fixtures are safe with up to 60 watt incandescent bulbs. You may also want to consider more eco-friendly choices, such as CFL or LED bulbs. These options have lower wattage but produce the same amount of lighting, saving you money on electricity in the long run.  

Test the bulbs by turning the electricity back on—flip the switch on the circuit breaker then turn on the room light switch. If it is flickering, dim, or not turning on at all, turn the electricity off again and check everything—look for loose connections or mismatched wires. If your lights are bright and solid, you are ready for the final step.

Step 5: Attach cover

Flip the light switch and circuit breaker back off before installing anything else. Take your light fixture’s shade, cover, or top and climb back up the ladder. Attach it to the base by twisting screws or attaching pieces until everything is tight and secure. If it’s a hanging light, make sure it’s at the proper height before finishing your work. Every light has different connecting components, so check your owner’s manual and just make sure it’s snug.

And there you have it, your guide for installing a new, updated ceiling light. Now that you know how to install it, make sure to visit our showroom to choose the perfect fixture for your ceiling!

Filed Under: 2023, Buying Guides, Ceiling Lights, Styles and Trends, Wellness & Safety

2023 Interior Design Trend: Creating a Cozy House that Feels Like Home

2023 Interior Design Trend: Creating a Cozy House that Feels Like Home

by admin · Mar 1, 2024

It’s 2023 and this is your wake-up call! Your home needs you – it’s ready for a refresh! This year, we’re all looking for a respite from the stress that always seems to work its way in. Designing a comfortable home will make you feel the extra happiness and productivity you’ve been in desperate need of. These 3 expert tips will make your home a haven you’ll be itching to get back to at the end of the day!

1. Choose a Soft Color Palette

It’s no secret that colors have a huge effect on your mood and the feel of a room. These rooms knock the color palette out of the park without sacrificing personal style or comfort. Achieving a soft color palette doesn’t have to be difficult – go with neutrals, a pop of color, or choose a monochromatic color scheme and you’re set!

Neutrals

A neutral color palette seems like an obvious choice when you’re going for comfort, but it can be tough to pull off – without color, other elements like texture or shapes will have to do the heavy lifting.

The heavyweight champions here are definitely the plants! Adding some green to an otherwise neutral-heavy space brings some life and vibrance without destroying the tranquility you desperately need. Finishing this look with a variety of textures and shapes from the hard wood edges to the pair of round tables to the woven area rug makes this space feel comfortable, creative, and cozy.

This neutral bedroom incorporates beige and white with black accents to ground the space. The night stands with pendants hanging above elevate the space, giving you lighting and a gorgeous focal point! We love how this space feels lived-in without looking cluttery. With neutral tones, the soft textures of the rug and blankets are what make this room feel comfortable and cozy.

Picking a neutral color palette for this sitting area really make the shapes shine. We love how arches are carried throughout the design from the furniture to the architecture. This chair looks like a cloud and with the gorgeous light above it, anyone sitting here would feel like they’re in the heavens!

Pop of Color

A cozy home doesn’t have to be colorless! If neutrals don’t speak to you, try mixing them with a pop of color. It’ll give your room some excitement, but not so much that it’ll feel busy or chaotic.

This living room took a bold color and ran with it. The navy blue is a stunning contrast to this cozy tan leather couch. If we could copy and paste this look into our homes, we would! The neutrals pop against the accent wall and we couldn’t be more obsessed.

These red velvet pillows and drapes contrast with the neutral room and bring in some cozy texture. The bright colors spice up what might otherwise feel like a bland living room.

Monochromatic 

Choosing a monochromatic color scheme is a 2023 trend we love. It’s bold, but still soft. In a true monochromatic space, there isn’t extra visual stimuli for your brain to process. This gives your brain a sense of peace and calm you may not feel in a room with more going on in terms of color. These rooms use a simple color palette and the effect is cozy with a touch of elegance. 

Green is one of the most soothing colors. It can bring a sense of peace and harmony to your home. This couch and wall combo is no exception! Choosing to pair them with beautiful browns makes this sitting room look like it was plucked straight from nature, then given a facelift.

This kitchen uses the monochromatic color scheme to make it look bigger than it is. We especially love that extra wood cabinet with accent lighting both for functionality to store more and for decorative purposes. The calming blues make this a space you’d want to do some stress-baking in!

2. Add Soft Textures

Texture is a vital tool in an expert’s tool belt, especially when comfort is your end-goal. A space can be gorgeous, but if it feels like a place your grandma will yell at you for touching anything in, it won’t really feel comfortable. Texture is what takes a space from formal and austere to a beautiful, cozy space you can actually live in.

There’s no question this bedroom is gorgeous, but it also feels like a space you could spend time in without completely messing it up. The intentionally unkempt linens on this corner of the bed add simulated texture that makes it feel like home. We also love the green velvet accent pillow and floor pillows for an extra cozy touch! A lamp and pendant allows you to have dimmer or brighter lighting to accommodate your changing needs.

There is no world where a chunky-knit blanket and lots of pillows won’t scream comfort. The touches of fur on the rug and the side bench give it an extra dose of coziness. Anyone would love to curl up and hibernate here all winter! Light a few candles in the lanterns and switch on the pendant for the perfect reading spot at night.

This feminine bedroom is a corner of paradise! The colors are soft and gorgeous, but the textures are what really make this space magical. The velvet headboard brings delicate softness to the space. The textured pouf and cane-detailed night stand here are working overtime – and they should get paid for it! They bring elements of texture and give some seating and storage space. The blanket and soft rug are the finishing touches that would have anyone making excuses to retreat here for peace and quiet.

3. Soften Your Lighting

Harsh lighting is the opposite of comfortable! It’ll leave you with a headache and can actually make it harder for you to sleep at night. To bring in some much-needed comfort, you’ll need to soften up your lighting. In a room with soft lighting, the transition from light to dark is gradual and easy on the eyes. Avoid harsh shadows and balance your lights out using these three tips and your eyes and mood will thank you!

Dimmable Lighting

Switching to dimmable lights is a relatively simple way to soften your lights and make your lighting customizable. This cozy room is the perfect place to recharge your batteries. Dim the lights 2 hours before bed to help yourself sleep better, then brighten them in the morning to jump start your mood and your day!

Layer Your Lights

Layering your lighting is a fool-proof way to give you adjustable light. Every room in your house should have at least a few light sources to make it feel more comfortable and eliminate any dark corners. Adding a few lamps across a room and some pendants will give you flexibility to have more or less light depending on your need and mood.

Accent Lighting

Accent lights are the finishing touches that make a room feel complete. They’re the piping on top of the icing on the cake! Adding them makes a room instantly feel warmer and more comfortable. Plus, they soften up your lighting by eliminating harsh shadows in areas that might otherwise go overlooked. Put sconces on an empty wall, strip lighting under cabinets like in this kitchen, or pendants above conversation areas. A room with warm, balanced lighting is a guaranteed ticket to having the relaxing ambiance you need for comfort.

—

Listen, it’s 2023 and it’s time you started living your life in comfort! Choosing to design a cozy home is about more than just aesthetics. It’s about overall wellness! You deserve to live in a home you love, so it’s time to get started. With a little inspiration, the expert tips above, and help from All-Phaseyou’ll be set! Give us a call and we’ll help you soften your lighting and give your home the extra relaxing boost it needs.

Filed Under: 2023, Styles & Trends

« Previous Page
Next Page »

Copyright © 2025