• Skip to primary navigation
  • Skip to main content

All Phase TC

  • Buying Guides
  • Styles & Trends
    • Bathroom Lights
    • Ceiling Fans
    • Ceiling Lights
    • Lamps
    • LED Lights
    • Outdoor Lights
    • Smart Lights
    • Wall Lights
  • Wellness & Safety
  • Shop Products

admin

3 Top Mistakes in Outdoor Lighting and How to Avoid Them

3 Top Mistakes in Outdoor Lighting and How to Avoid Them

by admin · Mar 1, 2023

Your home’s outdoor lighting makes your home safe, creates mood lighting, displays your personality, and more! And while there are many excellent ways to light your home’s exterior, there are so many ways to make mistakes. 

Poor outdoor lighting might just make your home boring after sundown. But in other cases, improper outdoor lighting can create real hazards for your home!

We’re here to give you some advice from lighting experts. We’ll walk you through three of the most common outdoor lighting mistakes people make and how to avoid them. Then you’ll be able to safely enjoy your home at any time, in any season!

No More “Starry Night”

Have you ever looked outside in the countryside and noticed how many stars there are? Especially compared to when you’re strolling at night in the city? But, of course, it’s not because there are more stars in the countryside– it’s because all the city lights create significant light pollution. 

Light pollution refers to the interference of electric light with natural light, like stars and the moon. If you use too much outdoor lighting, you may unintentionally worsen your view of the night sky. 

Here are a few top ways to avoid putting out too much light and keep your nights starry:

  • Use motion sensors or automated timers. One way to reduce light pollution is to only have the lights on when you need them. By using motion sensors or timers, you can keep your electric light to a minimum without sacrificing safety or functionality.
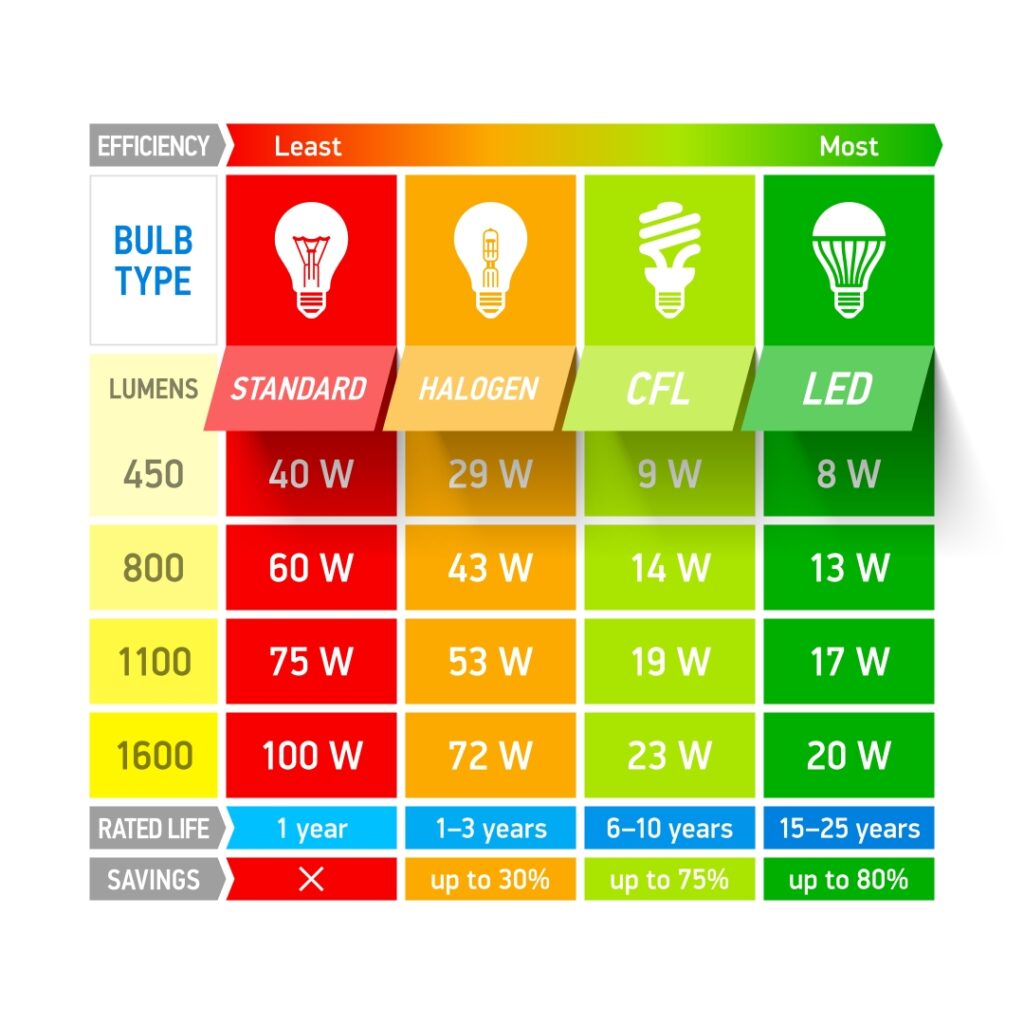
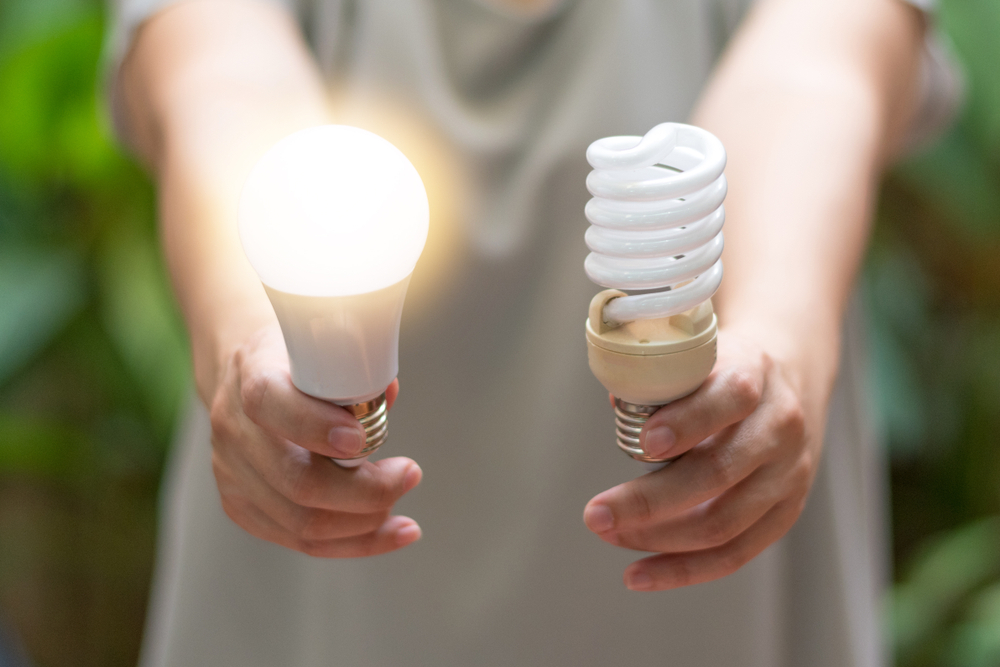
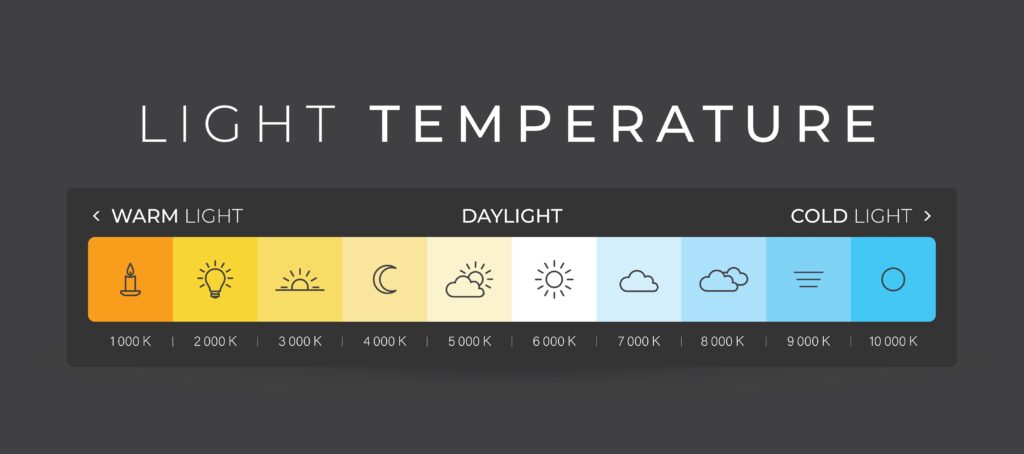
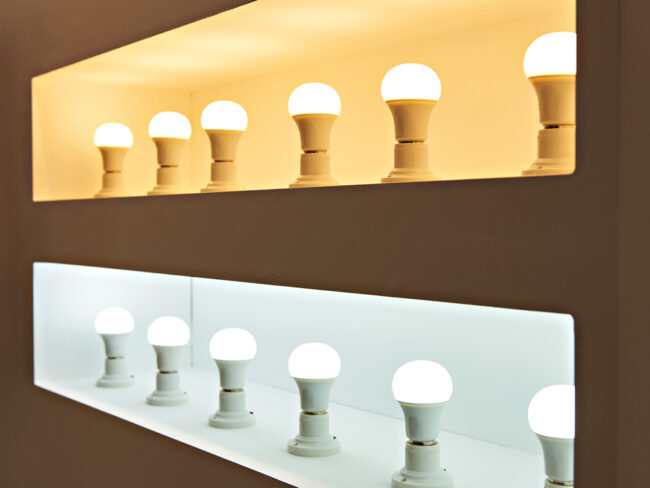
  • Keep your lights relatively warm and dim. Bright lights emit a higher frequency of light, which leads to greater light pollution. Think of cities and how all those signs and street lights cause a haze. So, warmer, dimmer lights, like solar path lights and fairy strings, will help clear the air. 
  • Use downlighting. Downlighting is an excellent lighting technique that focuses light beams toward the ground. Try using lampshade sconces or other fixtures that concentrate light in a single direction. This strategy will allow you to light your yard while keeping the starry sky bright.

Can’t Take the Heat… Or Rain

Outdoor light fixtures and wiring must withstand water, ice, snow, wind, and animals. But not all fixtures are up to the task! Some homeowners simply pick a fixture or bulb they like without checking for outdoor grading. Using indoor grade lighting may get damaged by rain and snow or be vulnerable to animal teeth. 

Carefully shop for fixtures and bulbs so you can balance your aesthetic with durable, quality equipment. When in doubt, try running over to your local light showroom for expert advice on a safe and beautiful home exterior.

Keep your outdoor lighting safe from the elements and pests:

  • Use only outdoor grade fixtures, bulbs, and wiring. Read all instructions carefully to ensure that you’re keeping yourself (and your outdoor lighting) covered!
  • Location, location, location. Pick strategic places for your lighting to reduce exposure and risk. For example, you can tuck them under eaves, keep them away from drainage routes, and leave lots of space between lights and trees.
  • Inspect lighting regularly and after significant weather. Check on your outdoor lighting at least once a year to see if you can find damage or wire exposure. It’s also a great idea to do a quick check if you have a severe storm!

Leaving Things “Plain Jane”

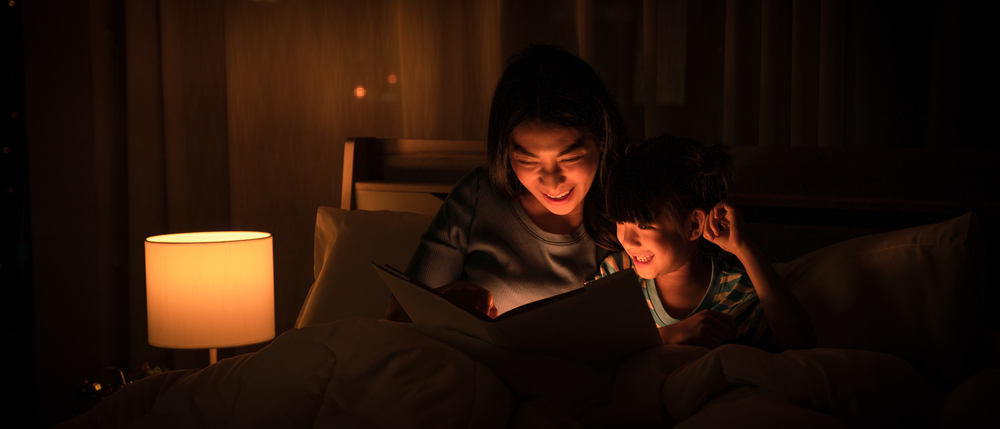
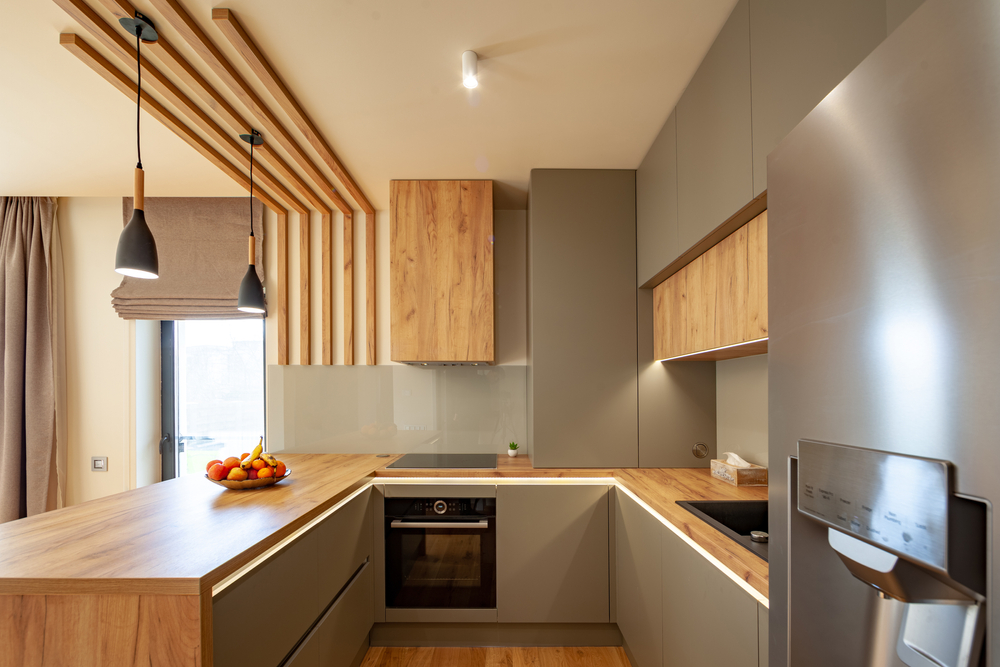
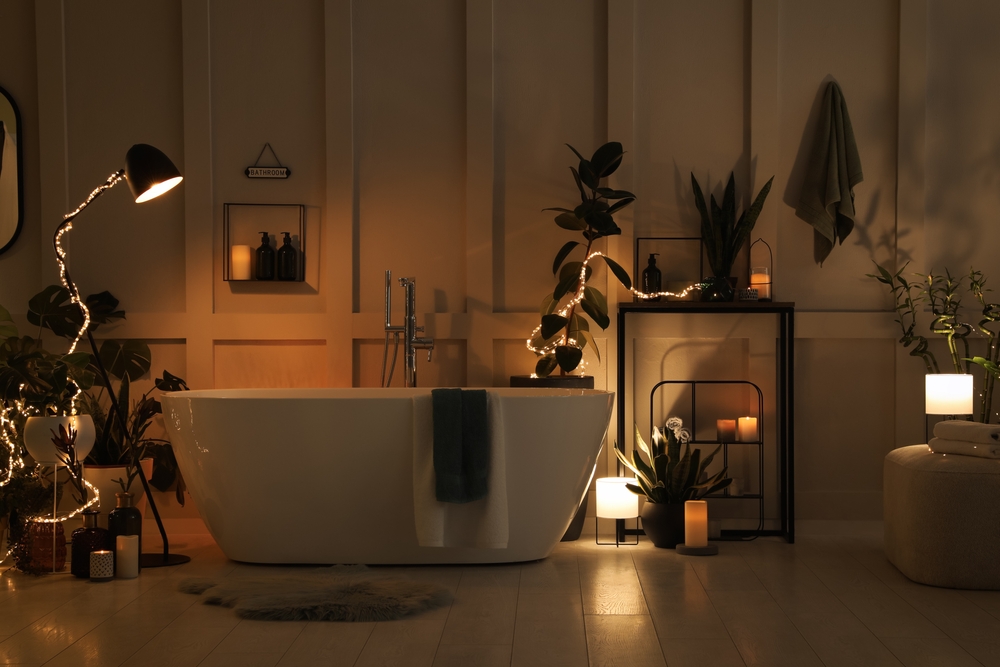
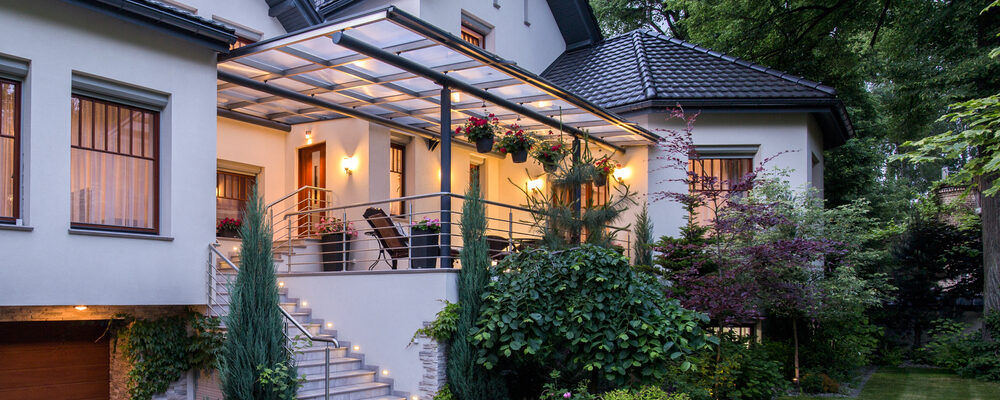
While the house in this picture seems beautiful, we’re not really sure because all of its features are hidden in the dark. But your home shouldn’t become “Plain Jane” just because the sun went down! That means you’ll need to add more lighting than what you’re getting with the house from the builder. 

Let your home’s personality shine around the clock by:

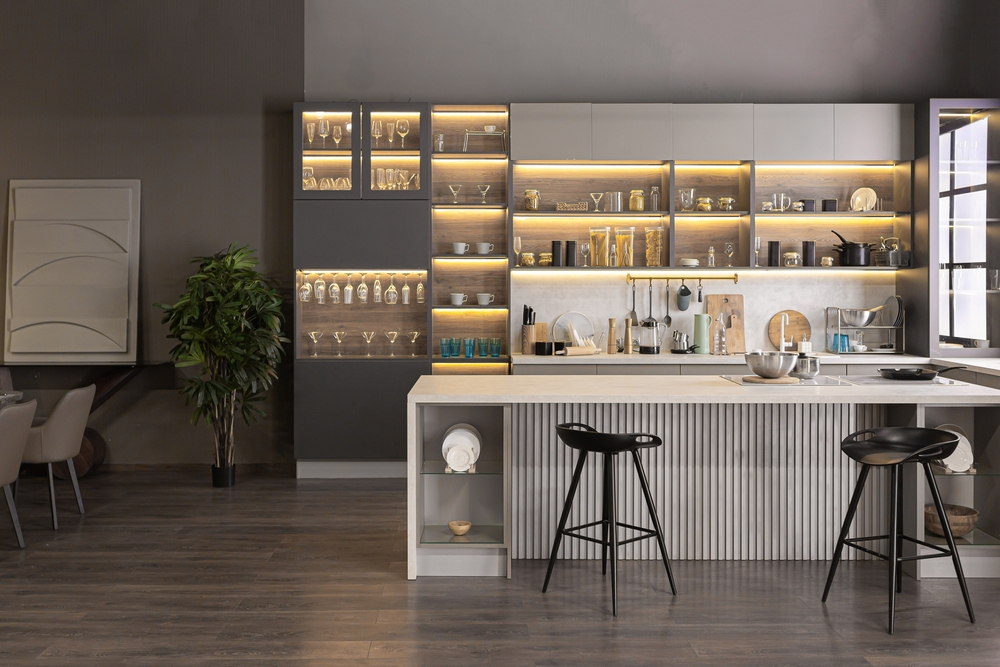
  • Using enough light sources. Interior design recommends using 5-7 light sources per room. You can use the same principle for your home’s exterior! Your standard porch and garage sconces will only cover half your lighting needs. Don’t want to install fixtures on your home? Try using ground light sources like LED pucks or ground lamps! 
  • Create a story. Lighting lets you say more about your style– are you classic, magical, or dramatic? What about luxurious, mysterious, or modern? The outdoor lighting you use will help you create a unique view of your home, even in cookie-cutter developments. 
  • Incorporate safety. Start with walkway lamps, lighting stairs, or highlighting danger zones like pools or ponds if you’re having trouble knowing where to begin your outdoor lighting upgrade. Then you’ll cover the essentials and add some personality too!

Special note: Dressing up your home with light often creates light pollution. So keep your balancing act in mind if you’re a regular star gazer, and ensure that you can easily control when your decorative lights are on. Your local lighting showroom is a great resource for tricks to balance opposing needs!

Need Help?

Proper lighting is essential to a fully functioning home– but it can be challenging to nail balanced brightness, great fixtures, and a budget! Contact the experts at Lit Living for advice on your project!


Filed Under: 2023, Styles & Trends

Step-by-Step Guide to Home Lighting Renovation

Step-by-Step Guide to Home Lighting Renovation

by admin · Feb 28, 2023

How to Plan, Prioritize, Budget, and Make it Happen

Updating the lighting in your home is one of the quickest ways to give your house a facelift. It’s easy to accidentally overspend on your house’s lighting if you don’t have the right information, but not to worry! With a few pro tips and some help from Lit Living, your home will feel brighter and look better – without breaking the bank.

1. Make a Plan

Before you start tearing lights out, pull up a chair and make a solid plan. When you’re on a budget, prioritizing which spaces need the most love is key. Look in each room and make sure all your spaces have multiple lighting sources to eliminate shadows and illuminate workspaces. 

Once you’ve done that, think about lighting focal points. Where do you want your lights to make the biggest impact? A few places to consider starting are: above the dining room table, in the living room, and in the bedrooms.

Pro tip: Make a list of all the fixtures you want in order of importance–it will come in handy later!

2. Evaluate Your Budget

Do your research and be realistic about your needs and wants. Knowing how much you can spend and being an informed buyer will help you make the most of your money and avoid overspending. 

Take a look at your budget and decide on two numbers – the amount you’d like to spend, and the highest amount you’re willing to spend. Then, put together some ballpark estimates for the fixtures you want. 

When you walk into the showroom prepared, you can put your money where it matters most!  It’ll also help us to know what price range you’re looking at to match you with the perfect fixture!

Pro tip: Don’t forget to include the costs of professional installation and light bulbs in your estimate! 

3. Prioritize Your Needs

If you’re renovating on a budget, ask yourself: Which light fixtures will make the biggest difference in my house? Remember that list of fixtures you made earlier? Pull it out and prepare to rearrange it. 

Prioritize fixtures that give off ambient, or full-room, light. Once you have those at the top of the list, move on to task lighting. Any workspaces will need additional lighting above them (kitchen counters, bathroom vanities, desks, etc.).

If you still have room in your budget, consider adding accent lighting to features in your home you want to highlight. Moving from general to specific will help you narrow your focus to what really matters, and light your house without running low on change.

4. Pick Your Fixtures

It’s easy to get sticker shock when you start looking at light fixtures. When you’re choosing lights for your renovation, you have two options: you can get a cheap fixture that will work for now, or you can get a quality fixture that will work for years. 

While there is a time and a place for inexpensive fixtures, just remember that buying lights that will stand the test of time will actually save you money in the long run. 

You also need to keep in mind how often you want to redecorate. Trendy fixtures will look outdated much faster than classic styles. If you don’t want to be repeating this process again in 5 years, get a classic, quality fixture that won’t need to be replaced when the fads change.

Pro Tip: Selling your old fixtures online can give you a little extra to put towards your next lighting purchase.

5. Remember the Bulbs

While LED lights cost a little more up front, they use at least 75% less energy, and they last up to 25 times longer than traditional light bulbs. To be sure you’ll see savings on your electrical bill, look for bulbs with the Energy Star rating logo on the packaging. 

Don’t make the mistake of buying bulbs that you’ll just have to replace in a few months! Be sure to work LED bulbs into your budget–we promise it’ll pay off!

6. Do It Yourself

One major cost of updating lighting is installation. In many cases, a handy homeowner with the help of a few Youtube tutorials can save money by doing it themselves. You may also consider installing some lights yourself and having others professionally installed–dropping a heavy chandelier would put a dent in your budget (and your floor)!

However, if you’re going to go this route, researching and implementing all the safety precautions is non-negotiable. Being well-educated can save you from causing a fire, burns, or other safety hazards.

If you’re unsure about doing it yourself, no worries. Just make sure to factor the professional help you need into your overall budget!

—

Updating and replacing lighting on a budget can feel like a daunting task, but with these tips and our expertise, you can’t go wrong! The step-by-step guide we made will help you have amazing lighting without feeling financially strapped.

If you get stuck on any of these steps, give us a call and we’d love to chat about solutions.

Filed Under: 2023, Styles & Trends

9 Ways to Upgrade Your Home with LEDs

9 Ways to Upgrade Your Home with LEDs

by admin · Feb 27, 2023

With their excellent energy efficiency, affordable price tags, and numerous customized options, LED light bulbs are quickly becoming the top choice for home lighting. Available in small bulbs and flexible strips, these microchip-powered wonders fill almost every need in your home– including some you didn’t even know you had!

So get ready to upgrade your home’s functionality and style! Here are nine ways using LED bulbs in your home can improve your home’s design, costs, comfort, and safety.  

1. Energy Efficient

LEDs are highly energy-efficient light sources because they create light with a microchip. With no gas or burning filament, they waste far less energy in heat production (not to mention much better customization in color, brightness, and temperature. But we’ll get to that later!) 

Unlike older bulbs, LED bulb packaging uses lumens instead of watts to tell you how bright they are. Watts measured the electricity needed for incandescent bulbs to glow, but lumens directly measure the amount of light a bulb gives off. The higher the lumens, the brighter the bulb.

But it’s not just the packaging that’s changed– your utility bill will decrease when you replace incandescent bulbs with LEDs. They use far less energy than incandescent bulbs to give off the same level of light, savings you’ll actually be able to see. 

2. Work with Most Light Fixtures

No matter your light fixture, there’s likely an LED bulb that’s a perfect match. LEDs come in a wide variety of standard-sized bulb sizes and shapes– so you can even use them in your candelabra chandelier! 

The only thing to watch out for is ventilation. LEDs are cool bulbs compared to incandescent and other traditional options, but they’re not entirely immune to overheating. So if you’re ever in doubt, give a local lighting expert a call and they’ll help you find the correct bulb.

3. Safer than Other Bulbs

LED bulbs are one of the safest ways to light your home– they produce minimal heat and use very little energy. They’re even safer than fluorescent bulbs, a top competitor for energy-saving lighting. Compact fluorescent bulbs, or CFLs, glow by passing an electrical current through mercury gas. So CFLs are a little risky in “accident-prone homes,” like homes with pets or small children.

On the other hand, LEDs glow using a microchip. In fact, LEDs don’t even need to use the glass bulb case– they’d be just as safe and contained without it! So if you want to increase your home safety while still being energy efficient, swap out your CFLs for LEDs.

4. Best Color Rendering Index (CRI)

Did you know that the way you see color depends heavily on the type of light shining on it? Stores and online product photos use great lighting to show their products at their best potential. But if you bring those products home in poor lighting, you may be surprised to find that it doesn’t look as great as they did before. It’s not always buyer’s remorse, though– sometimes it’s just bad lighting!

LEDs are one of the best on the color rendering index (CRI), meaning they show colors more accurately. Their light will be very close to the lighting in-store or in the product images, so it’s much more likely to look the same in your home as it did in the cart.

As a bonus, high CRI lighting is a huge help in places like your bathroom or closet. Accurate lighting can help you pick the right clothes and do your best makeup. No more surprises when you see yourself in the office mirror!

5. Dimmable

Dimmable bulbs are perfect for rooms with multiple functions. Take your living room, for example– during the day, you’ll want bright light as you move about your daily activities and tasks. But in the evening, you want your living room to be a soft, cozy space where you can relax and unwind. 

LEDs can come with dimmable capabilities, making them perfect solutions for bathrooms and bedrooms. They will also work with your existing dimmer switches and remotes. So simply swap out your old bulb, and you’re ready for a day-to-night lighting experience!

6. Vary in Temperature

A bulb’s light temperature refers to whether the light falls into cool (blue) or warm (red) light. Cool, blue light is in the same range as direct sunlight– it wakes you up and gets you focused. Warm light is similar to fire and candlelight and helps you to relax. Traditional bulbs were all warm light, but modern LEDs come in a wide variety of light temperatures.

How will knowing this improve your home, you ask? Our bodies work with a circadian rhythm– the natural cues to wake up with the sunrise and relax at sunset. But our modern life surrounds us with blue light well after sunset, eliminating the natural transition to red light before sleep. Choosing the right LED bulbs makes it easy to reintroduce the red light phase to your circadian rhythm. 

Opt for warm light bulbs in places where you relax at the end of the day (dining room, living room, bedroom, etc.), and it’ll help signal to your brain that it’s time to go to bed– making it easier to fall asleep at bedtime. Just don’t undo your brain’s relaxation by staring at your phone screen in bed afterward!

7. Smart Integrations

What’s a smart home without smart lighting? LED bulbs are a top smart home choice because they offer a wide range of stress-free customization.

This flexibility makes them a great choice to use on their own, but they’re also great options to use with your smart home setup. Set routines for lights to turn on and off and control settings from your phone on the go!

You can even create a habit with your smart home assistant to ”warm up” the temperature of your LEDs a few hours before bed. It’s a simple change that could significantly help your family rest better– and avoid the increased risk of depression, anxiety, and weight gain connected to regular poor sleep.

Remember, not every LED bulb is “smart,” so make sure you read the packaging to get the perfect addition to your smart setup!

8. Customize Color

LED stands for “light emitting diode”– big words to describe a glow from passing electricity through a microchip. Because of the way they work, many LED bulbs can change color, temperature, and brightness with the press of a button.

Color customization may seem like a party trick with little functional use. And while they are a great novelty at parties, color-changing lights can also help you wind down at night and reduce eye strain when watching TV or sitting in front of a computer monitor.

LEDs are excellent for creating bias lighting for your TV or computer. Bias lighting casts light on the wall surrounding your screen to help decrease the intensity of the image, making it easier on your eyes. It also increases the contrast of your screen, so you’ll get a better view without upgrading your tech!

9. Strip Lighting

A lesser-known use for LED lights in the home is strip lights. If you’re looking to make your home look and feel like a bespoke model home, these are the way to go. The best part– they’re inexpensive and simple to install. 

LED strip lights can be wired to a switch, but homeowners often opt for battery-powered or plug-in options for noninvasive installation. They typically come with either a remote or smart home integration capabilities. They’re also tiny, and since many come in a user-friendly peel-and-stick variety, they’ll fit just about anywhere! 

We recommend trying out LED strip lights in places like:

  • Kitchen Cabinets: Stash these inconspicuously under cabinets to make dinner prep easier and safer, or add them inside glass-fronted cabinets to turn your dishes into art! You can also place them under the toe-kick to light those late-night snack runs.
  • Stairways: Make your evening bathroom trip safer by lining your stairs with light. Don’t want to see them? Try tucking them underneath the handrail!
  • Closets and Shelves: Want to turn your dark closet into an elegant dressing room? LED strip lighting will elevate your closet without any structural changes. Add them to the top of shelves, above your shoes, or around the top edges of your walls – they’ll go anywhere you need more light.
  • Bedroom Mood Lighting: String a few LEDs around your walls and change the color  or brightness of your entire room without lifting a paintbrush– a very popular DIY for teenagers and social media creators
  • Bathroom GlowUp: Stash a few LEDs under bathroom cabinets for a toe-kick touch of luxury and soft lighting. Or use around your mirrors for true lighting during your daily skincare routine!

The Possibilities are Endless

LED bulbs and strips are small, easy to install, and can fit just about anywhere. Whether you’re swapping out all of your home’s bulbs or just adding custom lighting to your favorite spaces, LEDs can give you that luxury feel without breaking the bank. And when you factor in their energy efficiency, customization applications, health benefits, and smart home applications, it’s easy to see why LED bulbs are the swiss army knife for home lighting needs.

Proper lighting is essential to a fully functioning home– but it can be challenging to nail the balance between light levels, fixture designs, and a budget! For your next project, contact the experts at Lit Living.

Filed Under: 2023, LED, LED Lights, Styles & Trends

Home Lighting and Interior Design 101: Top Interior Design Tips From The Lighting Experts

Home Lighting and Interior Design 101: Top Interior Design Tips From The Lighting Experts

by admin · Feb 25, 2023

Have you ever walked through your home and wondered, “why did my stuff look cuter online/in-store?” If you have, there’s a decent chance the problem is your home lighting. Product images and store displays always have excellent lighting, showing you the best possible version of their decor, paint samples, art, and furniture. 

But if you buy that gorgeous piece or perfect paint color and put it under poor lighting, you’re bound to feel like you got duped.

Luckily, the rules to great lighting aren’t very complicated! You can start updating your home lighting for relatively low cost, low skill, and low tools. 

Consider this post a free course on home lighting essentials, including practical interior design tips from lighting experts. Answer quiz questions along the way to see if you’ve got it, then apply what you learn to make your interior design shine!

The Basics

Let’s start with a few basic terms and ideas– including five layers of great lighting and why the bulbs you use significantly impact how your home reads.

Layers of Light

You can break up your home lighting into five different categories. Once you understand how the categories work, you can mix and match them to fit your needs. Here are the five layers you should consider in each of your rooms:

  1. General/Ambient: the primary light source for the entire room.
  2. Task:  more focused light over a workspace, like a kitchen island or desk.
  3. Accent: think mood lighting; creates an atmosphere rather than light up the whole room.
  4. Decorative: it’s more about what the fixture adds to the overall design than the light it gives.
  5. Natural: working with windows (and firelight) to maximize color and space.

We’ll break down tips for working with each of these layers later on. For now, keep in mind that a well-lit room typically has five to seven light sources spread across these categories.

Question 1: Which type of lighting is most responsible for setting the mood in your space?

Warmth of Bulbs

There is so much information available on bulb temperature. The truth is you can get started with just a few pieces of information. First, bulb temperature refers to the color and brightness of the light. So let’s break it down.

Cool light will wake you up, help you focus, and is best for showing the true colors of paint, makeup, and clothing. These are the bulbs in the bottom row of the image above. Cool bulbs are great for offices, kitchens, and vanities.

Warm light has the opposite effect– it relaxes and casts a yellow or orange glow on your walls and furniture. Warm light is perfect for bedrooms, living rooms, and dining areas.

Both ends of the spectrum are important for different areas. And sometimes you might need to combine them in the same room so you can control the activity you’re doing. 

Now, let’s get into some specifics about how to work with each of our five light categories.

Question 2: Which light temperature is best for relaxing, cool or warm?

General or Ambient Light

As stated earlier, general or ambient lighting is your primary source of light for your space. It’s often centered in the ceiling so it can cast a bright, even light across the room. Your light fixture will greatly impact how the light casts. For example, flush mount domes offer little resistance to light, while metal shades will concentrate light downwards.

Since general lighting gives the most light, it will set the tone for your space. Here are a few top tips for nailing the general lighting in your home:

  • Use cool ambient lighting for kitchens, offices, and bathrooms.
  • Use warm light for living rooms, dining, and bedrooms. 
  • Swap out your builder-grade flush mount for an immediate (not to mention cheap and easy) upgrade. 

Question 3: Where should you position your general light source?

Task Lighting

Task lighting concentrates light (and your focus) on important tasks, like homework, dicing up vegetables, and filling out expense reports. They are also more obvious choices in your design since they often hang down or sit close to the action. 

Top tips:

  • Hanging pendants often look best in odd numbers, so stick to one, three, or five pendants where possible.
  • Strip lights or spotlights tap into task lighting fixtures to highlight art or displays to create design focus. 
  • Don’t forget LED strips as a versatile option! Place them around mirrors and under cabinets for steady, bright light.

Question 4: How do you know what areas need task lighting?

Accent Lighting

Accent lighting covers mood lighting and rounds out the lightscape. From reading lamps to LED strips behind TVs, they land closer to decorative lighting than really focusing on function. 

But don’t underestimate what they deliver! Accent lighting easily becomes general lighting during movies, date nights, and intimate gatherings with friends and family. 

Top tips:

  • Warm light is usually best for accent lighting. Scatter a few accent light sources around gathering places to have enough light to fill the room without the general light source.
  • Sconces are a great way to switch up typical lamps. And some come with plug-in cords– no hard wiring needed!
  • Color-changing bulbs and LEDs are a great option for accent lights. Then they are versatile for task lighting or mood lighting as the situation requires!

Question 5: True or false? If I want to add accent lights to my home, I have to hire an electrician.

Decorative Lighting

The final category is sometimes lumped in with accent lighting since they both have more to do with aesthetics than functionality. But we pulled this out to give special attention. 

Decorative lighting is about adding a super cool fixture, with the provided light taking a backseat. For example, using a chandelier for general lighting offers general light for the room, but its top priority is providing a visual “wow.”

  • Try mixing up the expected, like using pendants or sconces where you’d normally use a lamp. 
  • Get creative and turn a statue or other thrift finds into a one-of-a-kind light source.
  • Work with a local light showroom for designer-level pieces for a fraction of the price– plus top tips on installation and more!

Question 6: What is the purpose of decorative lighting?

Natural Light

Natural light is the final component of your lightscape. While manipulating natural light isn’t as easy as shopping for a great light fixture, it’s still critical to the overall feel of your home. 

For example, when shopping for paint, check the swatches day and night to see if there’s a dramatic change in appearance. This will also inform your decision on what kind of bulbs you use. And if your room’s color changes a lot from day to night, you can use cooler “daylight bulbs” to keep your color from changing as much. 

Top tips:

  • To get an airy feeling, use light curtains and hang them as close to the ceiling as you can, regardless of where your window stops. 
  • Which way do your windows face? You’ll get very different glows north versus south, as north-facing windows tend to get cooler light, with south-facing windows giving warmer light. Work with the natural light temperature when picking paint colors and decor!
  • Remember, dark colors absorb light, and lighter colors reflect it. So if you want a dark, moody space, dark paint will help to suck in extra light while still getting to keep the windows open. 

Question 7: True or false? Paint colors always look the same, no matter the time or the way windows face.

Summary

With a basic understanding of these simple lighting and interior design principles, you’re ready to convert your home from predictable and dull to vibrant and glowing! Remember:

  • You need all five layers of light to pull off a great room design.
    • General: main light source.
    • Task: focused light on important activities.
    • Accent: set the mood.
    • Decorative: dress it up, make it unexpected.
    • Natural: work the windows.
  • Bulb temperature affects concentration and color interpretation. 
    • Cool light for true colors and enhanced focus. 
    • Warm light for cozy relaxation and a golden touch to color. 
  • Updating your lighting doesn’t have to be complicated. Work with local professionals to get a leg up with great selections, expert advice, and affordable prices.

Need Help?

Proper lighting is essential to a fully functioning home– but it can be challenging to nail balanced brightness, great fixtures, and a budget! Contact the experts at Lit Living for advice on your project!

—

Quiz Answers:

Question 1: Which type of lighting is most responsible for setting the mood in your space?

General (ambient) lighting is a room’s main light source, so it’s the primary contributor to the mood.

Question 2: Which light temperature is best for relaxing, cool or warm?

Warm light naturally relaxes your brain and helps you to fall asleep. Cool light wakes up your brain for detailed work.

Question 3: Where should you position your general light source?

General lighting should come from as high and centered as possible for even light distribution.

Question 4: How do you know what areas need task lighting?

If you have an area where you perform detailed work, you should check to see if you need task lighting! Ambient lighting can provide enough light, but focused work often requires focused lighting.

Question 5: True or false? If I want to add accent lights to my home, I have to hire an electrician. 

False! There are many options for battery-operated and plug-in accent lighting.

Question 6: What is the purpose of decorative lighting?

Decorative lighting works with your decor as art, giving a unique lift to your design. It’s one more detail that helps you show off your style!

Question 7: True or false? Changing your lighting will change your paint colors.

True! All colors change with the quality of the light shining on them. Window position, time of day, and bulb temperature will all change how your paint reads.

Filed Under: 2023, Accent Lighting, Bathroom Lights, Bedroom Lighting, Buying Guides, General Lighting Tips, Kitchen Lighting, Light Bulbs, Lighting Types, Styles and Trends

3 Top Tips to Boost Eye Health With Proper Home Lighting

3 Top Tips to Boost Eye Health With Proper Home Lighting

by admin · Feb 24, 2023

Your eyes are responsible for sending about 80% of the total information that goes to your brain so it’s crucial to keep them healthy. While technology has made certain things better for our eyes, it’s also introduced new challenges.

And while it may be common sense that balanced lighting promotes eye health, what really goes into balanced lighting? First, we’ll explain how to create the best lighting for your eye health, then cover three main ways your home lighting habits may negatively impact your eyesight.

Ways Light Affects Our Eyes

Our eyesight is 100% dependent on light– the way it bounces around a space makes it possible for us to  see color, depth, and texture. Without light, there wouldn’t be any data for our brains to process. The quality of light you use has a big impact on your eyes – and your overall health – so getting the right types of light throughout your day is important. It can be a bit of a balancing act!

Bright light is essential to do good work– and working without enough light can strain or damage our eyes. Whether you’re reading a book, working at a computer screen, or slicing up veggies for dinner, you need lighting that supports your focus and subtle movements.

But dim light is also essential to eye health! Living with only bright light can seriously strain your eyes, particularly if you don’t decrease brightness in the evening. Top offenders include office fluorescents, overly powerful LEDs, and of course our phone and computer screens. 

Finally, we need a break from all light every day. Sleep resets our entire body, including our eyes. Dark spaces promote restful sleep, reducing dry eyes, itchiness, and vision-related headaches and increasing healthy eye nerves.

So how do you balance the need for bright, dim, and total darkness? And how does this apply to your home? Let’s dive into some specific tips.

3 Ways to Make Your Home Light Healthier

So, how customized does your home lighting need to be to pull off the perfect balance for your eyes? While high customizations are available, there’s no need to overdo it! By focusing on the following three categories, you can confidently know that your home has healthy lighting.

1. Screen Light

Screens are the number one culprit of today’s eyestrain and deteriorating eyesight for two reasons: the type of light and the proximity of the light.

All tech screens use blue light, from phones to tablets to computers. Blue light sends high-energy waves like the sun. This light spectrum shows true color and activates the brain to pay attention. So it’s typically a good thing that our screens use blue light.

However, shining that bright light at close range for eight or more hours a day can cause a lot of damage over time. To reduce the wear on your eyes from necessary screen time, consider the following tips:

  • Use task or bias lighting. Introducing additional light sources behind or next to your screen will help break up the contrast. Try adding lamps, improving your overhead light source, or sticking an LED strip around the back of your TV or computer monitor  to diffuse the light.
  • Take regular breaks. Experts recommend taking a screen break every hour for 5-10 minutes. Children should take more frequent breaks since their eyes are still developing. Kids should take a break every twenty minutes of screen time
  • Use blue light glasses. Blue light glasses help filter out harmful light waves and allow you to work longer, doing less damage.

2. Match the Light to the Room’s Needs

You use your kitchen, office, and bedrooms in a variety of ways throughout the day, so their lighting should change too! Otherwise you may accidentally strain your eyes with too much or too little light for what you need. With a bit of thought and a few simple tools, you’ll have your high-traffic areas perfectly prepared for all your needs, day or night.

  • Work Zones: Bright light is best for areas where you are performing skilled work. It will help you avoid mistakes and stay alert. So kitchens, offices, makeup tables, garages, and craft areas all need bright lighting. Make replacing current bulbs a priority in these rooms.
  • Resting Areas: Bedrooms, living rooms, and bathrooms are mainly for relaxing. Warmer, dimmer light is better for these locations. This will help you to give your eyes a rest, blend colors, and signal to your brain that it’s time to wind down.
  • In-between Places: You may have some spaces performing multiple functions. Bathrooms are a great example: you need bright light to get ready, but you also need a place to relax with a bath. Consider adding a dimmer switch in these rooms, or test out some color-changing LED bulbs that can be warm or cool with just the touch of a buttom.

Did you know that local lighting experts can help you get the right tools for your space? Bring your tricky areas to them to get help matching the proper lighting for your needs.

3. Types of Bulbs

Finally, let’s talk about bulbs. Your bulb selection will help you get the right balance for your eyes and avoid having them work too hard. Here’s a rundown of common bulb types and their effects on your eye health:

  • Compact Fluorescent Lights (CFLs): These twisted bulbs were trendy in the early 2000s as a domestic fluorescent option. However, fluorescent lighting is generally hard on eyes because it emits more UV rays. They also flicker at a high rate, so even though you likely won’t notice it, flourescents are associated with headaches and eye strain. So we’d recommend using another bulb first.
  • Incandescent: Incandescent bulbs are quickly phasing out as a non-efficient energy light. But, with no UV rays and low blue light emission, they’re “easy on the eyes.” So you could leave a trusty incandescent bulb in your favorite reading lamp!
  • LEDs: LEDs are highly customizable, meaning you can easily adjust brightness and temperature to help reduce strain on your eyes anytime. However, they emit quite a bit of blue light. They also flicker at a high frequency– it’s not visible to most people, but those prone to seizures may be triggered by too many LEDs. In general, LEDs are a safe option!
  • Halogen: Halogen bulbs are very bright, making them great for task and outdoor lighting. They’re also dimmable, making them more flexible than CFLs. However, they can get very hot and have been known to cause fires. Handle these bulbs cautiousl!

A little research will help ensure that you have the best bulbs, lumens, and temperatures for your family.

Need Help?

Proper lighting is essential to a fully functioning home– but it can be challenging to nail balanced brightness, great fixtures, and a budget! Contact the experts at Lit Living for advice on your project!

Filed Under: 2023, Wellness & Safety

How to Choose the Right Bathroom Vanity Lighting

How to Choose the Right Bathroom Vanity Lighting

by admin · Feb 23, 2023

When done right, your bathroom lighting should be able to take you from a bright morning routine to an evening spa break to a midnight trip to the restroom without feeling too over or underpowered in any scenario.

Most builder-grade vanity lights just don’t cut it. They’re often too high, too bright or dim, and don’t really add much to the design of your bathroom. So if you’re ready to try something new, we’ve compiled a list of the most common vanity light fixtures to help you figure out precisely what you (and your bathroom routine) need to create the bathroom oasis you deserve. 

Here is a short list of light fixtures and bulbs to consider so that you’ll be prepared to balance the functionality and style according to your budget and available space.

Types of Vanity Light Fixtures

Your bathroom vanity includes the mirror, counter, sink, and surrounding lighting. Vanity lighting is often the only source of light in the bathroom – and it largely determines your experience there. So it’s important to get it right!

There are several types of vanity light fixtures, each with its own set of benefits. Which one you choose is up to you – but make sure you consider both style and function to make sure you’re happy with the result.

Vanity Light Bar 

Light bars are the most common fixture for bathroom vanities because they’re easy to install and give off a lot of light. Light bars consist of a long base (the bar) with light emanating from its entire length. They’re usually mounted just above the mirror from a single, central wiring box. 

Most people picture a base with multiple bulbs sticking out into the room, like you’d see in a “builder’s grade” new home or surrounding the mirror in a makeup artist’s studio. Other light bars consist of a single, long light source, such as a sleek LED bar or a fluorescent tube. 

The advantage to installing light bars is that they create even lighting with fewer shadows. (Anyone who’s ever done makeup or shaved using a bathroom mirror knows how important that is!)

Pro tip: The most crucial part of successfully using a light bar is getting the proper proportions. Ensure the bar is at least 75% the mirror’s width and never longer than the counter below. Keeping the bar at least 6-6.5 ft high will give even light without shining directly into your eyes. 

Mirror-framing Sconces 

Sconces are light fixtures that attach to the wall rather than the ceiling. They’re often found above the center of the mirror, although it’s worth considering placing your sconces on either side of the mirror– you’ll get the best light for your morning routine and playfully break from tradition! 

The number of bulbs and types of shades will impact your placement. Some shades only allow for downward light, so those work best up high. Glass shades are a little more forgiving – they’ll shine light on your face when installed above or to the side of the mirror. 

Not only are sconces an excellent fit for lighting your vanity, but they also make a statement. You’ll show that you put real thought into your bathroom design by using a non-traditional fixture.

Pro tip: We recommend mounting sconces with the center of the fixtures about 60″ high and about 28″ apart. Try installing one on either side of your mirror to get even, shadow-free light on your face as you’re getting ready.

Unexpected Pendants

If you’re looking for a way to make your bathroom look unique, try out pendant lighting. These fixtures hang directly from the ceiling, with the bottom of the shade right above eye level. Not only are pendants a bold statement, but they’re also a versatile option if you’re short on space.

In a bathroom, sconce and pendant placement guidelines are very similar. A single pendant directly over the mirror is an excellent option for small bathrooms. They also work well as a pair, framing the mirror on either side. 

Because pendants have an extra “wow” factor, they’re also sometimes used in larger groups to create a design element. For example, this designer hung multiple pendants along the mirror – and we think it turned out great!

Pro Tip: We recommend spacing your pendants about 30 inches apart to avoid harsh lighting. Also, keep in mind the pendant’s ability to shine directly onto the mirror– a thin or transparent shade will reflect a lot of light. It’s a good trick to make your space feel brighter but may cast unexpected shadows.

Modernize with LEDs

For a modern (and energy-efficient) touch, consider opting for LED lights. They last for years, cost little to run, and come in a wide variety of color options.  LED light bulbs can be installed in almost any fixture in place of a traditional bulb.

Some light fixtures come with LED lights already integrated, which means you’ll never have to change a bulb for the life of the fixture. While these mirrors come in a variety of styles, they’re most often found in sleek, modern bathrooms with a minimalist feel. 

LED strip lights may be an unexpected choice for the bathroom. They’re easy to install (some are even peel-and-stick!) and will make your bathroom feel high-end with just a little bit of creativity. As vanity lighting, try installing them behind a mirror to give a soft, luxurious glow. 

Pro tip: Because they are so small, LED strip lights can be tucked in unexpected places, like along the underside of a mirror to light the counter, or along the bottom of a floating vanity to light the space underneath. Adding light to dimly-lit edges and corners of your bathroom will make it feel bigger!

When to Hire a Pro

If you own a newer home and have tools handy, you can probably handle most light fixture upgrades yourself. But not all fixture update projects are created equal. For example, you may have an older home that requires electrical updates, don’t own tools, need new circuits for new fixture locations, or simply don’t feel comfortable with an electrical project. 

Electricians will ensure your new fixture is installed quickly and safely. Not sure how to hire a qualified electrician? No problem! Your local lighting showroom can often connect you to a great pick– and offer a wider selection of fixtures while you’re there!

Ready to update your bathroom vanity? The experts at All-Phasecan help you find the right fixture for your room, budget, and style. Contact us today!

Filed Under: 2022, Bathroom, Bathroom Lights

12 Simple Bathroom Updates You Can Do Yourself

12 Simple Bathroom Updates You Can Do Yourself

by admin · Feb 20, 2023

Bathrooms are spaces that often go overlooked, but when they’re spruced up, they add some serious value to your home! Remodeling can take loads of time and effort (not to mention money), but giving your bathroom a facelift doesn’t have to. These simple tips can give you the bathroom of your dreams.

1. Organize

The last thing you want to deal with at the beginning and end of your day is CLUTTER. Give yourself the gift of a good system! Containers may seem unnecessary, but when you’re rushing out the door, it saves you a headache to just have an easy home for all your toiletries.

2. Add Greenery

Plants bring life, peace, and tranquility into a space. This bathroom would be the perfect escape from the stress of everyday life. The warm tones mixed with the green tell you to relax and take a break. Who are you to tell them no?

3. Change the Hardware

Arguably one of the easiest ways to take your bathroom from the early 2000s to today without spending a fortune is changing the hardware on your cabinets. Finish options are endless! The bathroom above uses gold accents to create a cohesive look with a modern feel.

4. Spruce Up the Walls

If you’re looking for a simple way to make a big impact in your bathroom and have a free weekend coming up, a fresh coat of paint and some elbow grease will make your bathroom feel like a brand new space with just a few hours of work! 

Want to take it to the next level? Bold wallpapers are in, and they really let you show off your personality! This bathroom incorporates the best of both worlds with a simple, painted board and batten wall on the bottom and wallpaper on top! It’s not as hard as it looks – check out this quick tutorial!

Renter-friendly option: Removable peel and stick wallpaper will give you the same look without having to commit long-term. Love the board and batten? There’s a renter-friendly tutorial for that too!

5. Update Mirrors

Bathroom mirrors are often neglected, but they totally change the feel of the room – don’t leave them out! These wood-framed mirrors bring warmth to this bathroom’s design and help to balance out all of the cool tones and polished finishes. 

Renter-friendly option: If replacing your mirror is out of the budget or you’re renting, adding a wood frame to an existing mirror is an easy one-weekend DIY project – just make sure you can easily remove it if you’re renting!

6. Paint Your Cabinets

Painting your bathroom cabinets may take a little effort, but it’s a great way to unify your space or to add a fun pop of color your bathroom. With just a small can of paint and some time, you can take your bathroom from basic to beautiful, even with a low budget. This bathroom’s painted cabinets help to ground the space, and provide much-needed contrast that takes the design from bland to balanced.

7. Replace Old Light Fixtures

Replacing a ceiling or wall light in your bathroom with a modern fixture that’s more your style will give the entire room an instant style boost! You don’t have to play it safe here – find a fixture you love and jump in! We love the way this bathroom shows some serious creativity with these pendant lights that highlight this AMAZING wood accent wall. 

Many homeowners are wary of swapping out light fixtures, but it’s usually a pretty simple DIY. We recommend starting with your vanity light first if you’re on a budget – great front-facing light by the mirror will make the biggest impact on your morning routine!

8. Layer Your Light

Every room in your house should have several light sources to make it feel more comfortable and eliminate harsh shadows and dark corners. In a living room, that’s as easy as tossing in a few lamps, but layering light in a bathroom can be a little trickier.

This bathroom uses a combination of pendant lights and recessed lights to make the whole space feel bright and airy. If your bathroom lighting isn’t working for you, installing an extra wall or ceiling light is the best way to go from dark and dingy to light and bright. 

If your bathroom’s already finished and rewiring isn’t in the cards – don’t worry! Fortunately, there are a lot of easy do-it-yourself options out there. 

LED light strips like the ones in this bathroom are inexpensive and as easy to install as a sticker! They’re usually used behind the mirror or under cabinets, but they can go anywhere you want some extra light. 

You can also replace a light switch or outlet cover with one that has a built-in light – no more blind fumbling for a switch in the middle of the night.

Renter-friendly option: Get a motion-sensing plug-in outlet light or a rechargeable countertop light! These are both non-permanent ways to add a layer of light and keep yourself from bumping into the counter in the dark.

9. Update Faucets

Another way to update the look of your bathroom and conserve water is by switching out your faucets. Look for a faucet with a WaterSense label to reduce your sink’s water flow by 30 percent or more. Less water flow means a lower water bill. With a lower water bill, you’ll have some extra change in your pocket to take your family out for dinner (or yourself–you deserve it!).

10. Dim the Lights

The lights in this bathroom make it a retreat from chaos. When you want a calming bath, dim the lights for optimal relaxation. Dimmable lights give you the flexibility to turn your bathroom into a spa.

Bonus points: Since dimmable lights are more energy-efficient, installing a dimmer switch will leave you with extra money to do more with your bathroom!

Renter-friendly option: Use other lower-light options like strip lights, countertop lights, or LED candles like in the bathroom above.

11. Add a Backsplash

The metallic accents and painted vanity in this bathroom are to die for, but what really makes this space magic is that classic backsplash. Not only does it breathe new life into this space, but it also protects the wall from moisture and staining, so you won’t have to worry about mold or mildew. With a little DIY magic, this bathroom feels complete!

Renter-friendly option: Use a peel and stick backsplash instead! It’ll look like tile without actually being permanent.

12. Update Your Tile Floor

While tile may be a bigger time or money investment, this bathroom clearly shows that it pays off. If you’re wanting to update the floor, choosing a unique tile like this is the way to go. Pro tip: while real tile will give you the best result, you can actually use a stencil to paint your floor. It will give it the same look for a fraction of the cost!

Renter-friendly option: Use removable flooring (peel and stick) to look like custom tile, or cut a vinyl piece to fit the size of any existing tile.

————–

Don’t let your bathroom fall between the cracks any longer! When you’re ready to take it to the next level, give our experts at All-Phasea call. We’d love to help you get started and give you more tips like these.

Filed Under: 2023, Bathroom Lights, Styles & Trends

« Previous Page
Next Page »

Copyright © 2025