• Skip to primary navigation
  • Skip to main content

All Phase TC

  • Buying Guides
  • Styles & Trends
    • Bathroom Lights
    • Ceiling Fans
    • Ceiling Lights
    • Lamps
    • LED Lights
    • Outdoor Lights
    • Smart Lights
    • Wall Lights
  • Wellness & Safety
  • Shop Products

admin

Lampshade Basics: 7 Styles to Consider for Your Home

Lampshade Basics: 7 Styles to Consider for Your Home

by admin · Feb 21, 2025

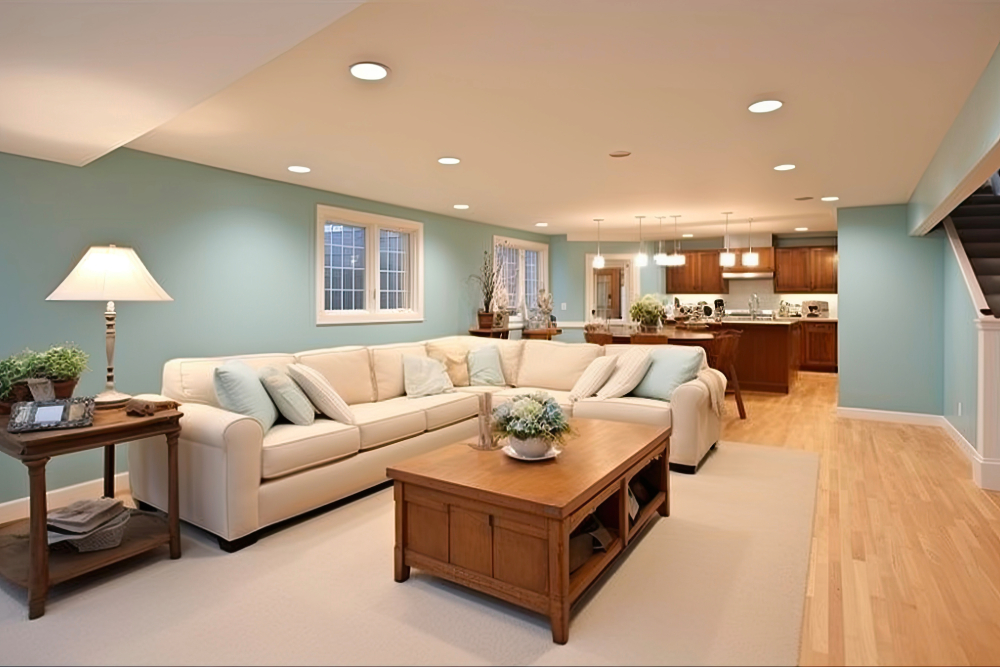
Lampshades may seem like a small detail in interior design, but they can have a big impact on the overall look and feel of a room. Whether it’s a table or floor lamp, or even a sconce or pendant, choosing the right shade is important. The shade you choose needs to do more than just complement your décor, its shape and opacity will play an important role in how effective your lamp will be at creating the right kind of light for the space. In this article, we dive into 7 popular lampshade options, and provide you with insights that will help you determine what type of shade will best suit your needs.

The Basics

Lampshades come in a wide variety of shapes, and knowing their names will help you to narrow down your search results as you shop. But before we dive into the shapes and names, it’s important to understand a couple of basic details about how shades affect your light. The shade on a lamp impacts the quantity, direction, and color of the light that emanates from the fixture. 

Quantity

Opacity matters when it comes to lampshades. Some shades are made from a solid materials like ceramic that lets little to no light shine through. Many are made from fabrics or frosted or etched glass that allow varying levels of light to filter through. Others are made of fully transparent materials like plastic or glass that allow all of the light through. Understanding your needs for the space will help you to determine what to choose. 

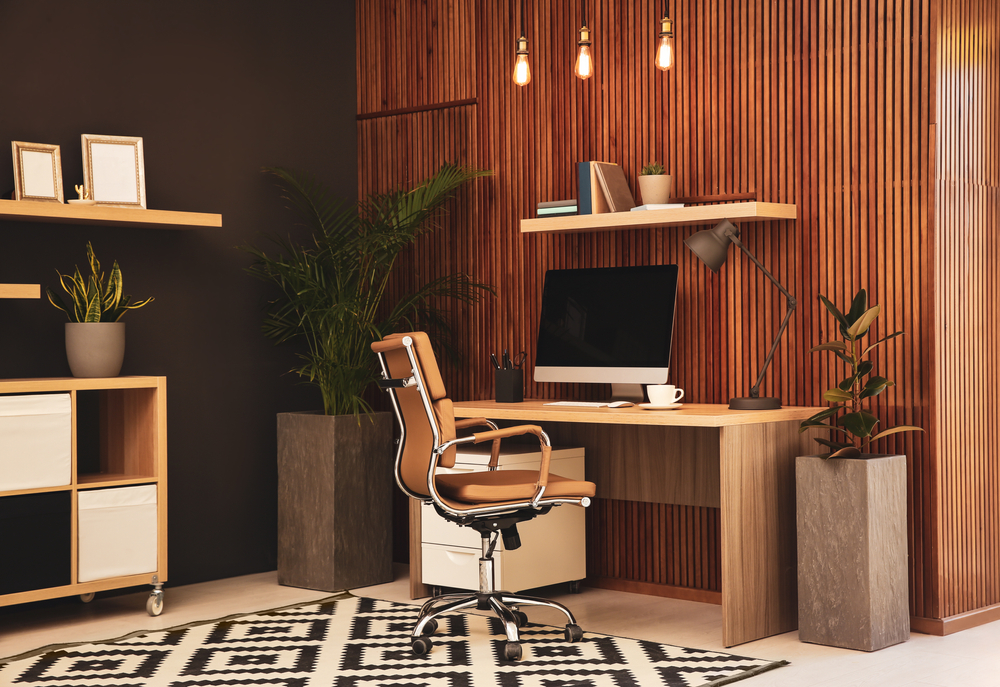
For example: An opaque lampshade may be the best choice for lamps at eye level to avoid glare and eye strain. A light filtering shade is an excellent choice for ambient or mood lighting to create a soft, comfortable glow. Clear shades are perfect for places that need lots of light, like a desk, workspace, or kitchen.

Direction

The shape of a shade will impact where the light can shine. The more opaque a shade is, the more important it is for you to be aware of the direction it will direct the light. A fully opaque shade will direct all light out the openings, and many have a reflective surface on the interior to maximize the amount of light leaving the shade. These shades help you to shine light where you want it, and nowhere else. Semi-opaque, light-filtering, and transparent shades will allow light to shine in all directions (although brightness levels will vary), so directionality is less important for these shades unless they’re being used as task lighting, in which case you’ll still want to be sure the opening on the shade is directed towards your work or desk space. 

Color

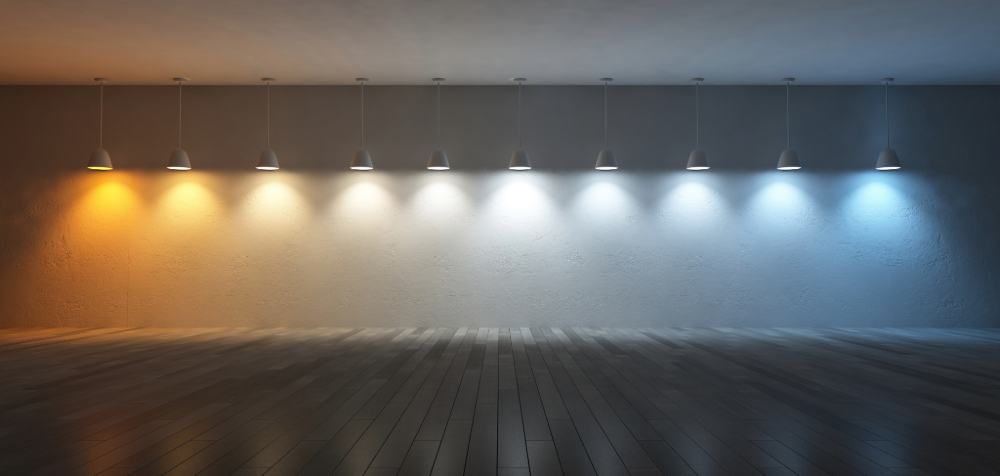
Swapping out a lampshade can make an old lamp feel brand new, but it can also have unintended consequences on the way the rest of the room looks. The color of the light on the bulb will take on some of the color of the shade. This can change the way colors look in your room on everything from the furniture to the paint on your walls. You can combat this a little bit by changing the color of the bulb you use if you find a shade you love, but neutrals are usually the safest route if you want to avoid unexpected color clashes. 

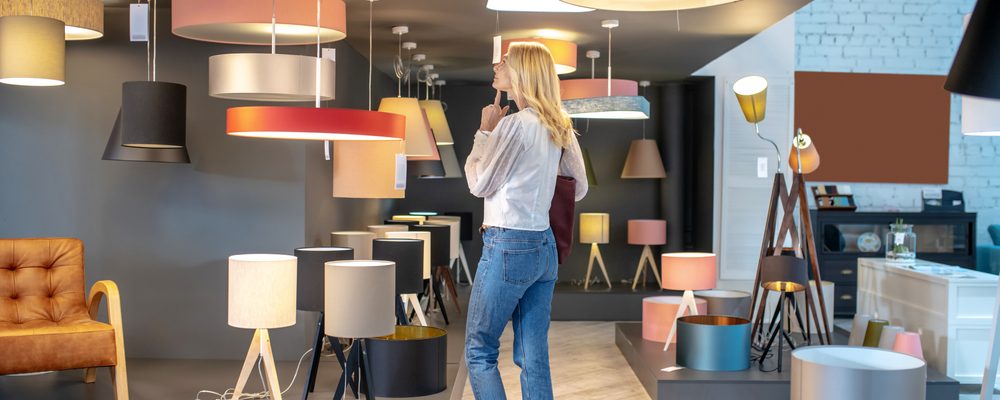
With these basics in mind, let’s dive into seven of the most popular lampshade shapes!
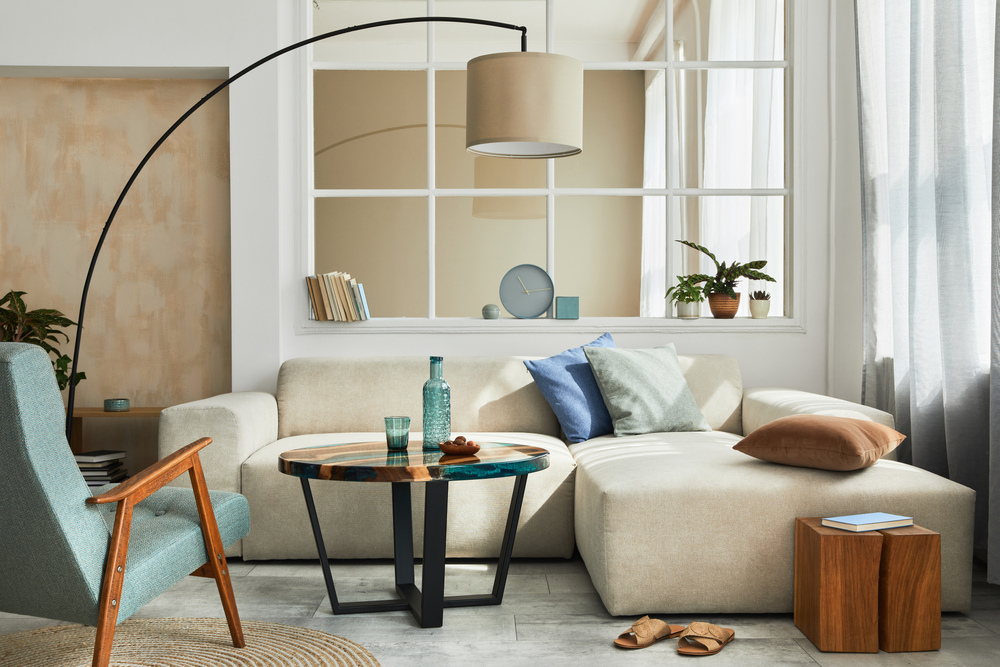
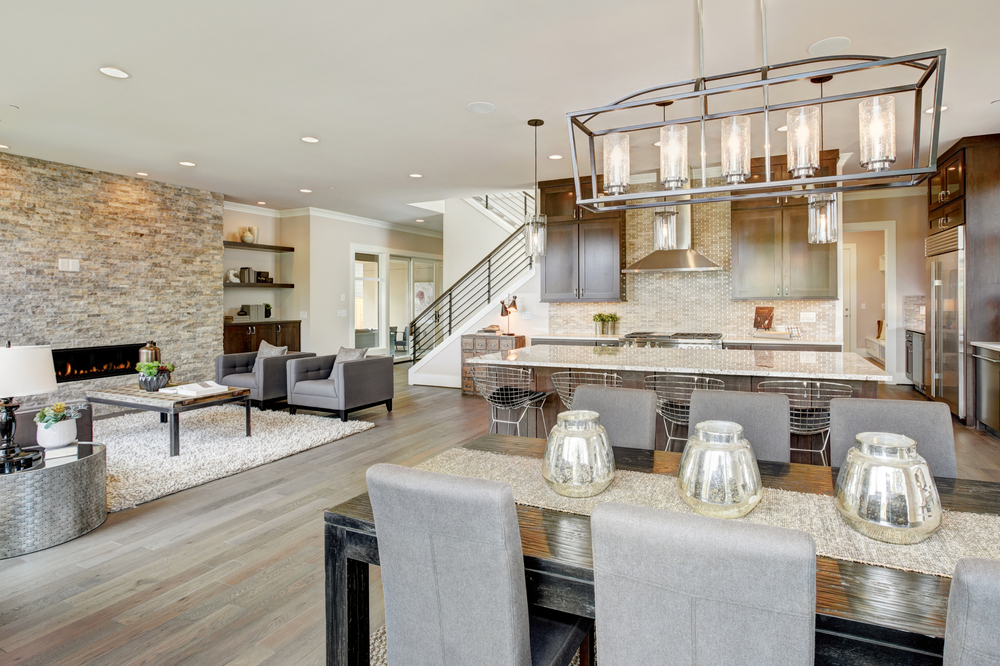
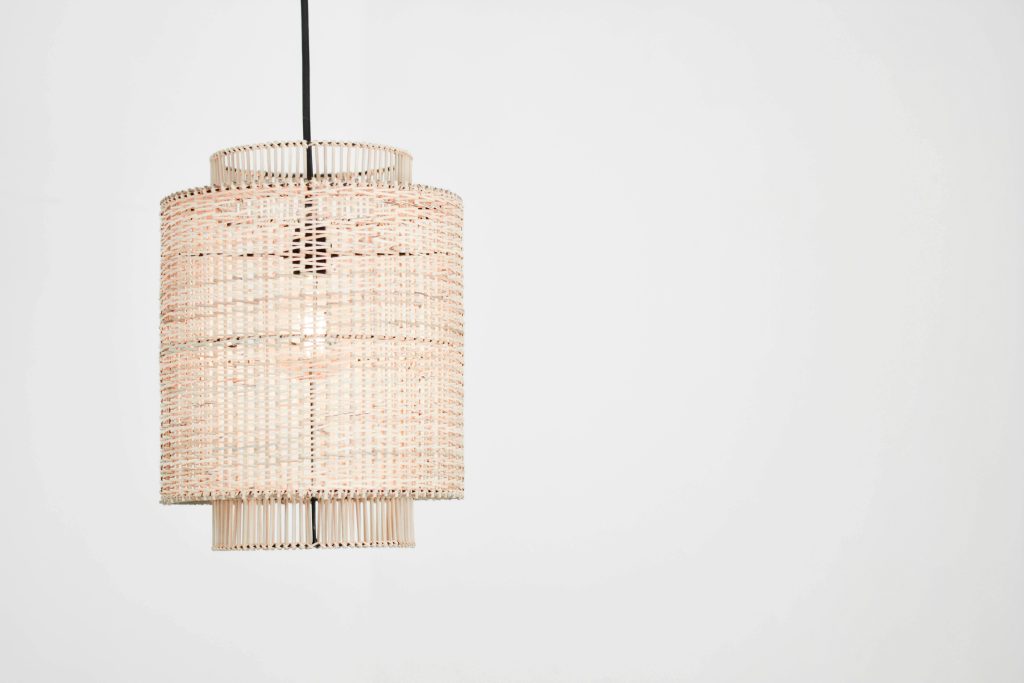
Drum Lampshades 

Drum lampshades are one of the most common and versatile options available right now. They feature a cylindrical shape with equal diameter at the top and bottom, creating a clean, minimalistic, modern look. Drum lampshades give off soft and even ambient light in all directions which makes them a great choice for many spaces. Drum shades look great on most base types – from dainty to sculptural. It’s hard to go wrong with this popular option!
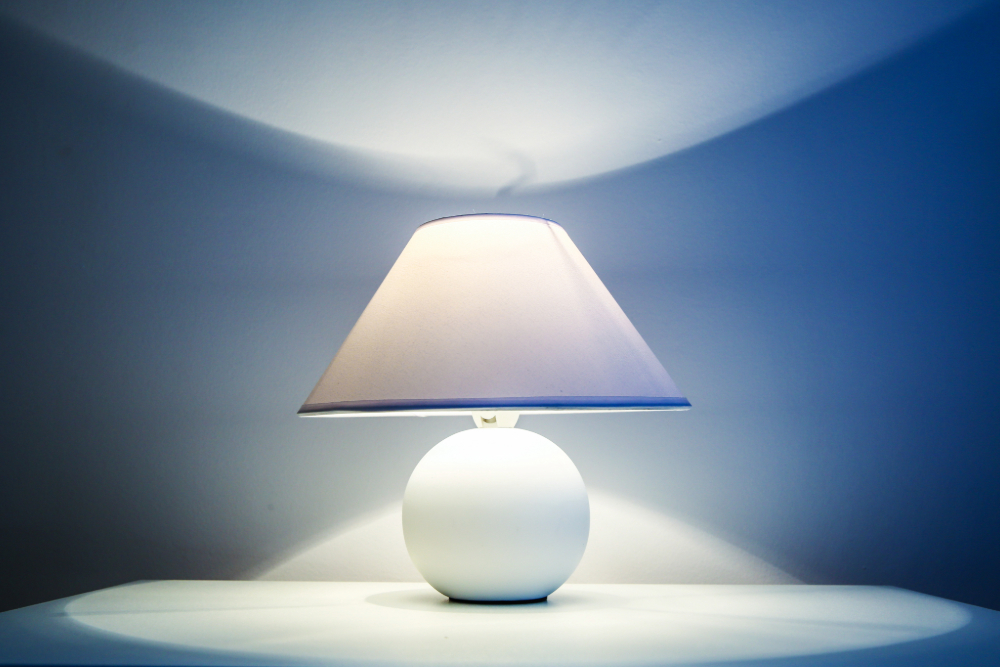
Empire Lampshades

With a narrower top and a wider bottom, empire lampshades are the go-to choice for those looking to give an elegant and traditional look to their space. That said, they can also fit into a more modern aesthetic when styled correctly and paired with the right base. Empire lampshades direct light downward, making them an ideal choice if you are looking for task lighting next to a cozy chair or at your desk. 

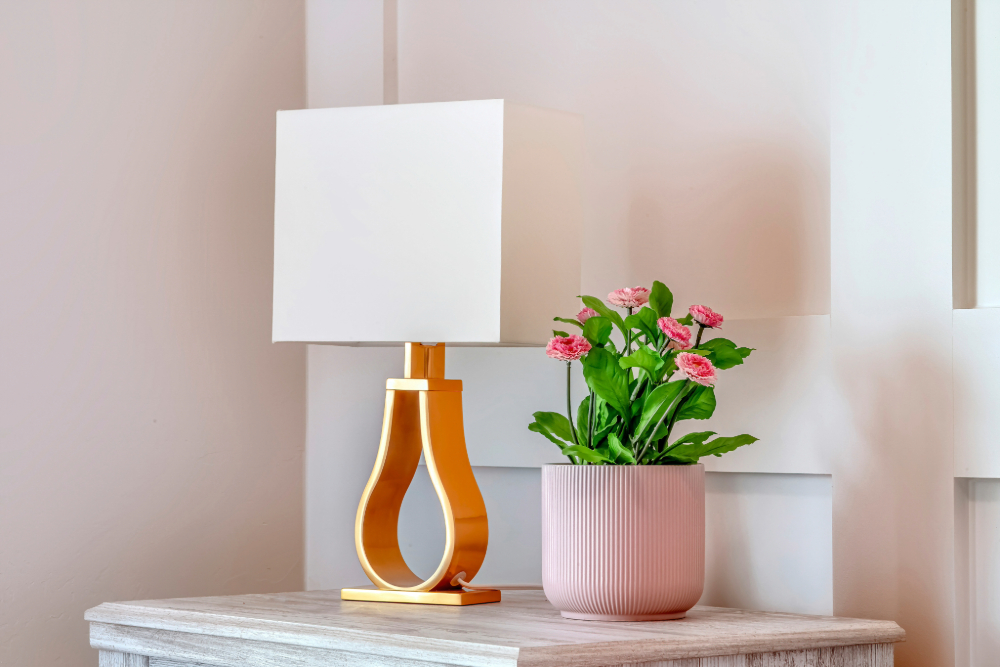
Square and Rectangular Lampshades

Unconventional yet stylishly chic, rectangular and square lampshades are perfect for adding a contemporary twist to your décor. These lampshades can make a bold statement, so they are perfect for those looking for a focal point in their room. Their shape allows the lamp to sit closer to the wall than circular shades, which means they work especially well on narrow surfaces like console tables and smaller nightstands. 
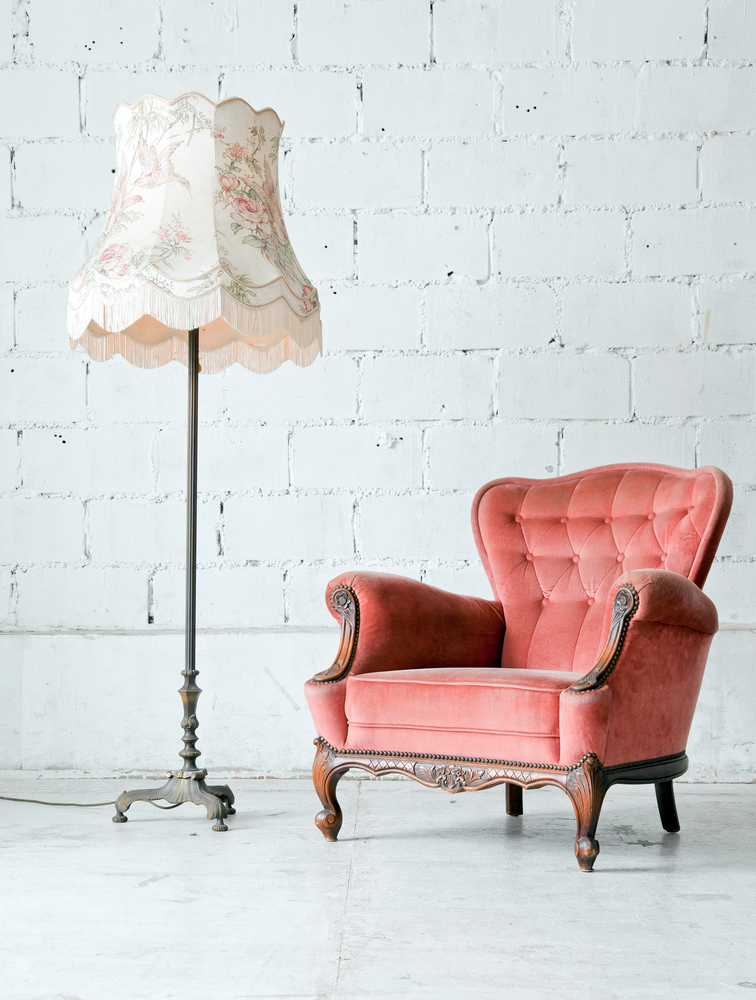
Bell Lampshades

Like their namesake, bell lampshades feature a flared base with a narrower top. These shades provide a touch of elegance and sophistication. They are most often used in traditional or vintage-inspired interiors. Due to their shape, bell lampshades cast a soft, subdued light. This makes them a wonderful choice for a warm, inviting living room or cozy bedroom corner. 
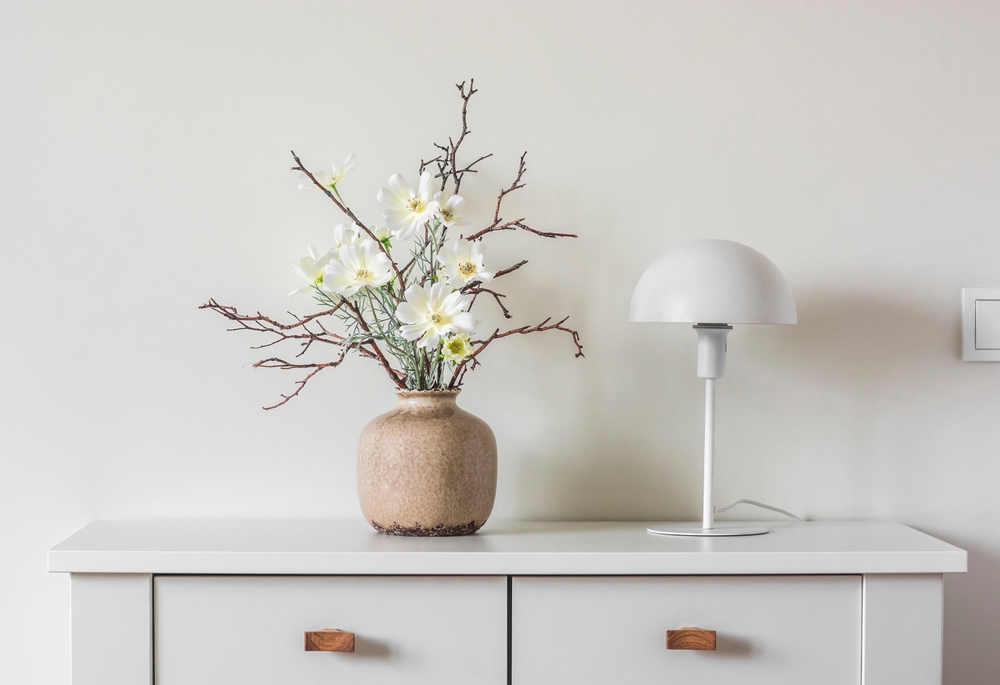
Dome Lampshades

Dome lampshades are simple yet elegant. They are an unexpected choice that can lean vintage, modern, or futuristic, depending on how they are styled. They are best paired with a thin, dainty base. Reminiscent of the domed cap of a mushroom, these are often a popular choice in biophilic designs as well. Dome lampshades direct light downward while also spreading it gently to the sides. They offer a balanced combination of ambient and task lighting, making them a great fit for most spaces. 
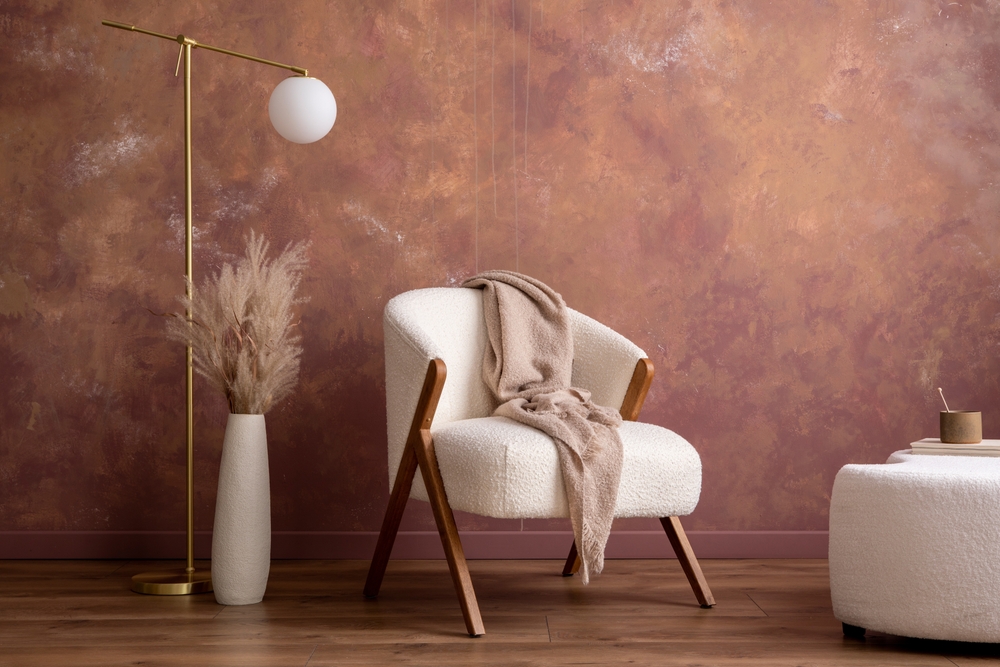
Globe Lampshades 

Globe lampshades are spherical and completely encase the light source, creating a gentle and diffused illumination. Since the light is cast in all directions, globe lampshades do not cast a harsh shadow or glare but rather create a warm, ambient lighting perfect for living spaces, dining rooms, and bedrooms. 

Coolie Lampshades

These lampshades have a distinct slanted shape that directs light downward, making them great for task lighting, such as desk lamps. While the shape of this shade is similar to the Empire shade, Coolie shades have a much larger difference between the top and bottom diameters, giving them a more distinctive slant. The unique shape of this shade fits especially well into retro, eclectic, and industrial-inspired spaces, and they make for an interesting centerpiece wherever they are placed.  

————-

Selecting the right lampshade for your space can be as simple as choosing the one that you like the best on the shelf, but if you want to truly do your lamp (and your room) justice, take an extra minute and consider the opacity, color, and shape of your shade, and how it will impact the way the light shines in your space. With just a little extra bit of understanding, you can create a well-lit and visually appealing environment that reflects your personality and enhances the atmosphere of your home. So, go ahead and shed light on your style with the perfect lampshade!

You don’t have to do it alone! For help finding the perfect shade, stop by our showroom and let the experts at Lit Living help you find exactly what you need, without the hassle. 


Filed Under: 2024

What is CFM? Ceiling Fan Acronyms Demystified

What is CFM? Ceiling Fan Acronyms Demystified

by admin · Feb 14, 2025

If you’ve ever shopped for ceiling fans, more than likely you’ve run across a new few terms and acronyms. Don’t fall into the trap of ignoring the specs and shopping for looks alone – CFM is an important term to understand before you decide on your next ceiling fan.

What is CFM?

CFM stands for Cubic Feet per Minute, which is a measurement that tells you how many cubic feed or air pass by a point in one minute. For ceiling fans, the CFM will tell you how much air a fan can move, or how “windy” it will feel at its highest speed. You’ll also see CFM referred to as “Max Airflow”.

There are a few things that can impact a fan’s CFM, including the motor and the number, pitch (or angle), and length of the fan’s blades. The most important thing to remember is that the higher the CFM, the more air the fan will move.

How much CFM do I need?

Generally speaking, a ceiling fan with a CFM over 4,000 should be enough for your needs, but a CFM over 6,000 is better. Some brands call fans with a CFM over 7,000 high airflow and over 9,000 CFM extreme airflow. 

This gets more complicated when you take into account the size of the room and the height of the ceiling. A small bedroom with 8 foot ceilings will be fine with a fan with lower CFM, and a large great room with vaulted ceilings will need to have a fan with much higher CFM in order to move enough air to feel it throughout the space. 

Because fan and motor designs vary by the fan and the brand, the best way to know for sure if you’re getting a ceiling fan that will work well for your room is to check the manufacturer’s recommendations for room size. 

CFM and Energy Efficiency

CFM is a useful measurement on its own, but it’s also a the key ingredient for figuring out how efficient your ceiling fan is. If you don’t pay attention to efficiency, you could accidentally end up with a fan that uses a lot of energy, costing you more money to use than you realised until it’s too late. An energy efficient fan will move more air using less energy, meaning you can keep your room cool without an unexpected spike in your power bill. 

To determine the efficiency of a fan you have to do a little bit of math. Airflow efficiency is CFM divided by the watts (or energy) used to power the fan at its highest speed. For example, a ceiling fan with 4,000 CFM that uses 80 watts will have an airflow efficiency score of 50 (4,000 / 80 = 50). 

Generally speaking, a ceiling fan with an airflow efficiency of 75 is considered efficient, but this can vary depending on the size of the fan. One of the easiest ways for consumers to tell if a fan will be energy efficient is to look for the Energy Star logo on the packaging. Any ceiling fan with an Energy Star endorsement will be much more efficient than conventional fans, which will save you money in the long run.

To see a breakdown of how Energy Star uses fan size and CFM to determine whether or not a fan is eligible for an Energy Star rating, check out these graphs. If energy efficiency is a goal for your ceiling fan search, you can also browse ceiling fans on our website, and filter by Energy Star to see only fans with an Energy Star certification. 


In short, CFM is a measurement that tells you how much air a fan moves at its highest speed. How much CFM you need from a fan depends a lot on the room its in – the overall size, the usage, the ceiling height, etc. While CFM isn’t the only statistic on the box that matters when shopping for a fan, it’s definitely an important number to consider – especially how it relates to energy efficiency and the amount of money you’ll spend using your fan over the years. Need help finding a ceiling fan? Our lighting experts can help you find exactly what you need at Lit Living.


Filed Under: 2024

Lighting Solutions for Open Floor Plans: 5 Essential Steps

Lighting Solutions for Open Floor Plans: 5 Essential Steps

by admin · Feb 7, 2025

In the world of interior design, open floor plans have become the standard of modern living. Open plans blend living, dining, and kitchen areas into a (hopefully) seamless and cohesive space that provides many options for functionality and creativity. The airiness in an open plan creates an atmosphere that’s hard to beat. But it’s this same openness that creates a unique set of challenges when it comes to lighting. 

How do you ensure every nook and cranny is well-lit? How do you ensure that your lighting choices work well with each other and provide a sense of harmony and balance? Lighting an open floor plan requires a bit of planning, but it’s very doable. 

What are some of the challenges with lighting an open floor plan?

  • Multiple Functions, One Space: Open floor plans often combine living, dining, kitchen, and occasionally other work areas. Each of these spaces requires different lighting levels and types. For example, a kitchen island may require task lighting, while the living area needs ambient and accent lighting.
  • Limited Wall Space: In a traditional room, you can usually rely on wall-mounted fixtures or strategically placed lamps for ambient lighting. Open floor plans have fewer walls, which can limit the location options for fixtures that evenly distribute light.
  • Balancing Aesthetics and Functionality: Because all areas are connected, the fixtures you choose will be visible from everywhere. It’s important to choose light fixtures that can be both beautiful and provide the amount of light needed for the tasks and activities taking place in each area of the space.
  • Maintaining Visual Harmony: With an open layout, it’s important that the lighting fixtures and decor flow seamlessly from one area to another. This can be a challenge if there are significant style or design differences between spaces. This can also make placing drop-down fixtures such as pendants or chandeliers tricky – they might light the table perfectly, but block sight or conversation lines between other areas in the space.

So, how do we tackle these challenges? Follow these 5 steps for beautiful and balanced open floor plan lighting:


1. Think About Scale and Proportion

When it comes to lighting, size and scale matter. Massive chandeliers or pendant lights might be eye-catching, but they can overpower the room and disrupt the balance and flow of a space. Likewise, fixtures that are too small and underwhelming can be lost in the visual depth of an open floor plan.  

A fixture’s scale (size in relation to the space it occupies as well as other design elements) should align with its intended purpose. For example, a fixture used for task lighting should illuminate it’s specific work areas without too much overlap, and a ceiling fixture used for ambient lighting should provide consistent overall coverage without overpowering or underwhelming the room. 


2. Layer Your Lighting for Depth and Drama

Just like a painting, a well-lit space has layers. Think like an artist and use these layers to achieve lighting perfection. Here’s how you can do it:

  • Ambient Lighting: This is your base, providing overall illumination. Consider recessed lights or track lighting for even coverage.
  • Task Lighting: This is focused light for specific activities like reading, cooking, or working. Think pendant lights over an island or desk lamps.
  • Accent Lighting: Add drama and highlight architectural features, artwork, or plants. Use wall sconces, spotlights, or strip lights.


3. Create Zones with Different Fixtures

Since open floor plans combine multiple functions in one space, it’s crucial to define different areas with lighting:

  • Living Area: Use a combination of floor lamps, table lamps, and overhead fixtures to create a cozy ambiance.
  • Dining Area: A pendant light or chandelier hung low over the dining table sets the mood for intimate gatherings. Depending on the layout, wall sconces are also a great option.
  • Kitchen: Under-cabinet lighting brightens up workspaces, while pendant lights over an island provide functional and decorative illumination.


4. Play with Temperature

The color temperature of your bulbs can significantly impact the mood of your space. It’s okay to mix and match light colors throughout, but avoid large differences in ambient color temperature in adjoining spaces.

  • Warm White (2700K-3000K): Creates a cozy, inviting atmosphere, perfect for living and dining areas.
  • Cool White (3500K-4100K): Provides bright, energizing light suitable for kitchens and workspaces.
  • Daylight (5000K+): Mimics natural daylight and works well in task-oriented areas.


5. Embrace Natural Light

In any rooms that have windows, you always want to consider the natural light that comes through them as a part of your lighting plan. A good lighting plan doesn’t just consider how the space will look in the evenings – you’ll also want to strategically place fixtures to complement, rather than compete with, natural light. Watch your room throughout the day, and throughout the seasons. You’ll notice places where the natural light might need a little extra help.

When you can harmonize your light fixtures with the changing natural light, you’ll end up with a space that feels just right from dawn to dusk. Planning your lighting around natural is big deal, but it’s not the only way to take advantage of the free light streaming through your windows.  Here are a few more tips for striking a harmonious balance with the natural and artificial lighting in your open floor plan:

  • Window Treatments: To let in more light without sacrificing privacy, look for light, airy curtains to use during the day. Don’t forget – sheer curtains aren’t great for privacy when it’s dark outside, so they work best in conjunction with a layer of blackout curtains or a set of blinds. If curtains aren’t your thing – opt for light-colored blinds that can be angled to allow natural light to flow freely. 
  • Mirrors and Reflective Surfaces: Strategically placing mirrors opposite windows can help bounce light around the room, making it feel even brighter and more spacious. You can get a similar result with furniture or art pieces with reflective surfaces – so feel free to mix and match to get the right look.
  • Install Dimmer Switches: Dimmer switches allow you to adjust the intensity of artificial light to complement changing natural light conditions. It’s a great solution for those cloudy days when the sunlight isn’t *quite* enough – you can add just a *bit* of light to comfortably see what you need to do without having to blast a full set of ceiling lights in the middle of the day. 

————

Remember, lighting is the heartbeat of any space, and in an open floor plan, it is an especially powerful element that can transform and define the space. If you find yourself needing personalized guidance or are seeking that perfect lighting fixture, don’t hesitate to reach out to a lighting design expert. Their expertise can make all the difference in creating a space that not only looks amazing but also feels amazing!


Filed Under: 2024

From Dark to Dazzling: 6 Tips to Achieve the Best Basement on the Block

From Dark to Dazzling: 6 Tips to Achieve the Best Basement on the Block

by admin · Jan 31, 2025

If your basement is more of a second thought or storage dungeon than a cozy retreat, you’re not alone. Many homeowners face the challenge of turning this below-ground space into something welcoming, beautiful, and functional. In this post, we’ll shed light on the challenges you might face and offer some creative solutions to transform your basement into a spectacular space.

Ready to rise above design challenges and claim your basement’s place as the “Best on the Block”? Let’s get started!

1. Dealing with Limited Natural Light

THE CHALLENGE

By their nature, basements often suffer from a lack of natural light, creating a dim and sometimes gloomy atmosphere. 

IDEAS AND SOLUTIONS

  • Lighting Placement: Brighten up the dark corners of your basement by strategically placing overhead lighting and light fixtures. 
  • Light-Colored Walls: Opt for light-colored wall colors to reflect light and create a feeling of brightness.
  • Mirrors: Hang mirrors to bounce the light that is coming into the space around the room, making it feel more open and airy. 
  • Egress Windows: Consider installing egress windows (windows designed to provide an emergency exit) if feasible, not only for safety but also to allow natural light into the space.
  • Window Wells: Create light wells or window wells to redirect natural light from above ground into the basement. These aren’t an easy addition if you’re doing a remodel rather than a new build, however, they are often the best way to add more natural light to your basement.

2. Overcoming Low Basement Ceilings

THE CHALLENGE

Low ceilings can make basements feel cramped and claustrophobic – the last thing you want when trying to cozy up to watch a movie or when hosting a family event! Changes to the structure or foundation can solve this issue, however, they are time-consuming projects and costly.

IDEAS AND SOLUTIONS

  • Strategic Lighting: Use low-profile or recessed lighting to avoid having light fixtures hang too low into the space. A low-hanging fixture is a visual reminder of how low the ceiling is, and can also be a hazard for taller friends and family.
  • Vertical Lines: Incorporate vertical lines in the room using things like bookshelves, curtains, structural elements (windows, pillars, etc), floor lamps and pendants, or wall art.  These vertical lines subtly help to make the space feel taller rather than wider.
  • Optical Illusions: Choose low-profile furniture to create the illusion of more headspace. You can also use vertical stripes or patterns on walls, art, or furniture to create the illusion of height. Additionally, painting the ceiling a light color, usually bright white, can help make a low ceiling appear taller.

3. Tackling Moisture and Humidity Issues

THE CHALLENGE

Basements can be prone to moisture, leading to mold growth, unpleasant odors, and a cold “damp” feeling.

IDEAS AND SOLUTIONS

  • Proper Ventilation: Install a dehumidifier or invest in proper ventilation to keep humidity levels in check.
  • Waterproofing: Seal any cracks or leaks in the foundation to prevent water from seeping into the space. 
  • Use Moisture-Resistant Materials: Choose durable, moisture-resistant materials for your flooring and walls. Not only will this limit potential issues but it will make using and cleaning the space easier for active kids and entertaining!

4. Balancing Lighting for Different Functions

THE CHALLENGE

Finding the right balance of lighting for various activities – from watching movies and playing games to exercising and working – can be challenging in a multi-functional basement.

IDEAS AND SOLUTIONS

  • Dimmer Switches: Install dimmer switches to adjust lighting brightness according to the activity and time of day.
  • Lighting Zones: Divide your basement into functional zones and install separate lighting types for each area to tailor to your specific needs. For instance, a kids’ play area should be brightly lit while a home theater area should have lighting that can be dimmed for ambiance.
  • Smart Lighting Systems: Invest in smart lighting systems that allow you to control the intensity and color temperature of lights with ease.
  • Motion-Activated Lights: Install motion-activated lights in less frequently used areas of your basement, such as storage and utility closets, to save energy.
  • Smart Bulbs and Systems: Explore smart bulbs and lighting systems that can be controlled via smartphone apps, allowing you to adjust settings remotely.
  • Color-Changing Lights: Add a playful touch with color-changing lights that can set the mood for different occasions.

5. Choosing the Right Colors

THE CHALLENGE

Poor wall and furniture color choices can make a dark basement problem even worse, leading to a cave-like atmosphere. Unlike bigger, more expensive basement projects (such as structural changes), paint is usually a quick and easy fix that makes a huge difference! 

IDEAS AND SOLUTIONS

  • Light-Colored Walls: Opt for light and neutral colors for walls to reflect light and create a more open feel.
  • Bright Accents: Introduce pops of bright colors through accessories, furniture, or artwork to add vibrancy and contrast.
  • Lighting and Decor Color: Your lighting will affect how the colors of everything else in your basement appear. Warm light will make your paint and furniture colors learn more orange and red, while cool bulbs will make them appear more blue. Look for bulbs with a high CRI (Color Rendering Index) value to keep your colors true. 

Pro Tip: To see which type of light makes your room look its best without breaking the bank on a full basement’s worth of new light bulbs, try buying one or two smart bulbs and screw them into a lamp that you can move around. Turn off the other lights, and play around with the color settings to see how they affect the colors in your basement. You may find that your walls and furniture look completely different at each end of the spectrum – a free home makeover with just a flip of a switch!  

6. Creating Functional Layouts in Limited Spaces

THE CHALLENGE

Limited space in basements can make it hard to plan out a functional space. But, with some pre-planning and creativity, you can create a basement that not only meets your needs but is the space your family gravitates towards day after day. 

IDEAS AND SOLUTIONS

  • Multi-Functional Furniture: Choose furniture that serves more than one function, like a sofa bed or storage ottomans. 
  • Wall-Mounted Storage: Maximize floor space with wall-mounted shelves and storage units.
  • Multi-purpose Lighting: Choose fixtures and bulbs that can meet more than one need. Track lighting, for example, can serve as both indirect general lighting and for highlighting artwork or decor. Countertop lighting over a kitchenette can be useful for food prep, stair lights are a helpful safety feature, and a TV back light helps reduce eye strain – and all three can also be flipped on to provide low-light ambiance for movie nights. 
  • Smart Bulbs: For ultimate versatility, choose smart LED bulbs with color adjustment options. Maybe you generally prefer cooler white light but want the option to warm things up when hosting a party or relaxing with a good book. Smart bulbs can be manually adjusted or pre-programmed to change to follow your routines. They can give you a space that’s bright during the day while you’re working, and then dim at night when you’re winding down. Since basements often serve many uses, your lighting should as well!
  • Open Concept Design: Consider an open-concept layout to make the space feel larger and more versatile, especially if your basement includes a bar or kitchen area. 

Designing and finishing a basement can pose some unique challenges, but with creativity and strategic planning, your basement has met its match! Embrace the unique characteristics of your basement space, experiment with different designs and lighting solutions, and choose materials and decor that stand up to the demands of below-ground living. Your basement has the potential to become a vibrant, functional, and inviting extension of your home—and the envy of the neighborhood!

————

Are you ready to create the basement of your dreams? Let the design experts at Lit Living guide you. Contact us today and we’ll help you get started! 

Filed Under: 2024

5 Styles of Exterior Lighting to Try in 2024

5 Styles of Exterior Lighting to Try in 2024

by admin · Jan 24, 2025

Exterior lighting serves as much a practical purpose as an aesthetic one. It lights the way after nightfall and even deterring criminal activity. And style-wise, outdoor lighting has come a long way! If you’ve hesitated to upgrade your lighting because you’re not sure where to start, we’ve got a few recommendations for beautiful, functional lighting styles that will elevate the curb appeal and outdoor living spaces of your home.

Here are 5 styles of exterior lighting fixtures you should consider for your home in 2024.

Outdoor Pendants

The pandemic brought a lot more of our lives outside, and we’re pleased that even post-COVID, we’re still enjoying meals and family time in the fresh air. Pendant lights bring a finished feel to outdoor dining and living spaces, making them more appealing for everything from a dinner party to a quiet night reading your favorite novel. A woven pendant feels casual and coastal, while a lantern-style metal and glass pendant is ideal in more traditional or rustic homes.

Exterior Sconces and Lanterns

Nothing says “curb appeal” like one (or a pair) of classic exterior sconces flanking your front door making your home’s portico look welcoming and warm as the sun goes down. 

Adding a motion detector switch turns a beautiful sconce into a security measure for your home.  It ensures the light switches on and illuminates your front porch when anyone approaches. This helps avoid tripping injuries, and can deter theft and break ins – keeping your family safe without the need for expensive cameras. Rustic, modern, and minimalist options abound, so there’s no doubt you’ll find one that works for your decor style.

Sconces aren’t limited to the front stoop, either! They work great on any exterior wall to bathe a space in light and add a chic touch.

Outdoor Ceiling Fans

Even when the peak of summer has come and gone, it’s never too early to plan for the warm days ahead. Exterior ceiling fans can circulate air to keep you cool on even the hottest days. They can help keep flying pests at bay, and are safe for kids and seniors who might trip over bulky floor fans or hazardous cords. Installing a fan is a complicated task best left to an experienced electrician – be sure to ask a lighting specialist for recommendations!

In recent years, ceiling fans have gone from practical eyesore to beautiful, useful fixtures. A minimalist design can blend right into your exterior deck ceiling, or you can go big and bold with a statement fan that’s as eye-catching as it is beneficial. 

Pro Tip: Ceiling fans aren’t just for hot months! Paired with an outdoor fireplace or fire pit, they can help circulate warmer air, keeping you cozy for outdoor movie nights or snuggling under the stars. 

String Lighting

String lights, also known as cafe lights, continue to be popular with homeowners, for good reason! They’re affordable, versatile, and create a magical ambiance in any outdoor space. Strung from trees, porches, and across pools, they make even the most mundane evening activities feel a little more special. Look for high quality, wet-rated outdoor lights from a reputable brand to ensure that they’ll stand the test of time.

Recessed Lighting

If you believe firmly in the “less is more” axiom when it comes to exterior lighting, outdoor recessed lights might be the perfect choice for you! This style of light blends seamlessly with your exterior ceilings (and even floors!) for practical illumination that requires very little maintenance. 

Like the look of recessed lighting, but don’t want the hassle of in-ceiling installation? Several brands offer low profile lights that can be fitted into existing light electrical boxes, saving you money and time. 

Recessed lights can also be use together with more decorative pendants or sconces to give your statement pieces room to shine while also ensuring that your exterior spaces will be well-lit for any activity or event.

——————-

Having quality exterior lights on your home isn’t just a matter of showing off for the neighbors. Attractive, practical exterior lighting expands your square footage, creating more living space for your family to enjoy all year long. It’ll improve curb appeal, deter crime, and keep your friends and family safe long into the evening hours. What more can you ask for? 

Still overwhelmed by the options? Stop by our showroom to talk to one of our lighting experts. We’ll help you find beautiful lighting for your outdoor spaces – without the hassle of spending hours of time online researching, only to put it off for another day. You don’t have to wait to make your home look great, we’ll help you get started today!

Filed Under: 2024, Outdoor Lights

Style With a Purpose: How to Blend Fashion and Functionality in Your Home Lighting

Style With a Purpose: How to Blend Fashion and Functionality in Your Home Lighting

by admin · Jan 17, 2025

Your home should not only be a reflection of your style – it should also cater to your daily needs. Lighting is a vital element that influences the overall atmosphere, mood, and functionality of a space so it’s important to get it right! Balancing form and function can be challenging, but it is possible and the result is worth it. With a few tips and some pictures for inspiration, we promise you can achieve the perfect balance – every room in your house will shine!

Kitchen

A well-lit kitchen ensures a safe space to prepare meals and gather to enjoy them. When you’re working with sharp tools like knives, safety is non-negotiable! To get the most out of your lighting, install overhead lighting for indirect lights and include more directly above any workspaces. Choose lights that pair with your kitchen’s design for a look that’s gorgeous and safe! Look for fixtures that match your cabinet color or hardware finish to seamlessly incorporate a new fixture into an existing space. 

In this kitchen, overhead track lights provide indirect light to the entire room while a gorgeous pendant hangs over the island for more task lighting. The lights in this space blend seamlessly into the overall aesthetic with clean lines and a matte black finish that matches the cabinets. 

The only thing this kitchen is missing is under-cabinet lights! They’re simple to install and would beautifully highlight the alcove while also making it easier to work in that space.

Bedroom

Your bedroom is one of the most critical rooms in your house for your health – it’s where you sleep! Improving your sleep is key to having a better mood and overall improved health. According to the Sleep Foundation, “Light is the most important external factor affecting sleep!” Your body’s internal clock (or circadian rhythm) is particularly sensitive two hours before bed and one hour after waking up. That means more light in the morning will help you wake up faster and less in the evening will help you have a better night’s sleep.

In a bedroom, having several light sources can help you customize the amount of light you’re exposed to, so it’ll work for both waking up and winding down for the day. You can also install dimmer switches for the same purpose. More lighting also means more gorgeous design pieces to work with!

This bedroom’s pendant provides ambient lighting so you can see your clothes in the morning, and the bedside lamp is perfect for making it through one more chapter of your bedtime book! In the morning, turn all the lights on for plenty of visibility and to help your body wake up. At night, just turn on the lamp to wind down for the day.

This room is also the perfect example of balancing beauty and practicality! It’s a stunning room with to-die-for details like a customized headboard, tons of cozy textures, and coordinating pastels (the pink on that light is swoon-worthy!). We’ll definitely be stealing some of these ideas for our own homes!

Bathroom

The bathroom is an essential room in your house. It’s a very functional space where you meet your basic hygiene needs, but it’s also a place for privacy and relaxation. Designing a place to fill both functions is vital to your overall well-being! You deserve a retreat from the hustle and bustle of your life. 

For a bathroom’s lighting to meet both requirements, it needs to be adaptable. For getting ready you need clear, bright light. For relaxing, you’ll need soft, warm light. Get this balance with a dimmer switch, a color-changing LED light, or a combination of fixtures that can be used on their own or together to get just the right mix. 

Welcome to self-care central! This bathroom already has gorgeous natural light, so the lighting is the icing on the cake (for early mornings, later nights, or more light on a rainy day). The pendant lights are perfect for a well-lit, relaxing bath, and a back-lit mirror ensures an extra glow for your skincare routine. The LED light strip tucked into the ceiling above the shower creates the perfect mood for both slow-wake-up mornings and wind-down-after-a-long-day evenings. The simplicity of this design is complimented perfectly by the understated light fixtures. 

Office

A well-lit office space within your home can enhance your productivity and focus! It provides a designated area for concentrating on tasks, free from distractions commonly found in other parts of the house. A home office helps create a work-oriented environment, allowing more organization and efficiency. But home office lighting can be so much more than a boring ceiling light and basic desk lamp.

When you’re designing and lighting an office space, start by adding ambient or general lighting. Then, you’ll need to consider where you work – are you a couch-dweller, a desk sitter, or both? Add task lights accordingly to help with mental focus and avoid eye strain! The last thing you want is distractions due to improper lighting. Put in a little effort up front and your productivity will pay you back!

This office is moody and we’re here for it. We can’t get over the warm wood accent wall paired with the black-and-white color palette! Pendants are perfect for overhead lighting and the desk lamp is a great addition for unavoidable late nights working on a project. In a room this pretty, you might not even mind the excuse to spend more time in it! This home office screams productivity and comfort – a delicate balance to achieve. We’re impressed!

Nooks

Every home has under-utilized nooks and crannies. An unused corner is an opportunity to give the space a purpose. Once the space has a purpose, you can light it accordingly! Do you need an extra workspace? Add a small desk and a small stool with a lamp! Looking for a cozy spot to read? Add a chair and a pendant or floor lamp. Nooks are what make give your house a personality that’s unique to you – and choosing fixtures that both meet your needs and make you happy to look at will help that personality shine through!

This oversized couch is the perfect place to cozy up with a book or take a late-afternoon nap. The exposed bulb pendants give extra lighting without sacrificing the gorgeous aesthetic. This designer didn’t waste a square inch in this nook-turned-oasis. Giving an unused corner a purpose is the essence of good design!

—

Fashion and functionality are two sides of the same coin! Both are essential to a happy, smooth-running home. By evaluating your family’s needs in each of the rooms in your house, you can plan lighting placement. Then, with some help from our experts, you can choose the best fixture for your room and aesthetic. Give us a call when you’re ready to get started creating a beautiful home with a purpose!

Filed Under: 2024

A Homeowners Guide to Standard Lighting Measurements and Guidelines

A Homeowners Guide to Standard Lighting Measurements and Guidelines

by admin · Jan 10, 2025

If you’re building, renovating, or just ready for a change in lighting, there’s nothing worse than spending hours researching and choosing a light fixture, only to get it home and find out that a measurement got missed somewhere along the way and it won’t work the way you wanted.

Before you buy, read and bookmark this article for quick reference. When you’re armed with the best information, you’ll make the best choices. 

And remember, the very best way to get your information right from the get-go is to ask a lighting expert – so don’t skip the trip to your local lighting showroom! They’ll be able to help you avoid any common mistakes and help you get what you want right from the start.

Understanding Light Output

You’ll want to get familiar with a couple of vocab words before jumping in. 

  • Watts: The amount of energy or electricity a bulb uses. Has nothing to do with brightness.
  • Foot Candles: The amount of perceivable light from a fixture at one foot away.
  • Lumens: The amount of overall light given off by a light source. Has nothing to do with power consumption.
How These Terms Relate To Each Other

Comparing a fixture or bulb’s wattage and lumens will show its efficiency. A bulb with low wattage and high lumens uses less power to generate more light, meaning it will cost less to light your home. 

Not all rooms are created equal – bedrooms generally need less light than a kitchen. To determine how many lumens you need, multiply the square footage of the space by the foot candle recommendation. For example, a typical 300 sqft bedroom will need around 3000-6000 lumens in total. [Sqft of room x min and max foot candles = Total min and max lumens needed]

This total includes all types of light in the room, from ceiling fixtures to lamps to sunlight. For best results, you never want to have all of the light in a room come from a single source. A great lighting plan considers the times of day the room will be used, accent lighting like reading lamps, and activities that happen in the room. If your room can transition perfectly from busy daytime work to a relaxed evening at home, then you’ve nailed it.   


Universal Standard Measurements

While most fixtures have their own set of standard measurements for placement and sizing, there are a handful of things that are universal. For brevity’s sake, we’ve put those things here rather than repeating them for each fixture. 

  • Height and Head Clearance: Keep at least 7’ of clearance between the bottom of the fixture and the floor. If there is any chance that a hanging fixture could be in the way, especially in places like hallways and stairs, raise the fixture a bit more to avoid accidents. Vaulted or high ceilings may need more clearance between the fixture and the floor to look balanced. Lower fixtures will make a room feel more intimate, while higher fixtures are less noticeable (which is sometimes the goal).
  • Door Clearance: If you’re installing a fixture near a door, keep 6” of clearance between the bottom of the fixture and the top of the door.
  • Weight Limit: Modern standard ceiling light boxes are manufactured to hold up to 50 pounds when installed correctly. It’s important to check the weight of your fixture and the structure of your ceiling before installing any ceiling fan or a fixture over 35 pounds. Installing the extra support doesn’t usually cost much – and it’s way cheaper than paying for damages if an improperly supported fixture falls.
  • Dining Table: The max width of a light fixture over a dining table should be around 1/2-3/4 the width of the table. The bottom of the fixture should be just above your seated eye level so that it doesn’t obstruct the view – usually about 30-36” from the table surface. Always center the fixture over the table, not in the center of the room. [table width x ½ and ¾ = min and max fixture width]
  • Great Rooms and Multi-Purpose Rooms: You’ll want to consider all angles when choosing fixtures for rooms with multiple uses. For example, many great rooms have a dining room between the kitchen and living room. You’ll still want to follow standard dining fixture recommendations to start – but you’ll also need to hang your fixture high enough to avoid glare and an obstructed view while standing and using the rest of the space.

Standard Measurements by Fixture

Standard measurements will work well in almost every home, but there’s always room to bend the rules a little for a fixture you love or in a unique space. For rooms or areas not mentioned, refer to the general standards and/or rooms with similar uses.

FLUSH AND SEMI-FLUSH LIGHTS

  • General Sizing: Add the length and width of the room in feet together, then record that number in inches to determine the best width for a ceiling fixture. For example, a 10’x20’ living room can accommodate a 30” wide ceiling fixture. (This formula works well for most ceiling-mounted lights, not including fixtures like ceiling fans and recessed lights.) [room length in feet + room width in feet = optimal ambient fixture width in inches (no conversion, just change the units)]
  • General Placement: Flush and semi-flush lights are generally installed in the center of a room, or over the center of a specific-use area like a dining table. Flush mounts work best in rooms with standard ceiling heights at 8’, and may feel dim if installed on a tall ceiling. Semi-flush lights hang down from the ceiling, and work great in rooms with 9-10’ ceilings. 
  • Bathroom: It’s best to maintain 8’ between the top of the bathtub and the bottom of a fixture. Flush mounts are a great choice for ambient lighting in a bathroom, but they don’t work well as the only light in a bathroom, as they can create shadows on the face. For best use in the bathroom, combine your ceiling fixture with a pendant or sconce near the mirror.

PENDANTS 

  • General Sizing: For single pendants, the same room length in feet + room width in feet = fixture width in inches formula from above works well. For grouped pendants, sizing depends largely on personal preference and the available space for installation. 
  • General Spacing: When hanging multiple pendants, the minimum spacing between them should be about 18”. For larger pendants, the recommended minimum spacing is equal to the diameter of the pendants. For example, 20” wide pendants should be hung at a minimum of 20” apart.
  • Kitchen Island: There are many ways to hang pendants over an island, and there isn’t one hard-and-fast set of rules. Here are a few guidelines to consider:
    • For islands up to 6’ wide, the max is usually two pendants, but you can sometimes get away with three small pendants if you prefer that look. For islands over 6’ wide, many homeowners choose to use three or more pendants to maximize light coverage across the countertop.
    • To determine how far away from the edge of the island pendants should be, divide the diameter of the pendant in half. For example, the side of 18” pendants should be a minimum of  9” away from the edge of the island. [pendant width / 2 = recommended distance from pendant to edge of island]
    • A large, single pendant should not exceed 2/3 of the island’s width. For example, the widest you’d want to go on a pendant over a 6’ island is about 48”. [total island width x ⅔ = max pendant width]
  • Sinks and Counters: The standard distance from the counter for a pendant is 30-40” but 36” and above is best. When using pendants for task lighting, choose a fixture that allows the light to shine in the right place – a pendant with a solid bottom won’t light a counter very well.
  • Bedroom: As a reading light above a bedside table, aim for the lighted portion of the pendant to be about 55-60” above the floor or 30-36” above the mattress. 

CHANDELIERS

  • General Sizing: To determine the ideal diameter, add the length and width of your room together in inches. For example, a 15×20 room would need a chandelier approximately 35” in diameter (15+20=35). To determine the ideal height of the fixture, plan on around 2-3” of height for each foot of ceiling height. For example, in a home with 8’ ceilings, a chandelier should be about 16-24” tall (8×2=16, 8×3=24). A two-story foyer in that home can easily support a chandelier that’s 32-48” tall (16×2=32, 16×3=48). [room length in feet + room width in feet = optimal chandelier width in inches (no conversion, just change the units)], [ceiling height in feet x 2 and 3 = min and max chandelier height]
  • General Placement: Chandeliers are a bold design choice intended to stand out and make a statement. They’re almost always placed in the center of a room, or centered over a part of a room with a specific use, like a dining table or a clawfoot bathtub.
  • Dining Table: In a room with 8’ ceilings, the standard height is about 30-36” above the table, then add 3” for every foot over 8’ in ceiling height. Always center the chandelier over the table, not in the center of the room.
  • Two-story foyer: Keep the bottom of the chandelier above the height of the first floor.

SCONCES

  • General Sizing: When it comes to sizing and scale, there isn’t a great universal formula here – it’s left largely up to personal preference and a good eye. A good rule of thumb for sconces is this: The closer you’ll be standing to look at whatever the sconce is lighting, the smaller the sconce should be. 
  • General Placement: Sconces are usually placed around eye level, around 60-72” from the floor. In rooms with higher ceilings, 66-72” will feel more balanced. Take into consideration the style of the fixture – a sconce with a bare bulb will feel more comfortable a bit above eye level, whereas a sconce with a shade will feel more comfortable if the shade is at eye level to avoid catching the glare of the bulb from under or above the shade.
  • Dining Room: Because people will be seated for the majority of the time, sconces should be hung slightly lower in the dining room – closer to 60” from the floor.
  • Bathroom: Sconces work best placed on either side of the mirror at eye level, around 4-12” away from the edges depending on the look you’re after and where the electrical boxes can be installed. Sconces can also be centered above the mirror at just above eye level, usually between 60-70” off the floor. 
  • Bedroom: As a reading light above a bedside table, aim for about 55-60” above the floor or 30-36” above the mattress. 
  • Porch, Patio, Doors: When choosing a sconce to go near an exterior door, look for one that is 1/4 – 1/3 of the height of the door. For example, the most common standard door height is 80”. To determine the best sconce size, 80” ÷ 4 = 20” and 80” ÷ 3 = 26.6’ tell us to look for a sconce that is around 20-26” tall. Generally speaking, outdoor sconces should be positioned at around 66-72” above the ground at the center of the light. You can fudge the high end a little for extra tall spaces, but going above 72” isn’t usually recommended. [height of exterior door x ¼ and ⅓ = min and max of sconce]
  • Garage: The best practice is to put a sconce on either side of every garage door, with the bottom of the fixture around 1’ from the top of the garage door. With this configuration, opt for fixtures that are 1/4 – 1/3 of the height of the door. For example, an 8’ garage door will look best with sconces that are 24”-32” (96” ÷ 4 = 24” and 96” ÷ 3 = 32”). When hanging lights centered over the garage doors instead, be sure that the fixtures are large enough to light the full width of the driveway. [height of garage door x ¼ and ⅓ = min and max of sconce]

RECESSED LIGHTS

  • General Sizing: Standard recessed lighting is typically 4-6” wide. 6” lights are the most common and are most often used for general lighting. 4” and 5” lights are often used for task or accent lighting, such as providing extra light over a kitchen counter. 
  • General Placement for Ambient Lighting: The number of lights you’ll need will vary greatly depending on the size and brightness of the lights, the size of the room, and the height of the ceiling. The formulas below will get you a good rough estimate, but it’s usually a good idea to stop in at a lighting showroom and check in with an expert when planning a recessed light layout. There are a lot of things to consider, and recessed lighting is difficult to move after the fact if you run into an issue. 
    • Amount – A good place to start is to multiply the room’s square footage by the recommended foot candles to calculate the total lumens you’ll need. Then, divide the total lumens by the lumen output of the recessed lights you want to use. For example, for a 300 sqft bedroom, requiring 10-20 foot candles, using 370-lumen lights, you’ll want to stick to around 8-16 lights (300 x 10 ÷ 370 = 8.1) and (300 x 20 ÷ 370 = 16.2). [room sqft x min and max foot candles = total lumens min and max], [total lumens min and max / one light’s lumen output = min and max number of lights needed]
    • Spacing – It’s always best to follow the manufacturer’s recommendation, but a good rule of thumb for planning is to divide the ceiling height in half to determine how far apart the lights should be. Divide that number in half again to determine how far away from the wall the lights should be. For example, in a room with 8’ ceilings, space your lights about 4’ apart and 2’ from the wall. [ceiling height / 2 = distance between lights, distance between lights / 2 = distance from wall]
    • Zoning – If you have a room that serves multiple purposes (like a great room or a living room with a home office nook), measure and map out each area separately when planning your overall layout.
    • Existing fixtures – It’s very common for a room to have a grid of recessed lights in addition to a statement fixture like a chandelier or a ceiling fan. You’ll want to plan around the fixture location and take its light into account.
    • Furniture – A bright recessed light directly above a couch can feel uncomfortable and create shadows. In these situations, try to place lights around the perimeter and in the middle of the room to help with glare.
    • Dimmer switch – Sometimes a grid of overhead recessed lights can feel a little harsh. We always recommend installing a dimmer switch for your lights so that you can always feel comfortable in your space.
  • General Placement for Task or Accent Lighting: Recessed lights are also used for supplemental lighting in places where that need a bit more light, like over a kitchen counter, a piano, a reading nook, etc. Place these accent lights based on where you need the light, but choose carefully – you want your task lighting to shine on your task rather than on your head or in your eyes. Some recessed lights can be angled, which makes getting the light in just the right spot a bit easier.

CEILING FANS

  • General Sizing: Ceiling fan sizes are measured by the diameter of the blades, or the blade span. The size fan you need is determined by the size of the space it needs to cool. An undersized fan will feel weak and underwhelming, but a fan that’s too large can turn a room into a wind tunnel. Size recommendations can vary a little depending on the manufacturer, but this chart will give you a general idea of what size fan you’ll need:

  • General Placement: For 8’ ceilings and lower, you’ll need a flush mount or hugger fan that attaches directly to the ceiling to keep the required 7’ minimum clearance to the floor. You also need at least 8” of clearance between the blades and the ceiling for optimal airflow. For ceilings over 8’, look for a ceiling fan with a downrod, which will drop the fan away from the ceiling. Aim to have your ceiling fan around 8-9’ above the floor for the best airflow.
  • Airflow Efficiency and CFM: Cubic Feet per Minute refers to the amount of air moved per cubic foot that a ceiling fan can move in one minute at its highest setting. The higher the CFM, the more air a fan moves. To determine the efficiency of a fan, divide a fan’s CFM by the Watts. An efficiency score of 75 is the minimum requirement to label a fan as energy efficient. [CFM / Watts = Airflow Efficiency]

TABLE LAMPS

  • General Sizing: Measure the height of the furniture the lamp will be on. Aim for a lamp that’s around ⅔ the height of the furniture, and avoid going above 1.5 times the height. (You may want to go smaller for lamps placed on taller furniture to avoid glare.) The widest part of the lamp and shade should be smaller than the width of the furniture. [best standard lamp height = table height x ⅔]
  • General Placement: Best practice with table lamps states that the lamp should be at about eye level when you’re near it. For lamps near couches and chairs, that’s typically around 58-64”. Whether you spend most of your time sitting or standing in a room, the bottom of the shade should be around eye level to avoid accidental glare above or below the shade.

———————-

Don’t get stuck in the muck – if you’re planning a lighting project, save the stress and stop by our showroom. All we do is lighting – and we do it right. You’ll get free expert advice and access to thousands of fixtures – and customer service that you just can’t beat at a big-box store or shopping online. Skip the headache, and stop on by. We’ll see you soon!

Filed Under: 2024

Next Page »

Copyright © 2025